CoScan™ - Manual
CoScan is a fast and accurate PDF document and barcode scanner app for iPhones with iOS 16 or higher. While the app is easy to use, please spend a few minutes to make yourself familiar with the different screens and options.
Before you start
You may have wondered about the app's name, CoScan. Well, the "Co" is short for "Confidential". From the outset, CoScan has been designed to follow Apple's lead and to protect your privacy:
- Image processing happens entirely on device
- Likewise, text recognition takes place entirely on your iPhone, no scans or other data are sent to some server in the cloud
- No need to create a dedicated account
- No tracking
- No ads
- No need to have an internet connection, the app runs 100% offline
With that said, let's see how CoScan works.
CoScan Main Screen
Screenshot shows the main screen of the app at first launch. The center pane is currently blank because no documents have been scanned yet:
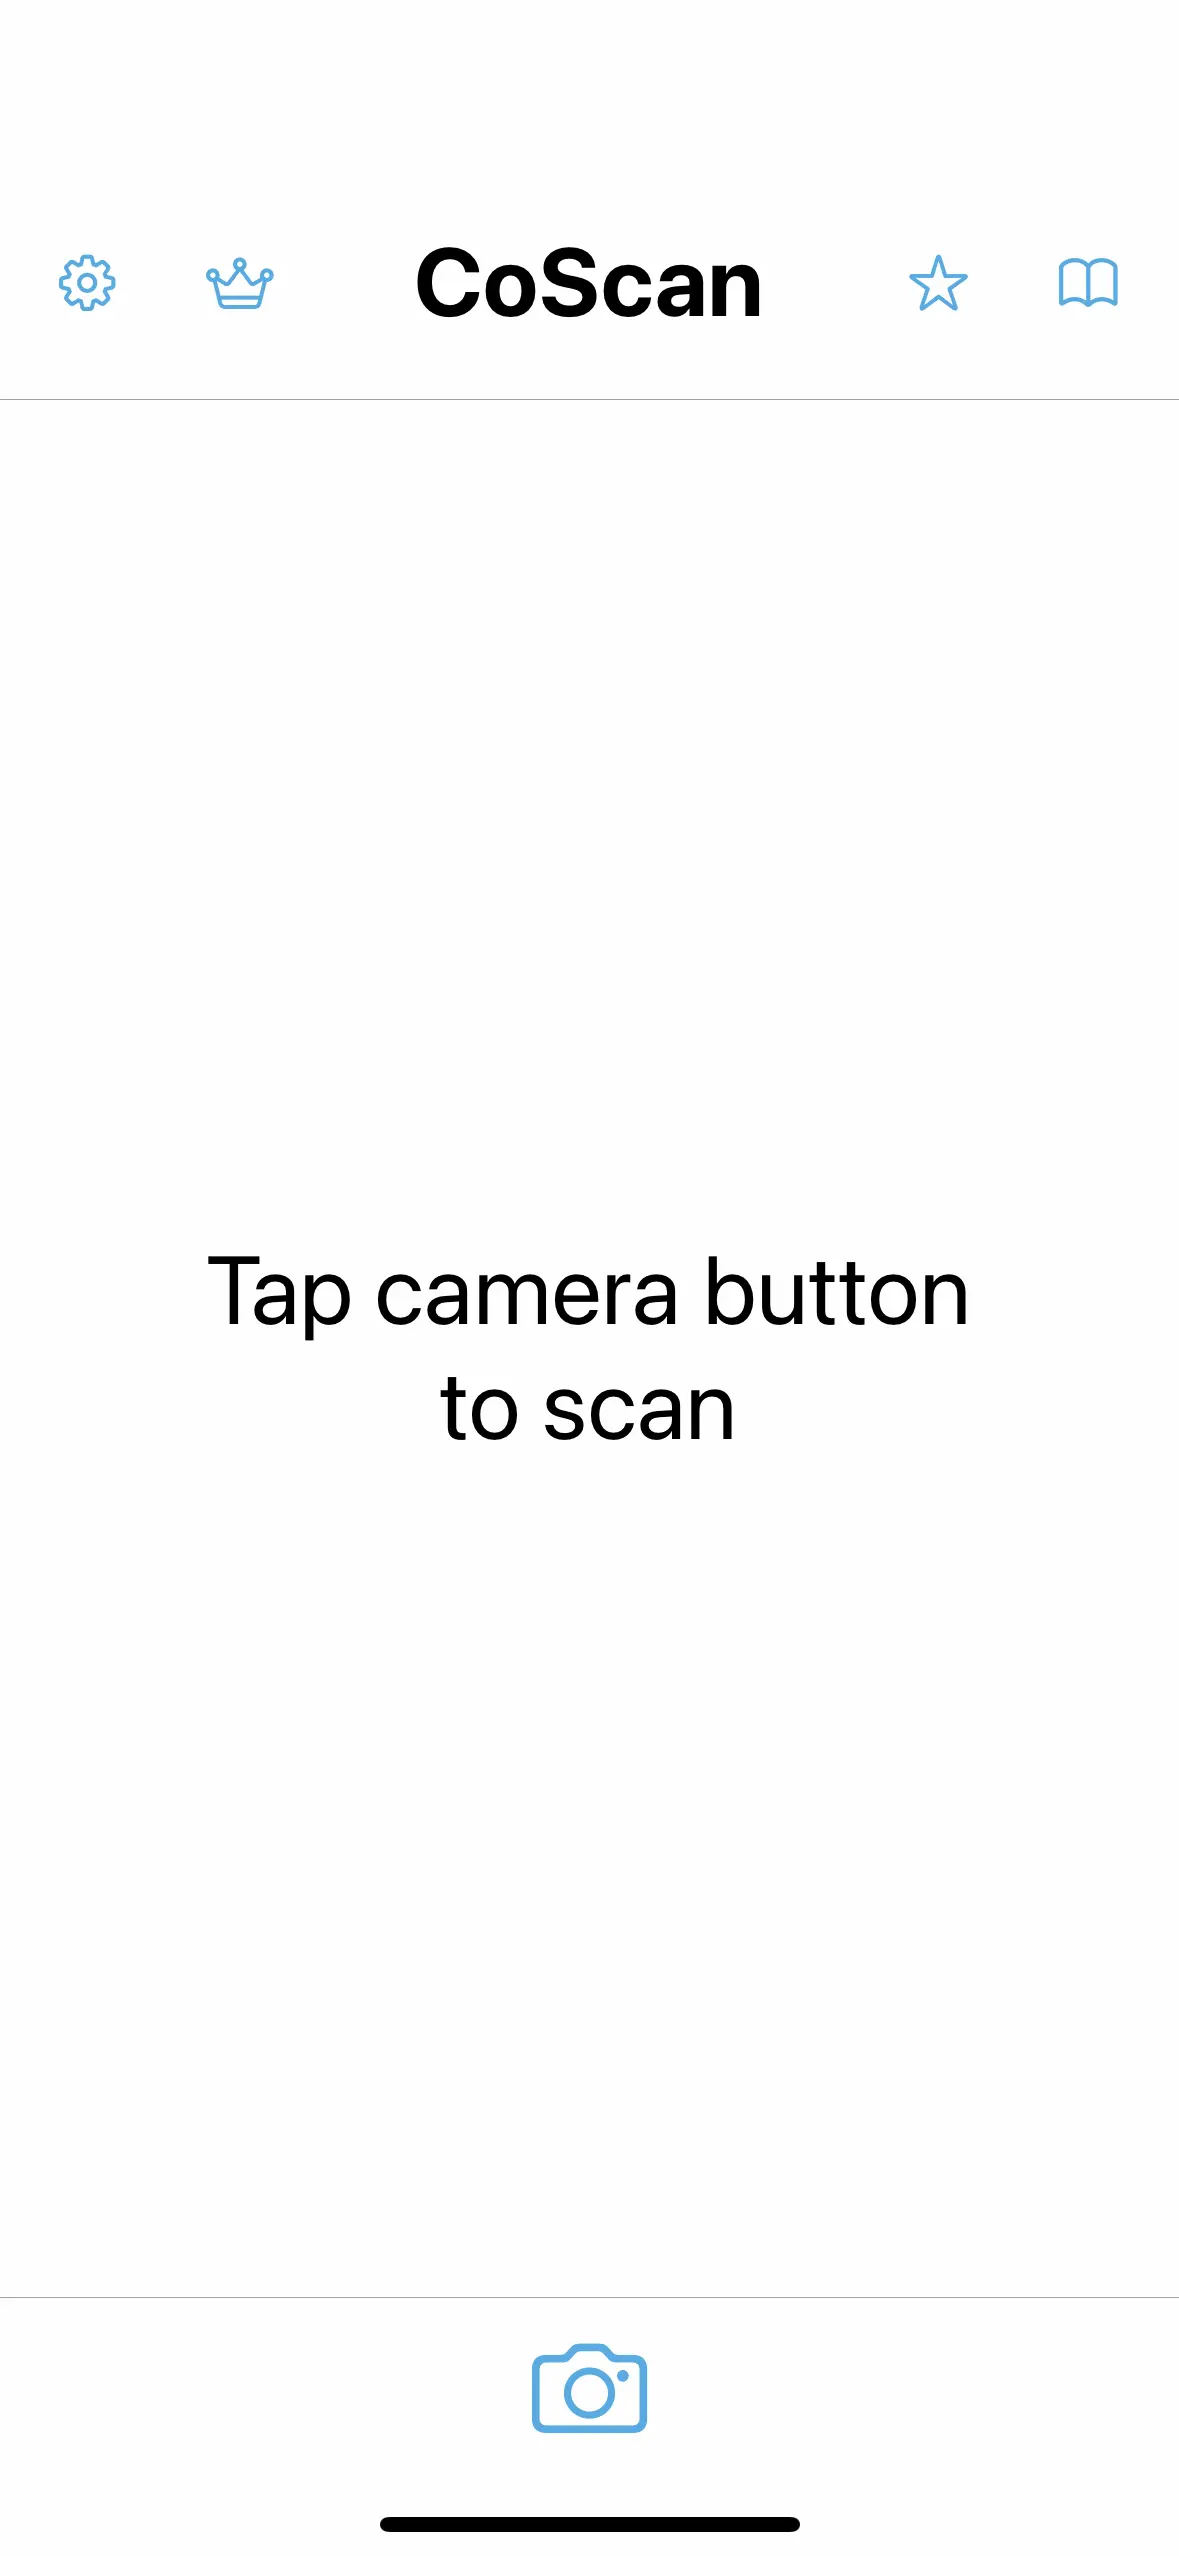
The top row buttons:
| Open settings pane |
| Stroked: "Pro"-features disabled Filled: "Pro"-features enabled |
| Tap to leave rating / review |
| Open online manual |
Scanning documents
We begin by looking at how to scan documents. Open the live camera view by tapping the camera icon at the bottom of the main screen:
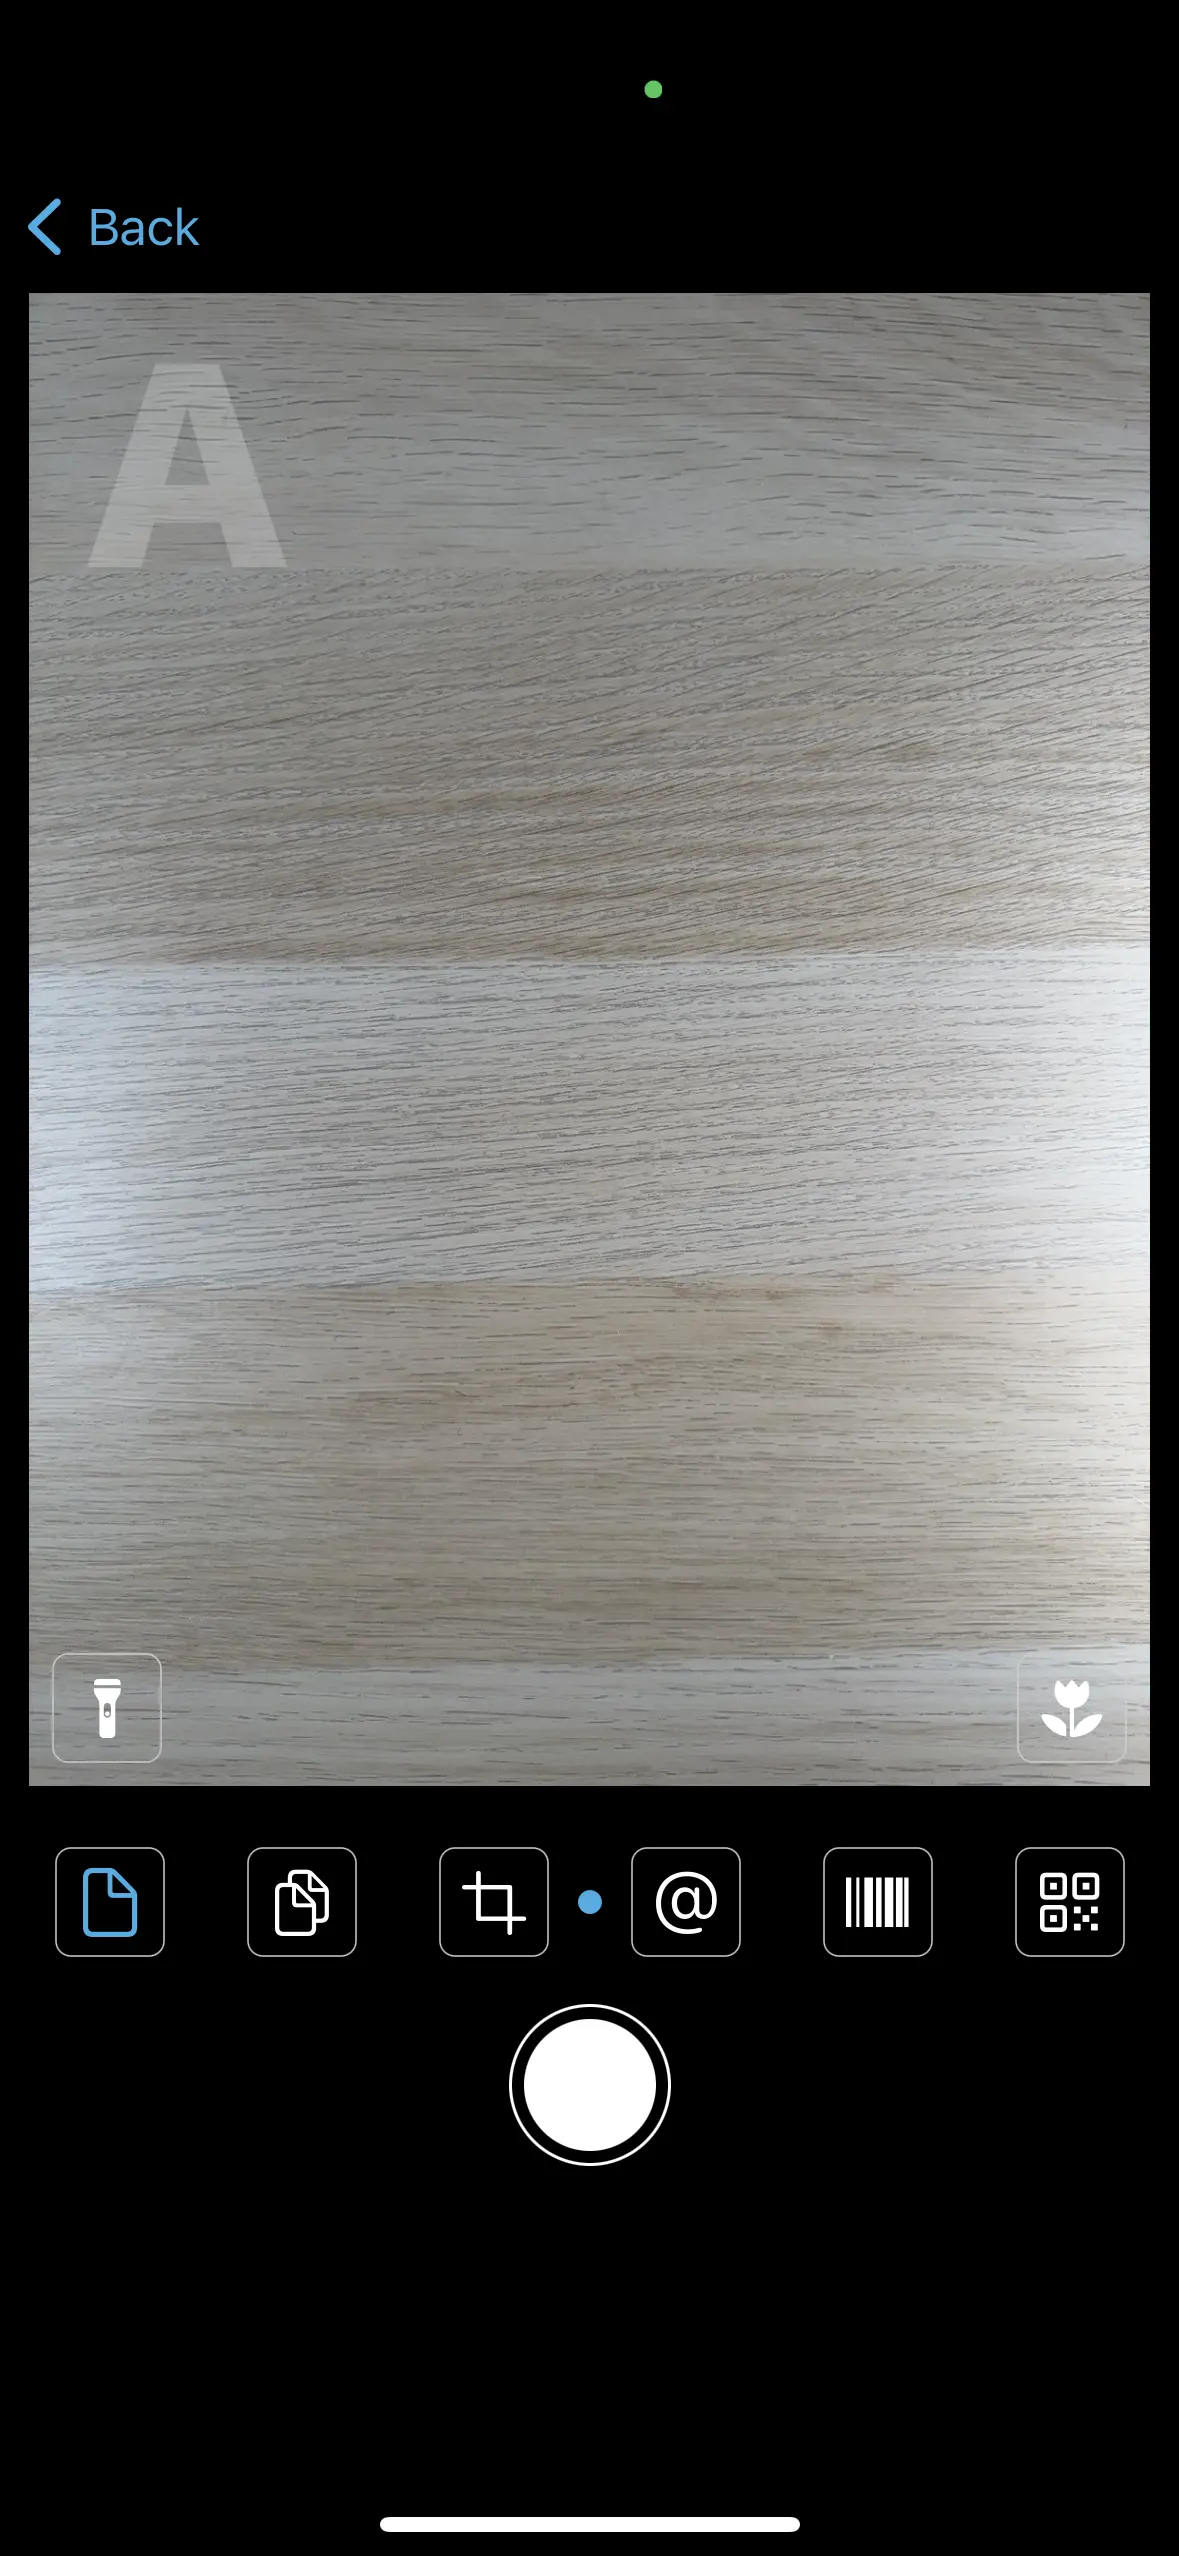
In the camera pane, note the row of buttons below the live view. These buttons set the current scan mode. Preset is "Single page", indicated by the blue highlighting. Here, each scan is a separate document.
The different scan modes; we will look at each mode in more detail below:
| Single page mode. Each scan is a document. |
| Multi page mode. Scans will be added to the current document. |
| Area mode. Like Single mode, but the scan will be from a user drawn area. |
| Contact mode. The app will attempt to locate phone numbers, email addresses etc. in the live image. |
| Barcode mode. The app will detect and decode barcodes in the live image. |
| QR mode. The app will attempt to locate and parse QR codes in the live image. |
There are also a number of indicators overlaying the live image:
| Torch. Toggles the camera's torch on and off. |
| Macro. Switches to the ultra wideangle camera for macro mode. Useful for small print etc. Only available on iPhones with triple camera on the back: iPhone 13 Pro, 13 Pro Max, 14 Pro, 14 Pro Max. |
Finally, note the large gray letter "A" in the top left corner. The letter indicates the text orientation the app expects. When the phone is in landscape mode, the letter will rotate accordingly.
Single & Multi page mode
Select the Single or the Multi page mode to scan letters, reports, invoices and similar documents. Place the document in the camera view. Make sure you have proper lighting and that no objects block the view of the camera. Once the app detects a document it will draw a colored frame around the object:
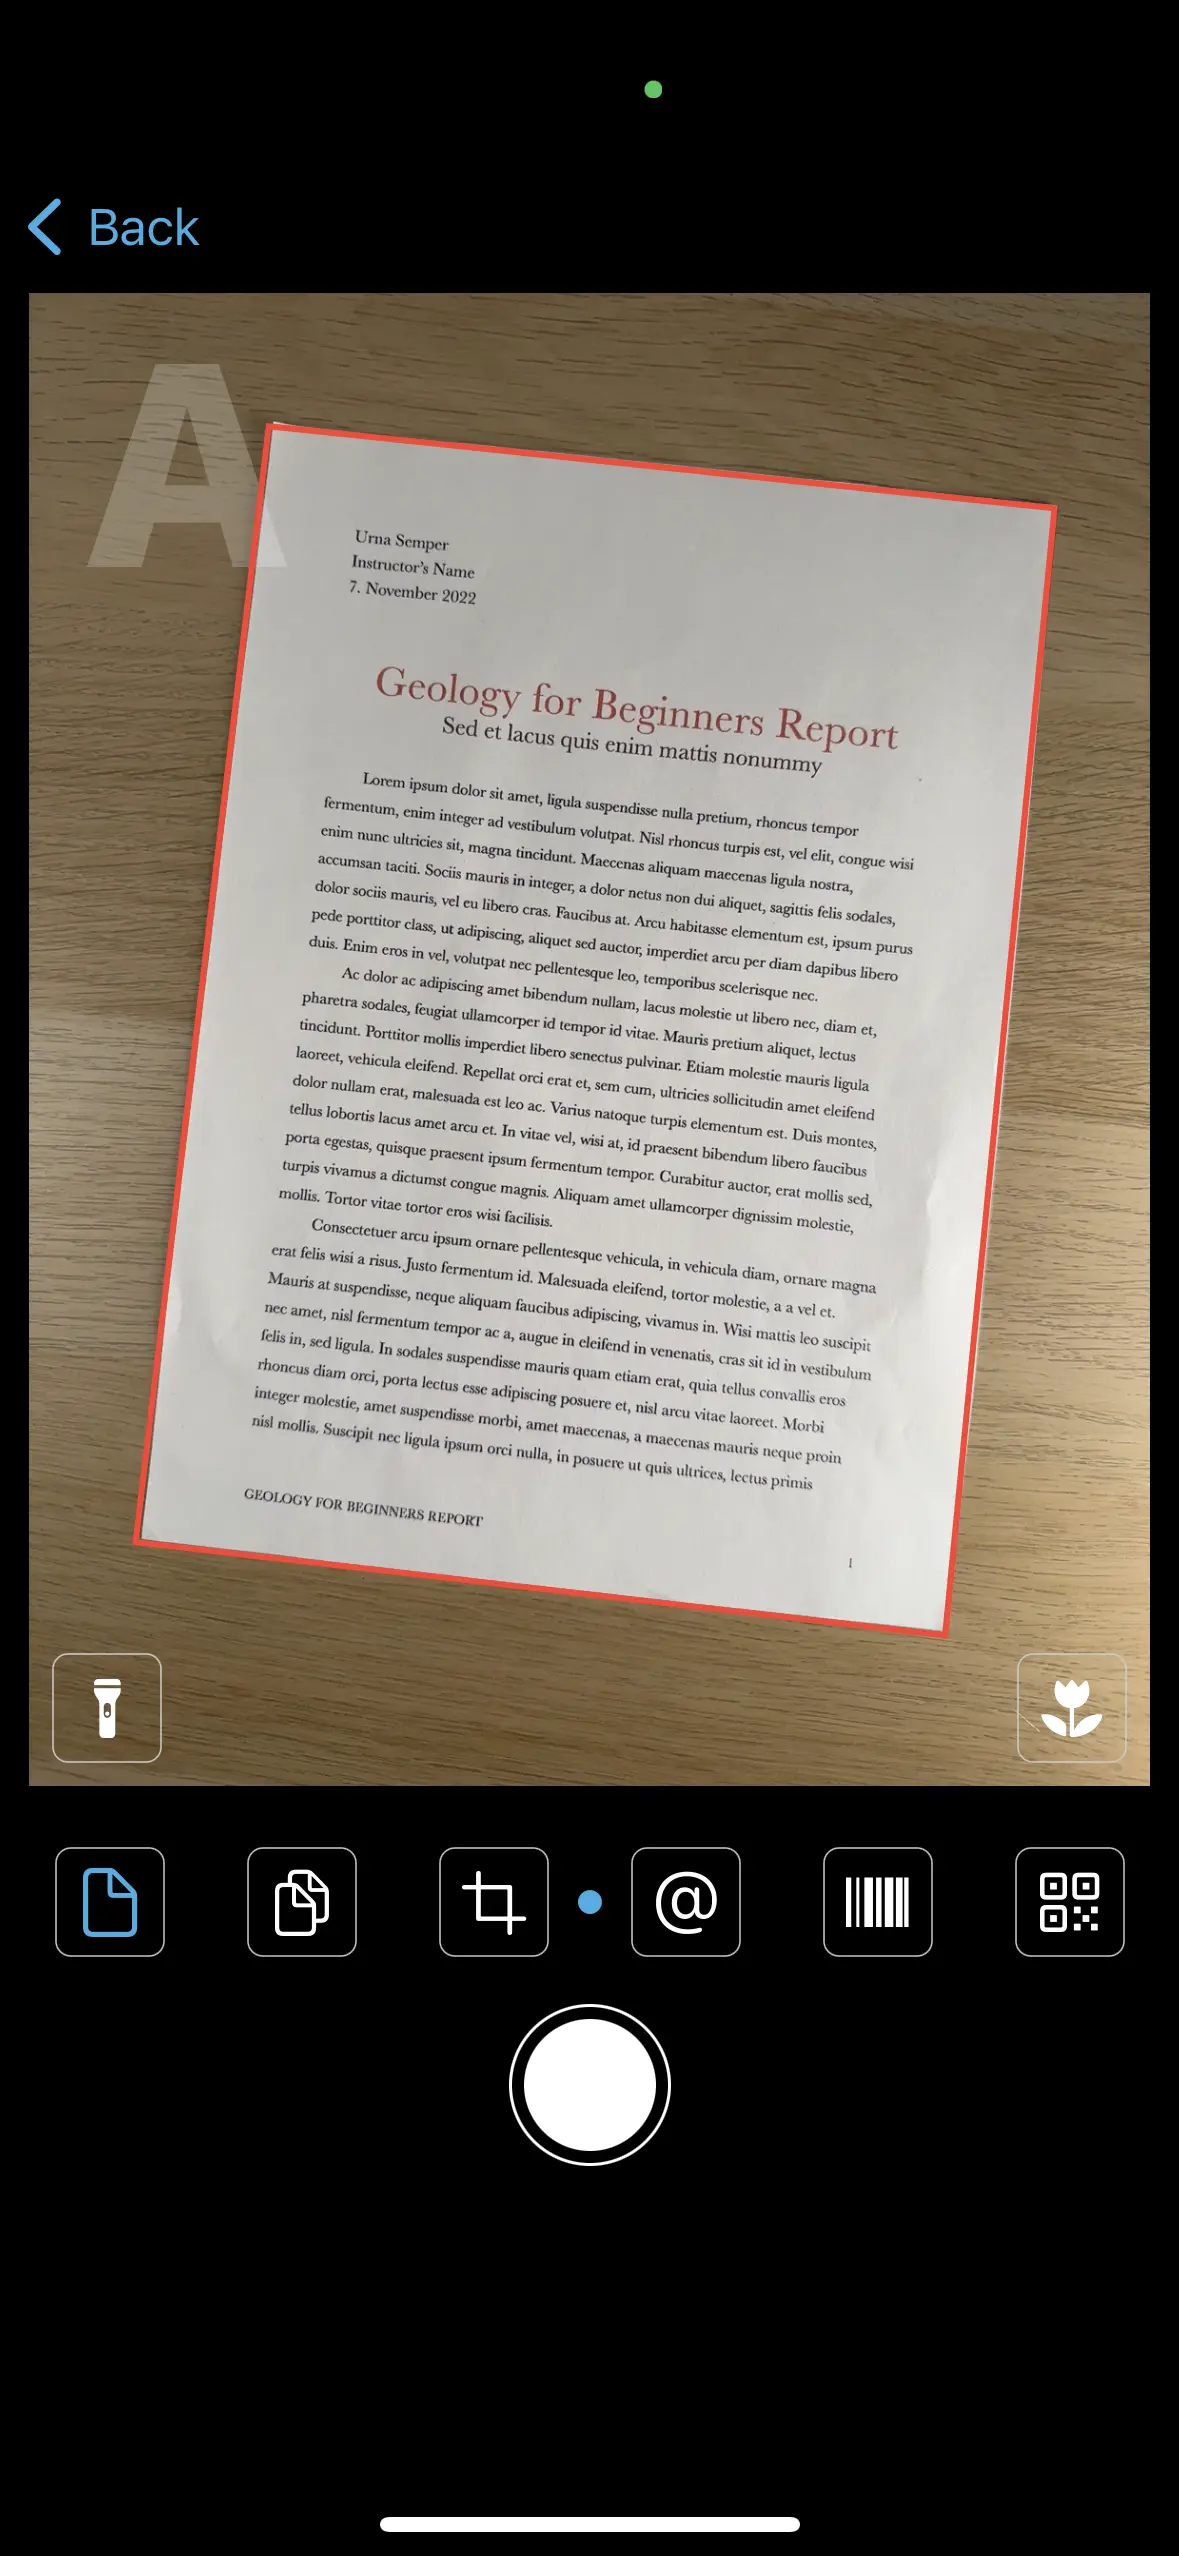
You will get best results when the camera looks straight down; note that in the screenshot above the frame around the document is drawn red, indicating that the camera view is not optimal. Avoid skewed angles and rotated documents. If the object's position is correct, the frame will turn green:
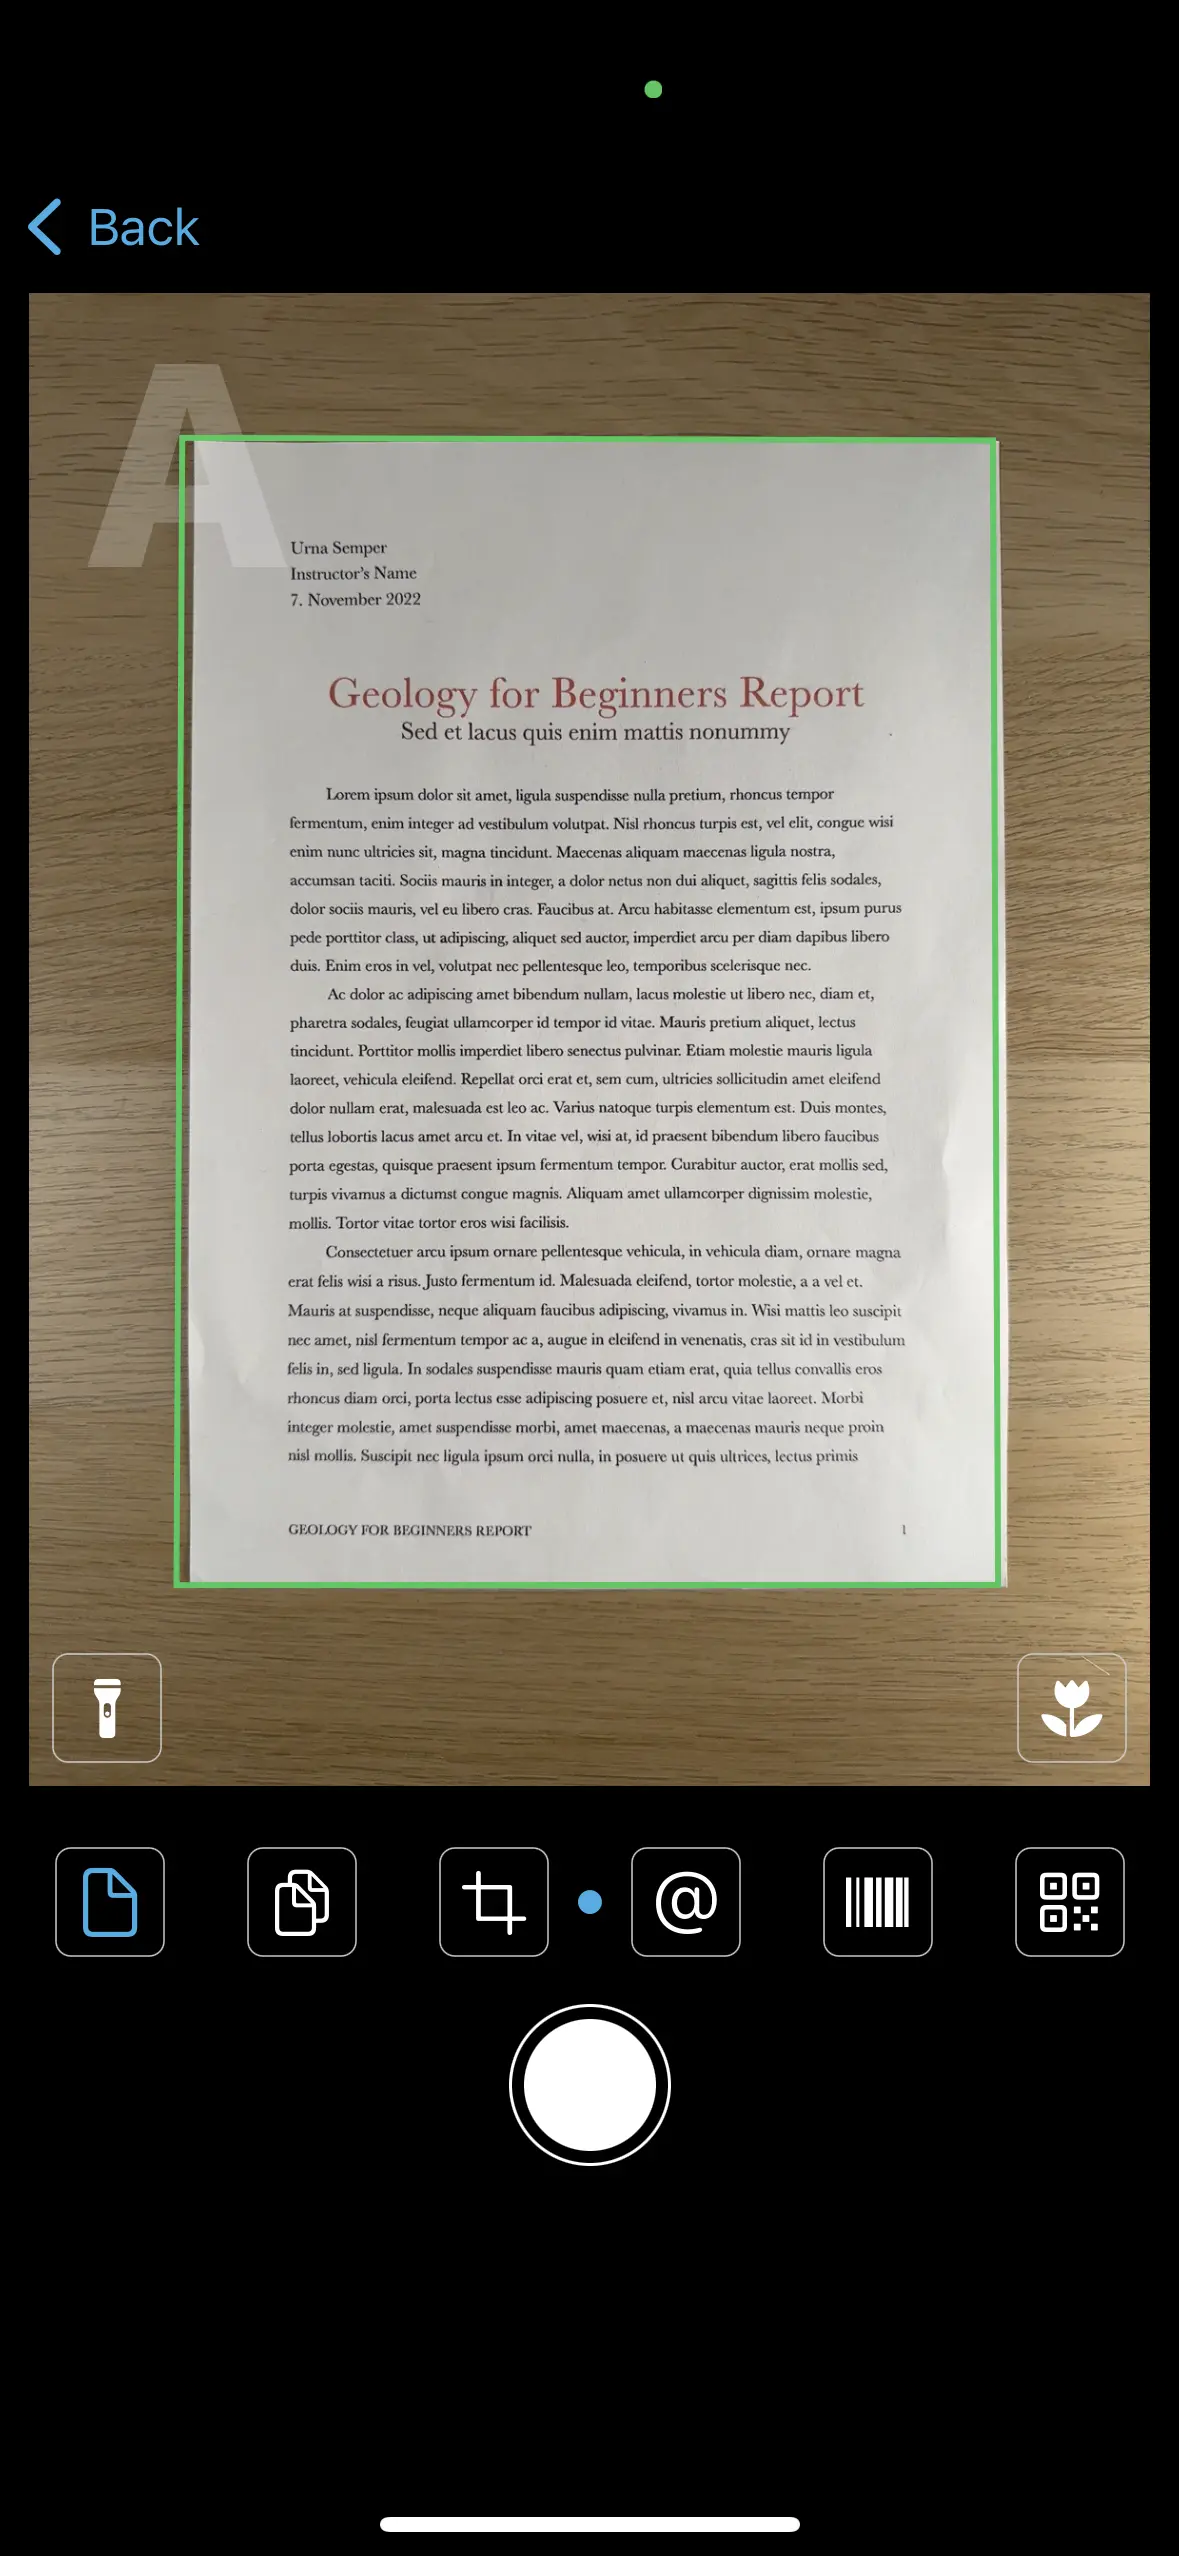
Once the frame is green, press the shutter button to take the scan. The app will automatically crop and color correct the scan and will then start the text recognition. The scan will then be shown in the thumbnail list at the bottom of the screen:
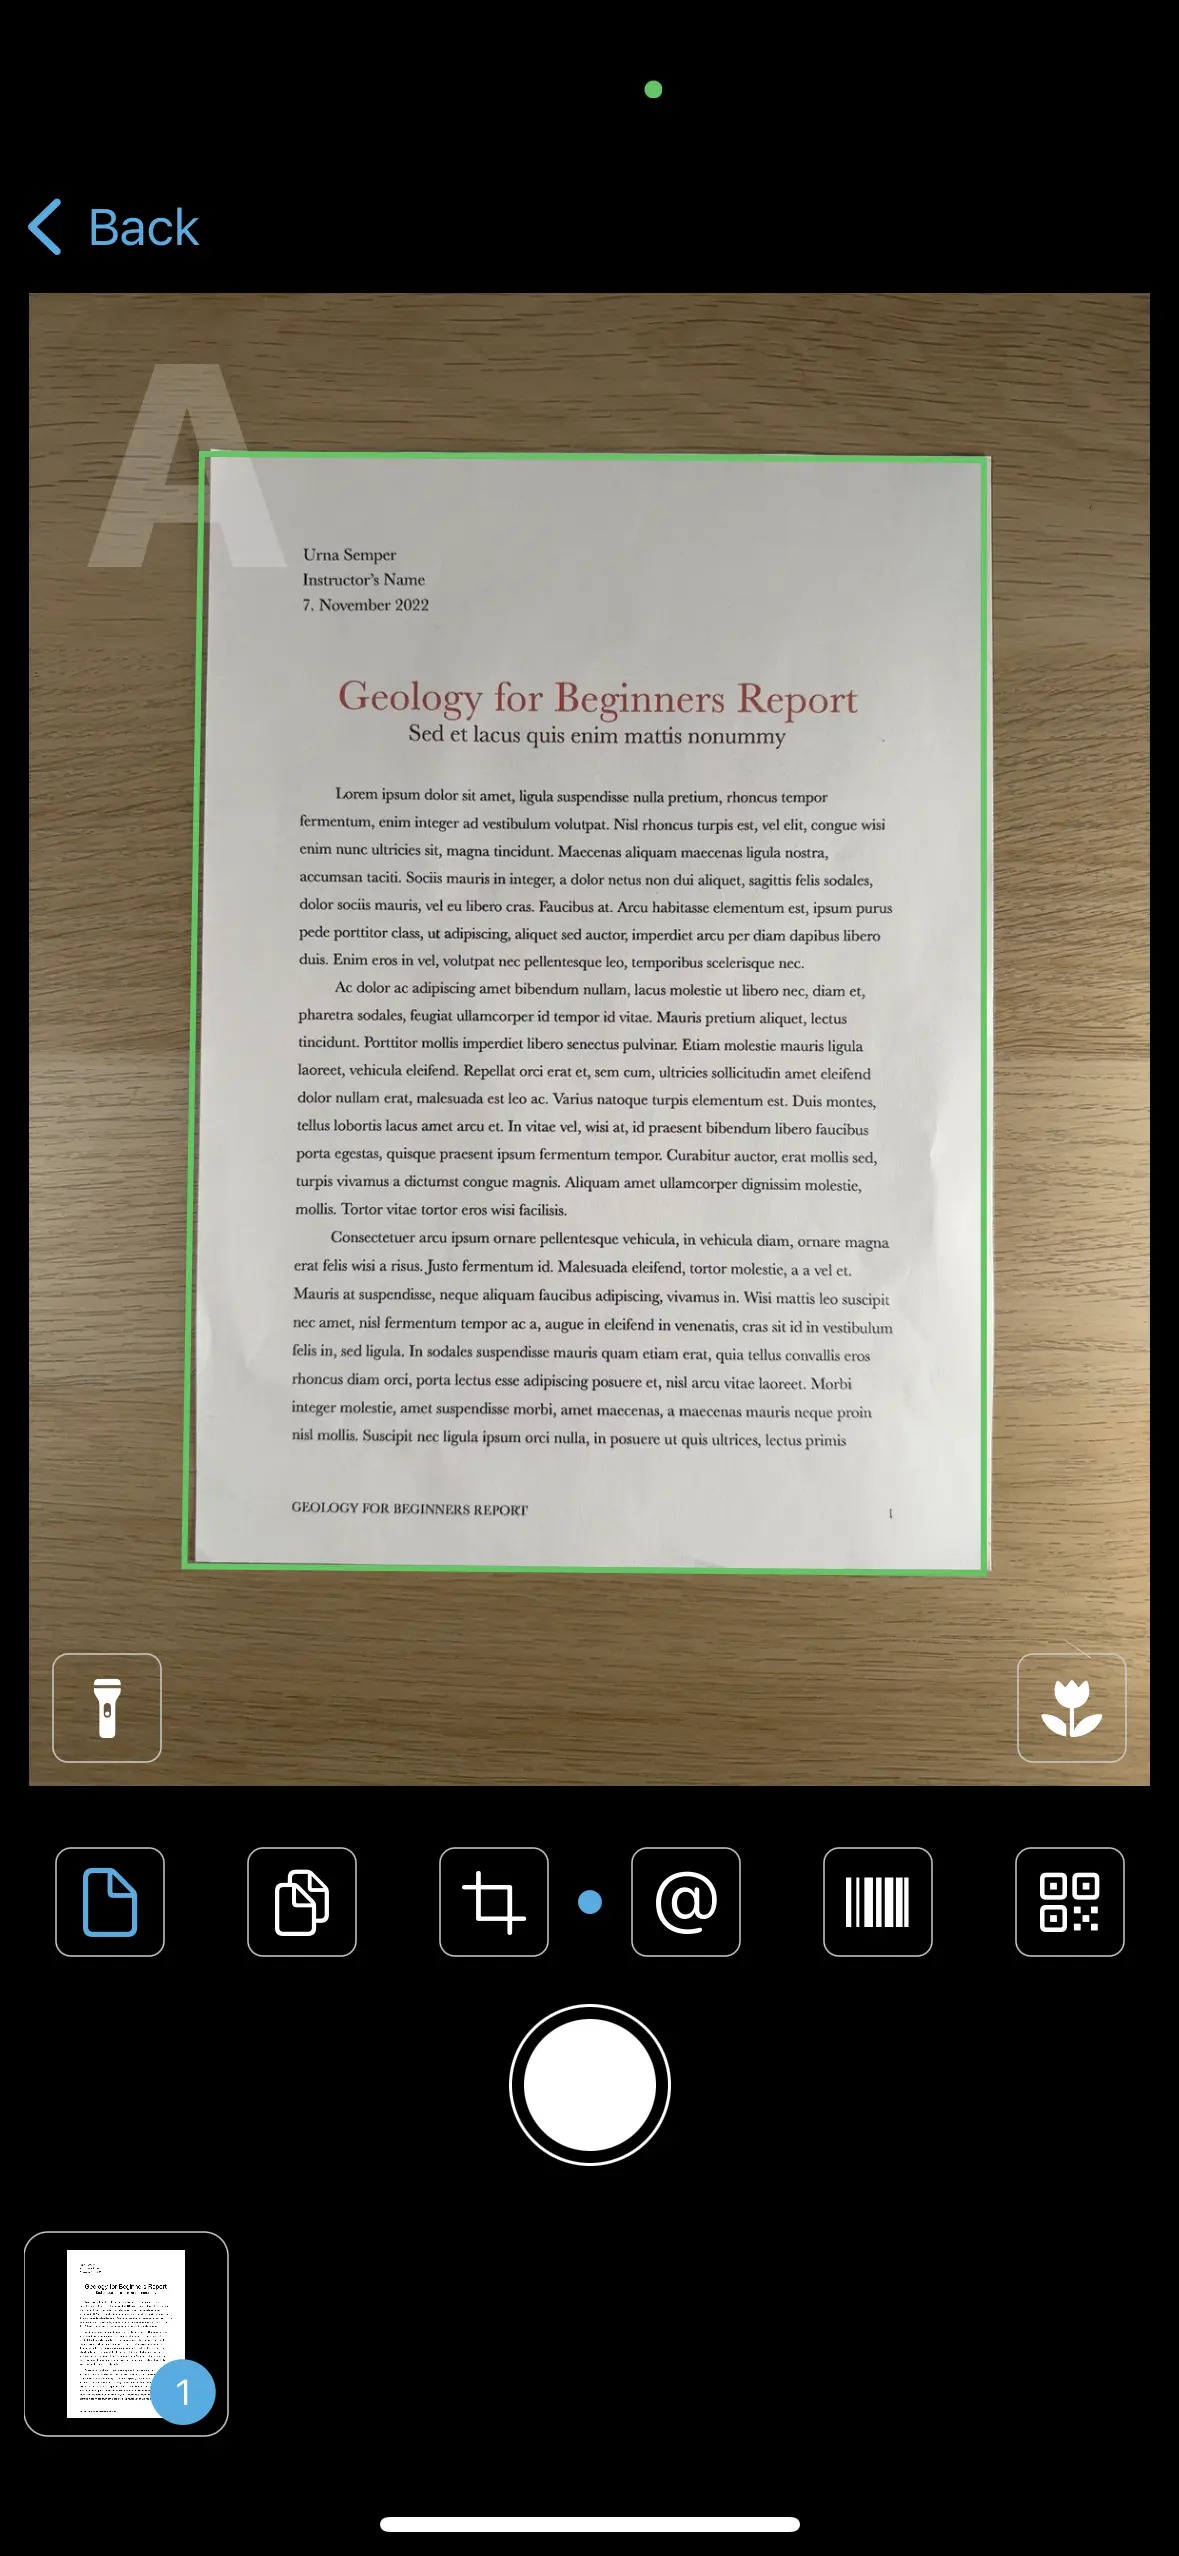
Note the blue indicator drawn at the thumbnail. It indicates the number of pages of the respective document. In Multi page mode, all following scans will be added to the current document until another mode is selected or the camera is closed. In Single mode the next scan will create a new document, again with one page. Note that you can anytime append scans to existing documents if necessary, see further below.
Tips:
- Make sure that the document is not crumpled or otherwise damaged and lays flat on the surface
- If the document is in a protective plastic sleeve, take it out to avoid reflections
- You will get best results if there is good contrast between the document and the background like in the screenshot
- If there is not enough contrast, e.g. white paper on a white table surface, the app may not be able to detect the document borders. In this case you can still capture a scan but it will not be cropped to the document. Consider using Area mode in such a case, see next section
Area mode
Sometimes you will want to capture only part of the document, e.g. only the body or only the header. Use Area mode for this. Simply tap and drag a frame in the live camera image like so:
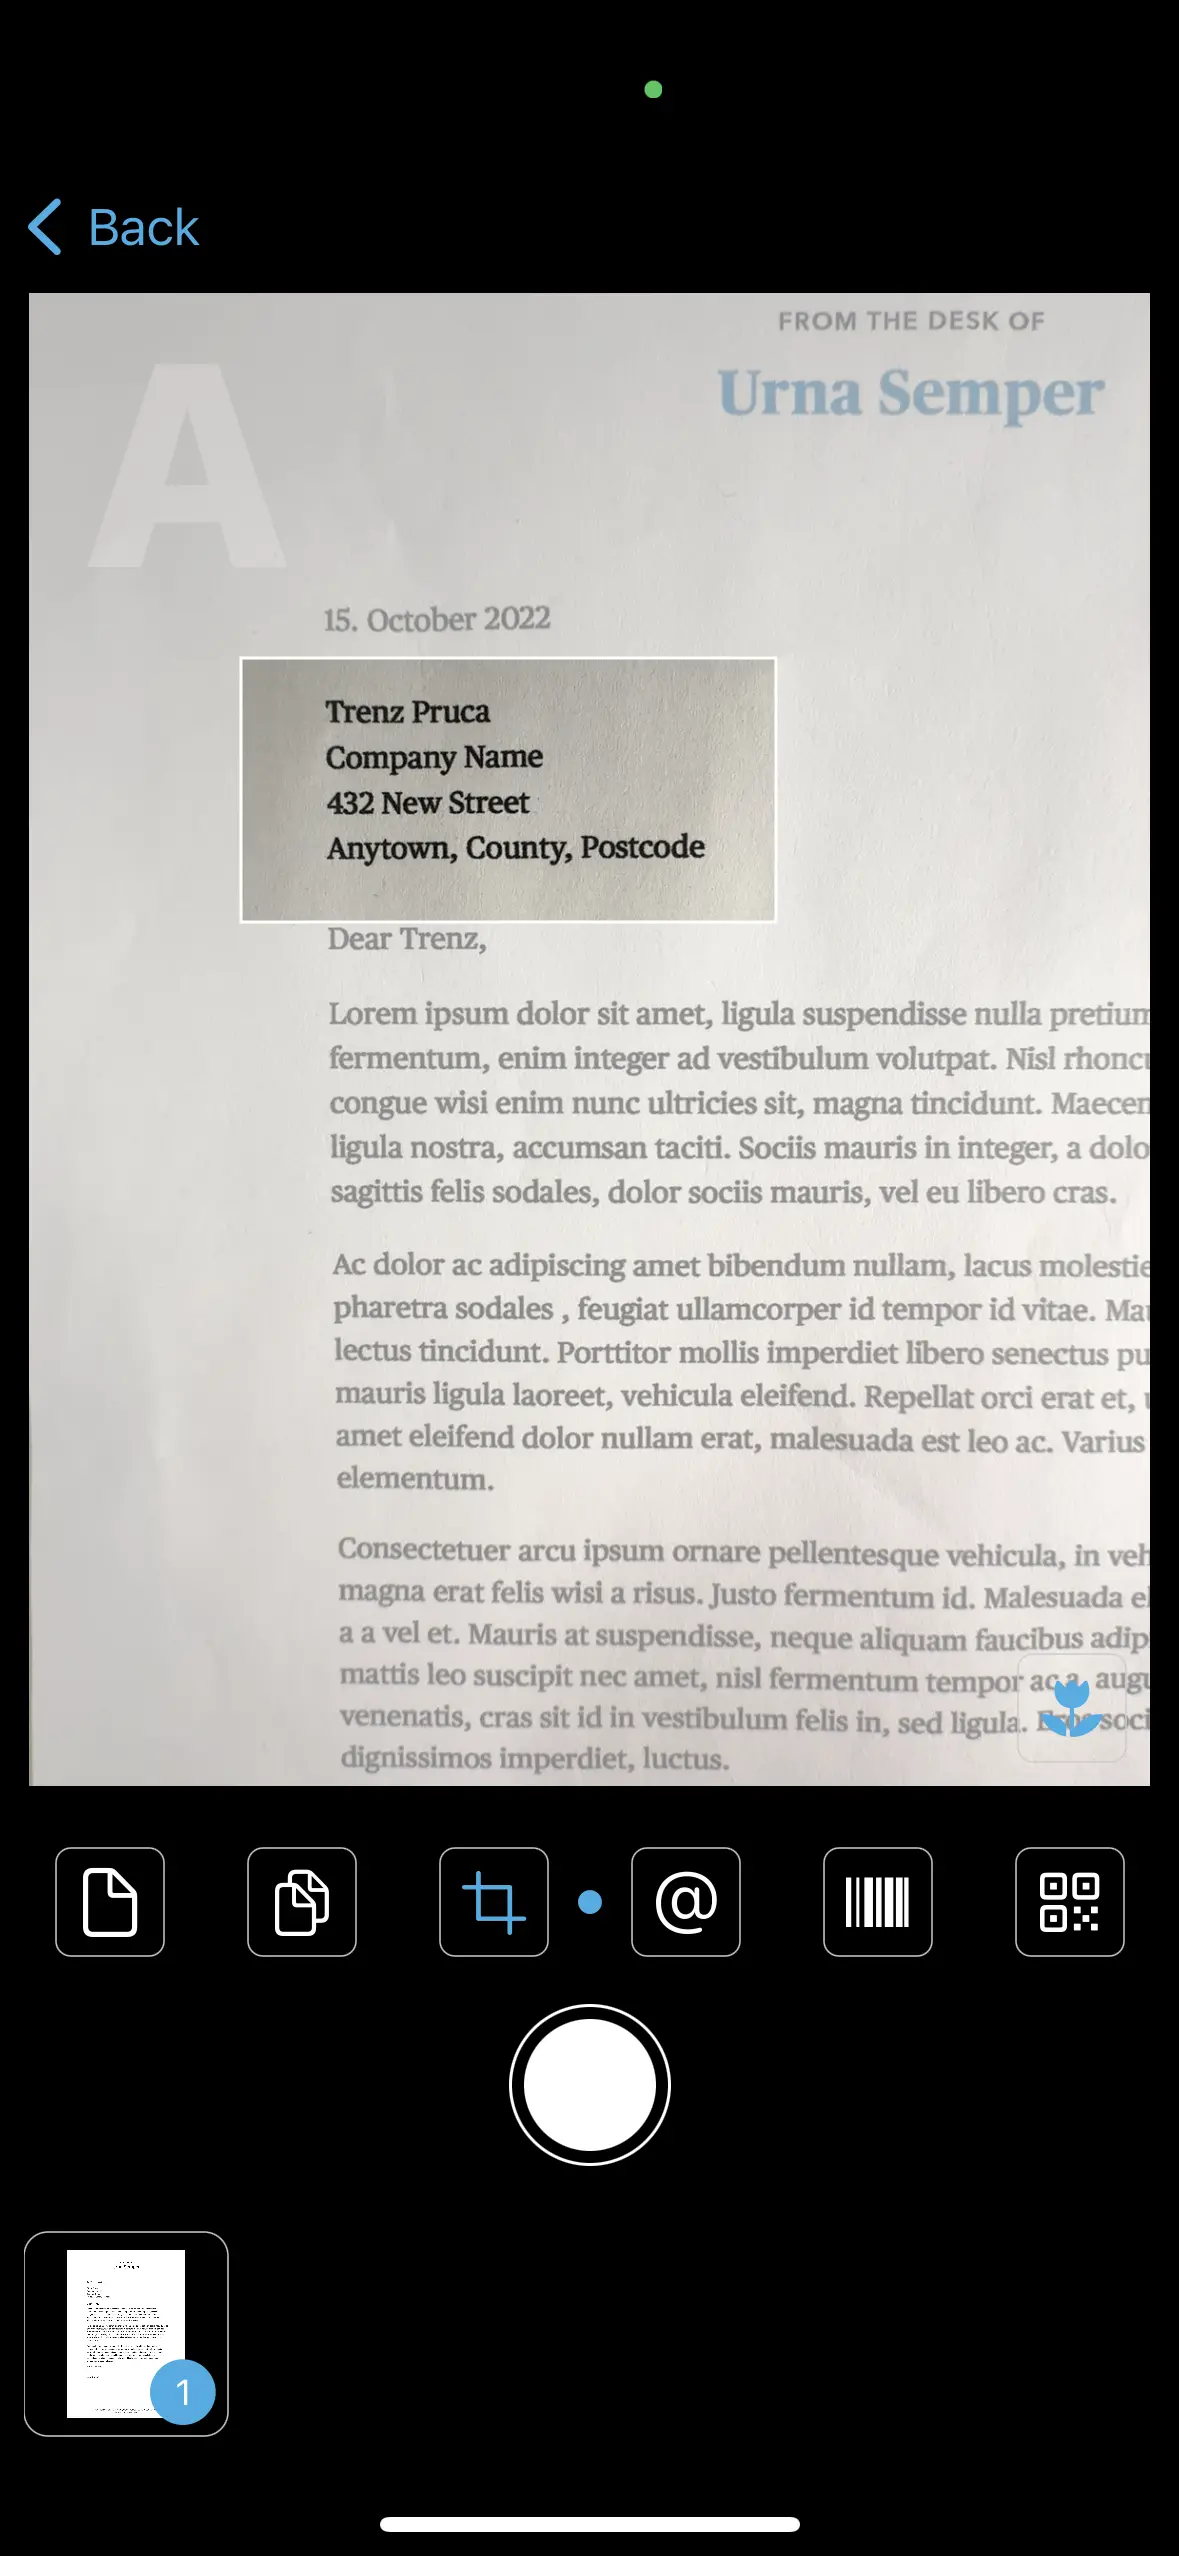
Tap the shutter button to capture the area in the frame; to remove the frame tap the screen once. If no frame was drawn, the whole camera view will be captured.
In all other aspects Area mode works like Single mode: Each scan creates a single page document and further pages can be added later, see below.
The blue dot
You will have noticed the blue dot in the middle of the mode buttons. Up to now we discussed scan modes where the scan is captured by the camera and subsequently processed and OCR'd. These are the three modes to the left of the indicator. The three modes to the right of the blue dot work live: They will detect and recognize text and barcodes without the need to take a photo.
Note that the capture button still works in these modes but differently: Tap the button and the app will take a photo of the full camera view and add it to your iPhone's photo roll.
Contact mode
Use Contact mode to detect phone numbers, URLs and email addresses in the live image:
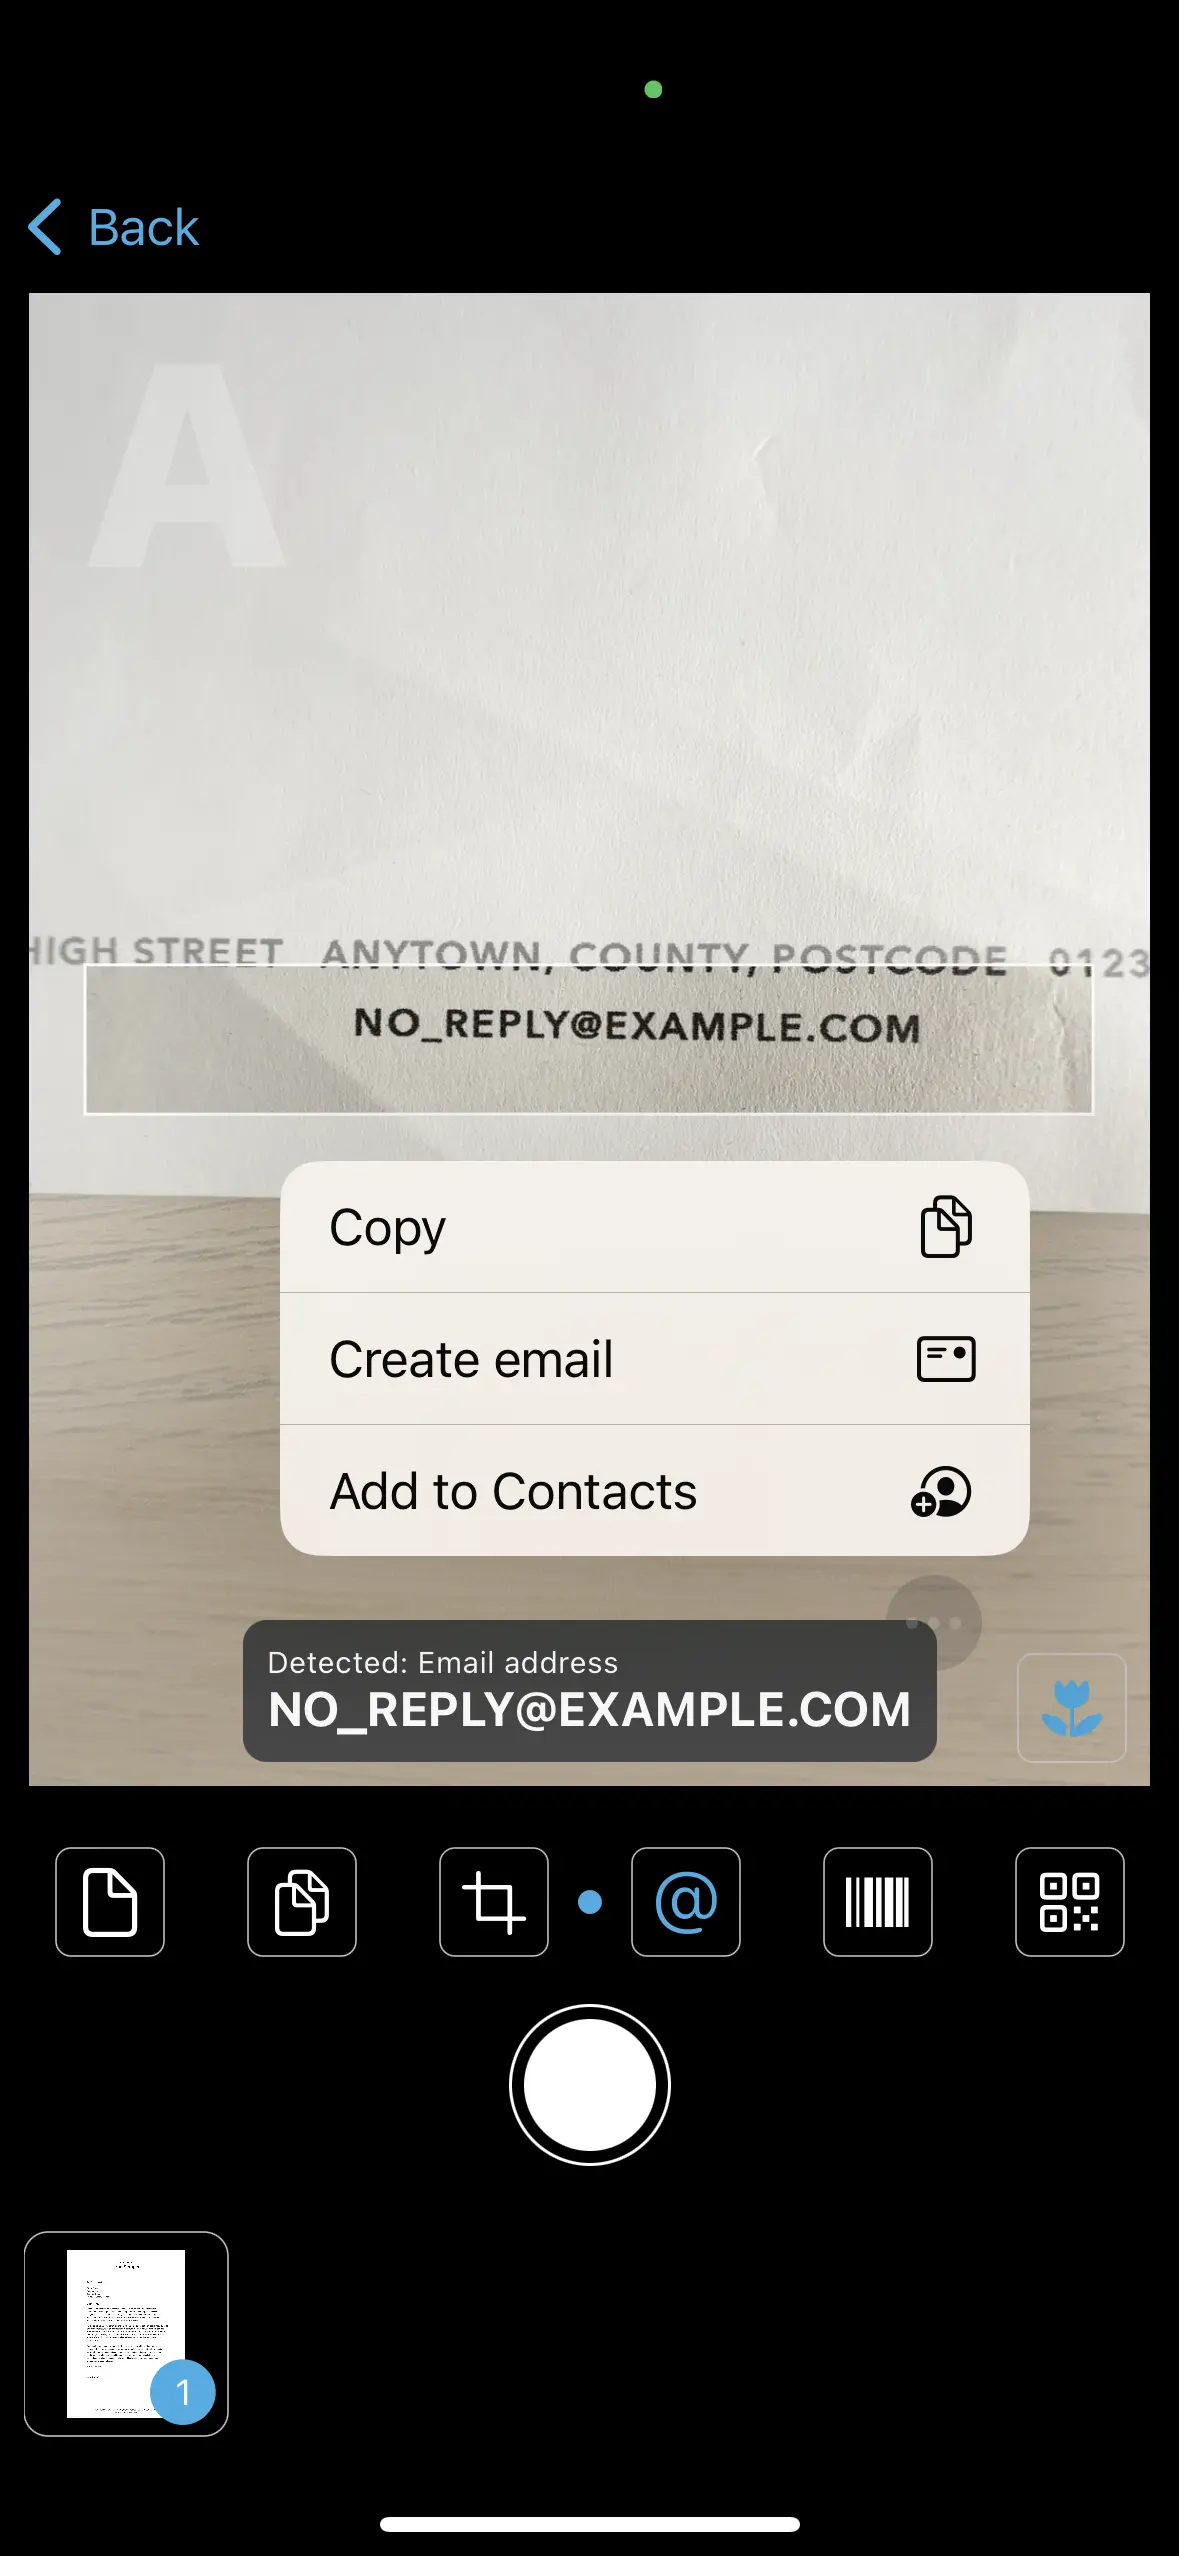
Place the respective part of the document in the highlighted area as a shown in the screenshot. Once a contact detail has been detected, tap the ellipsis button ("...") for a context menu. The commands in the menu depend on the detected data type. For email addresses they look like this:
- Copy: Copies the recognized text to the clipboard; it can then be pasted into Notes, Office and other apps
- Create email: Will open the iPhone's Mail app and create an empty email with the address already filled in
- Add to Contacts: Will create a new contact and add it to your iPhone's Contacts
Barcode mode
Use Barcode mode to live detect and decode barcodes in the Camera's view. The app supports all common linear and 2D barcode symbologies:
- Retail barcodes: EAN 8, EAN 13, UPC-A, UPC-E
- Linear barcodes: Code 2/5 Interleaved, 2/5 Industrial, ITF-14, Code 39, Code 128, Codabar
- 2D matrix codes: PDF417, Datamatrix, Aztec, QR ("cellphone barcode")
Place the barcode near the center of the preview. Detection will be indicated by a green frame; the barcode symbology and content will then be displayed, like in this example with a Code 128 barcode. Use the context menu to copy the encoded data to the clipboard:
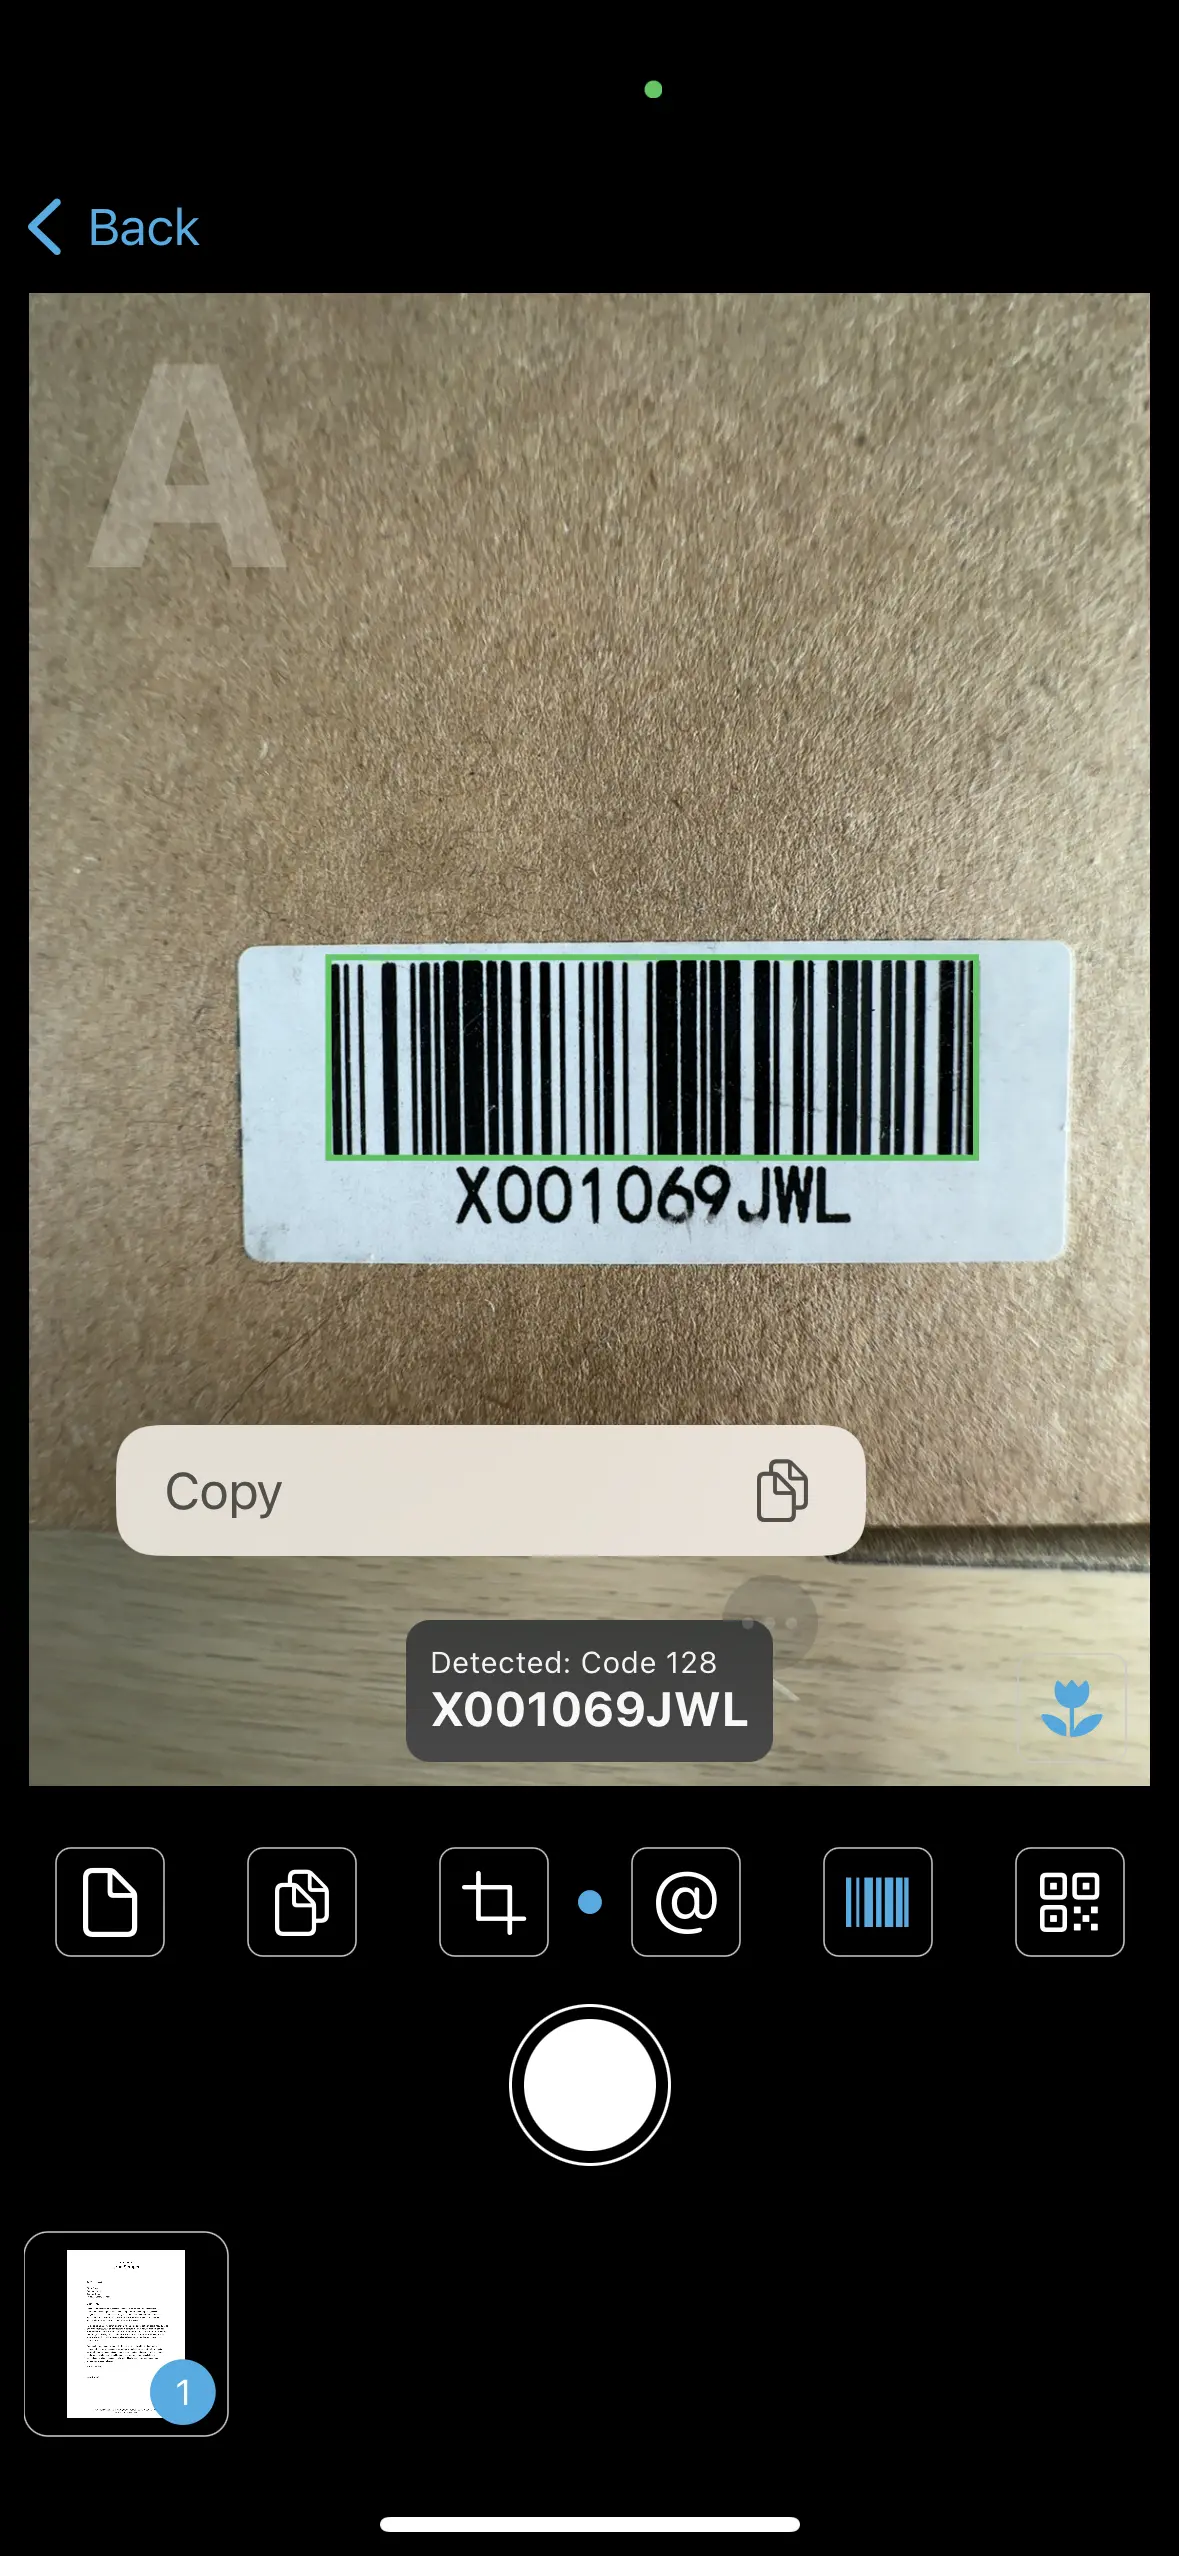
QR mode
The Barcode mode will not attempt to parse the encoded data; it simply returns the textual content of the code which for most barcode symbologies is exactly what the user needs. The popular QR codes on the other hand can encode structured data like URLs, phone numbers or vCard contact data. Use the dedicated QR mode to scan such data. As before, place the code near the center of the preview:
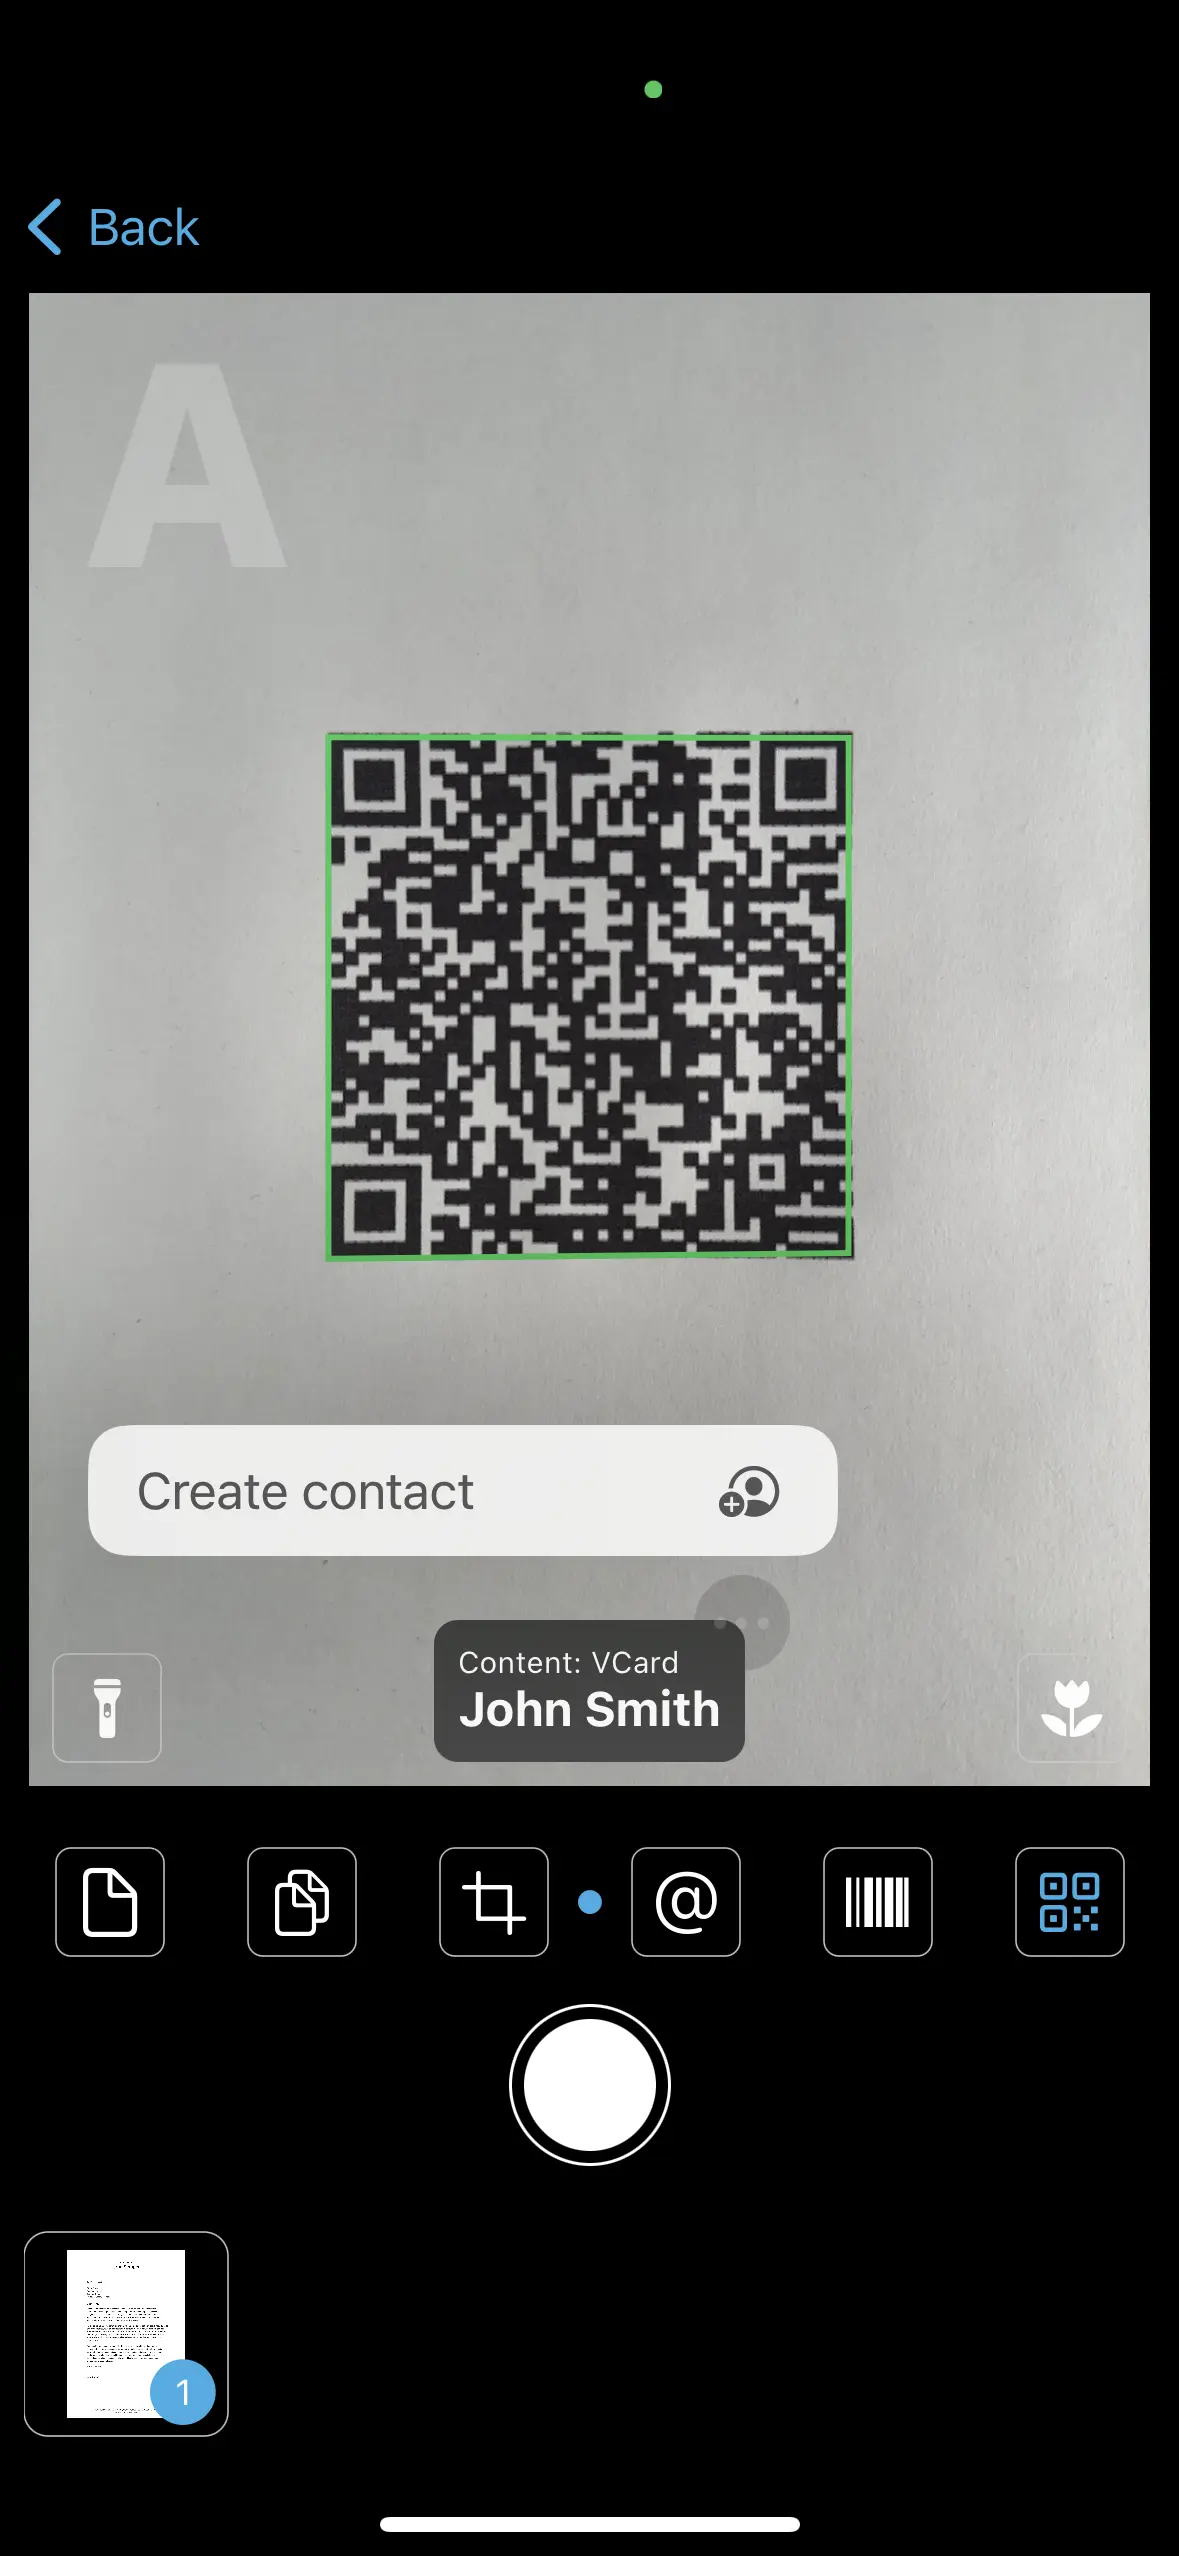
The app will display the detected content type (vCard in this example) and then offer suitable commands: vCards can be added to the Contacts, URLs can be opened in Safari, phone numbers can be called and so forth.
Sharing documents from the main screen
Tap the "Back"-button in the camera screen to go back to the main screen. Here the newly scanned docs are listed:
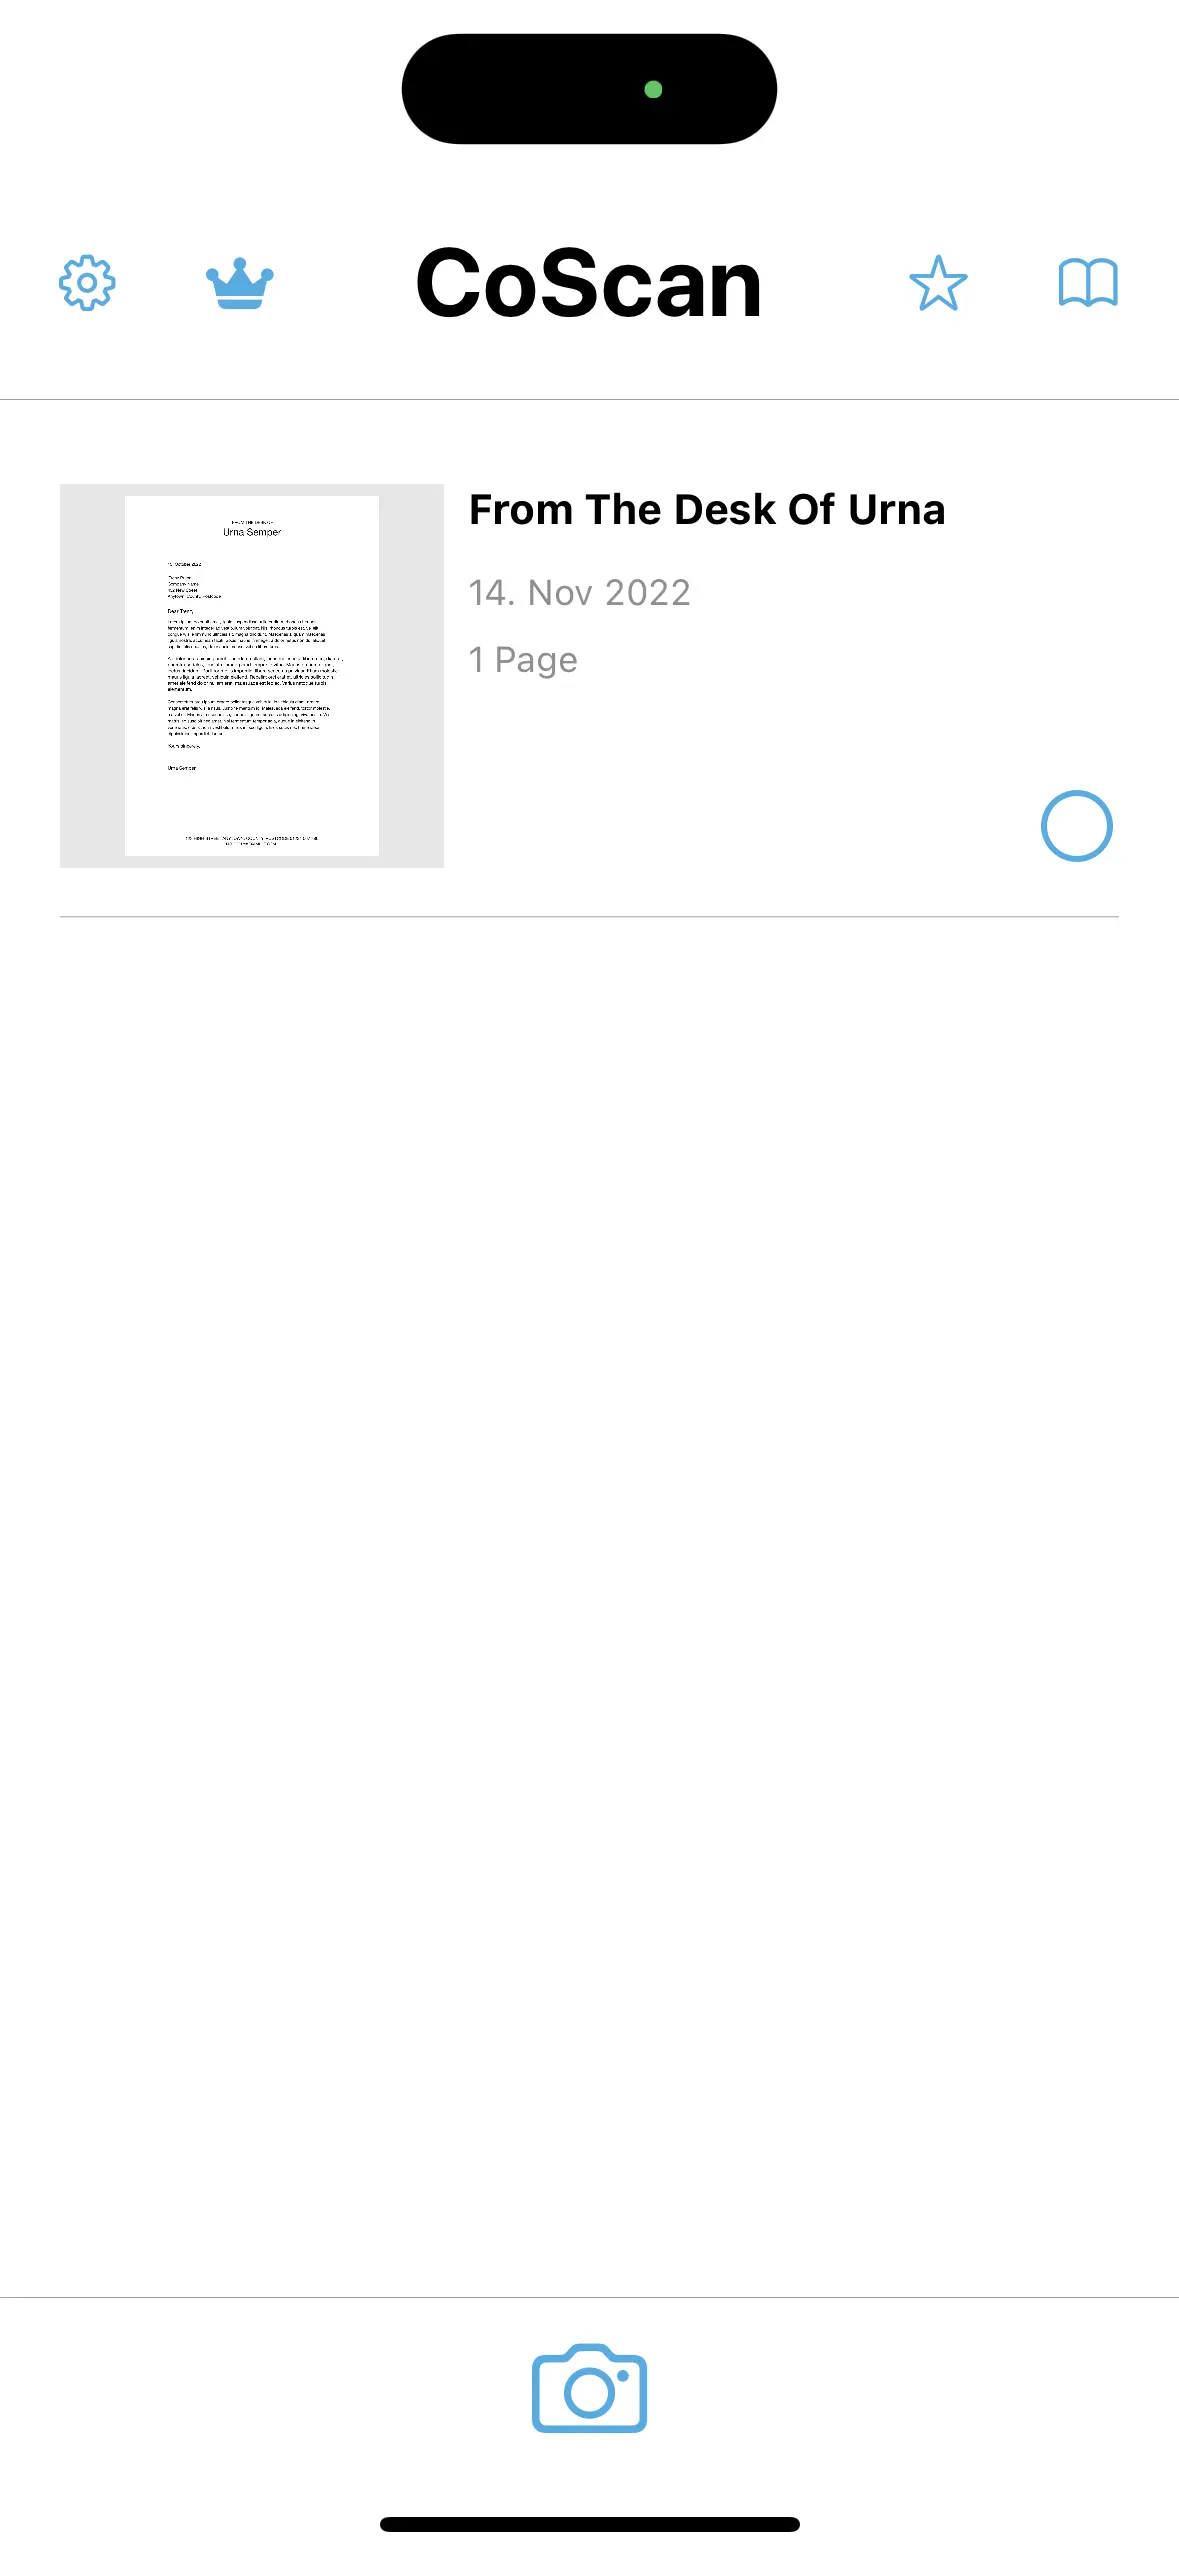
Select a document by tapping the blue circle to the right of the thumbnail. This will present buttons for sharing (bottom left) and deletion (bottom right):
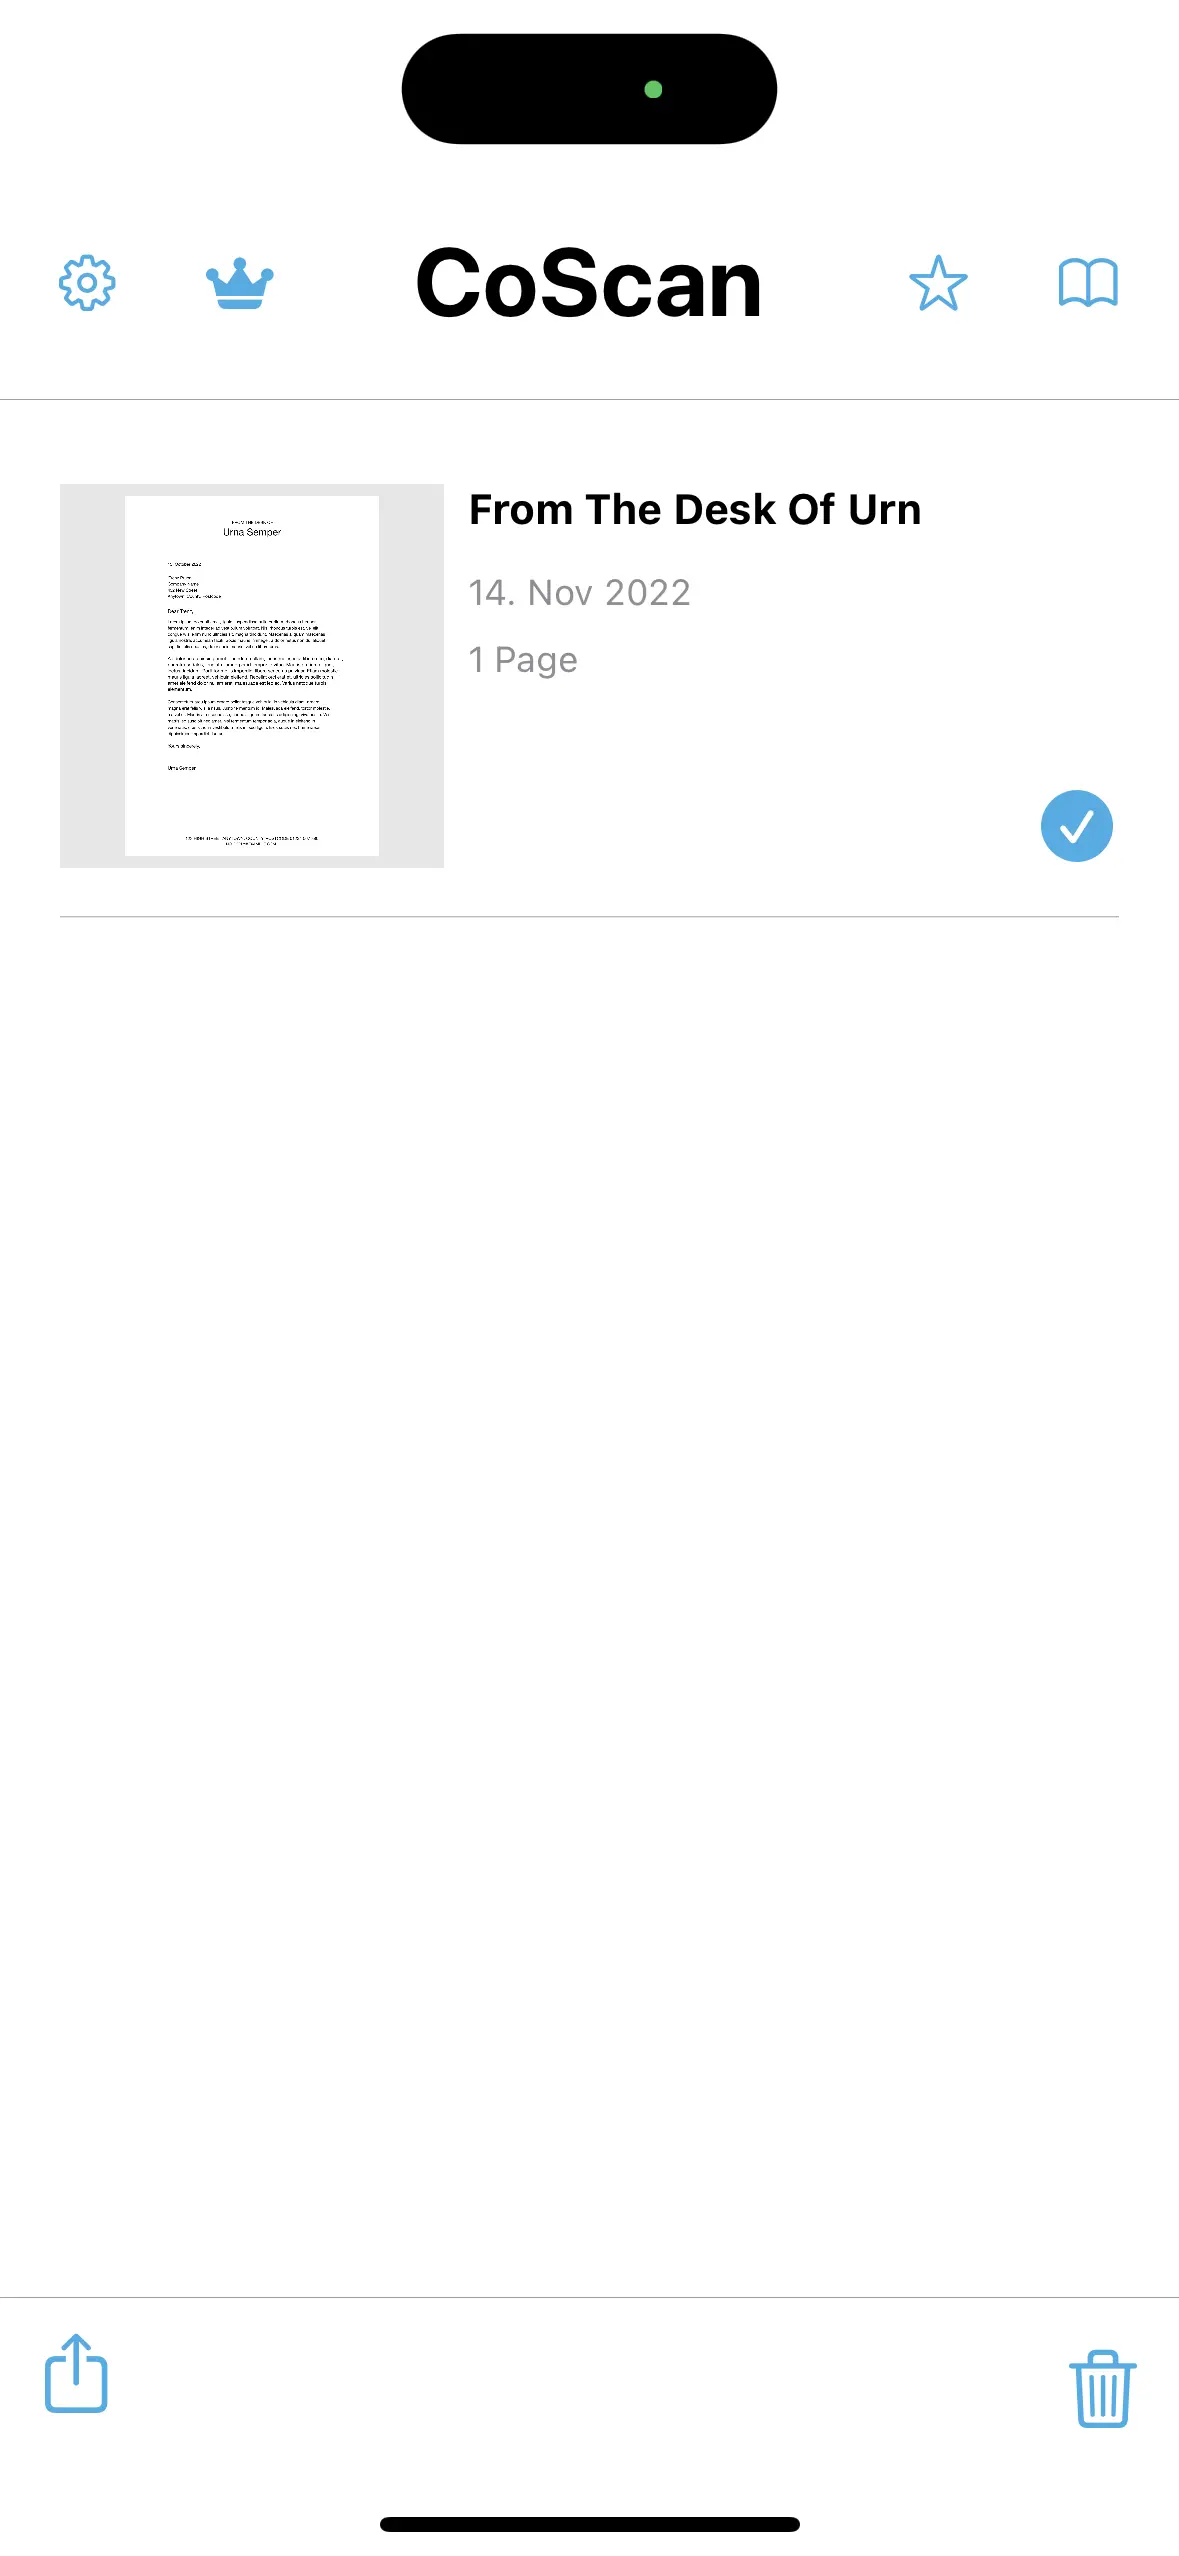
Tap the "Share"-button for a context menu:
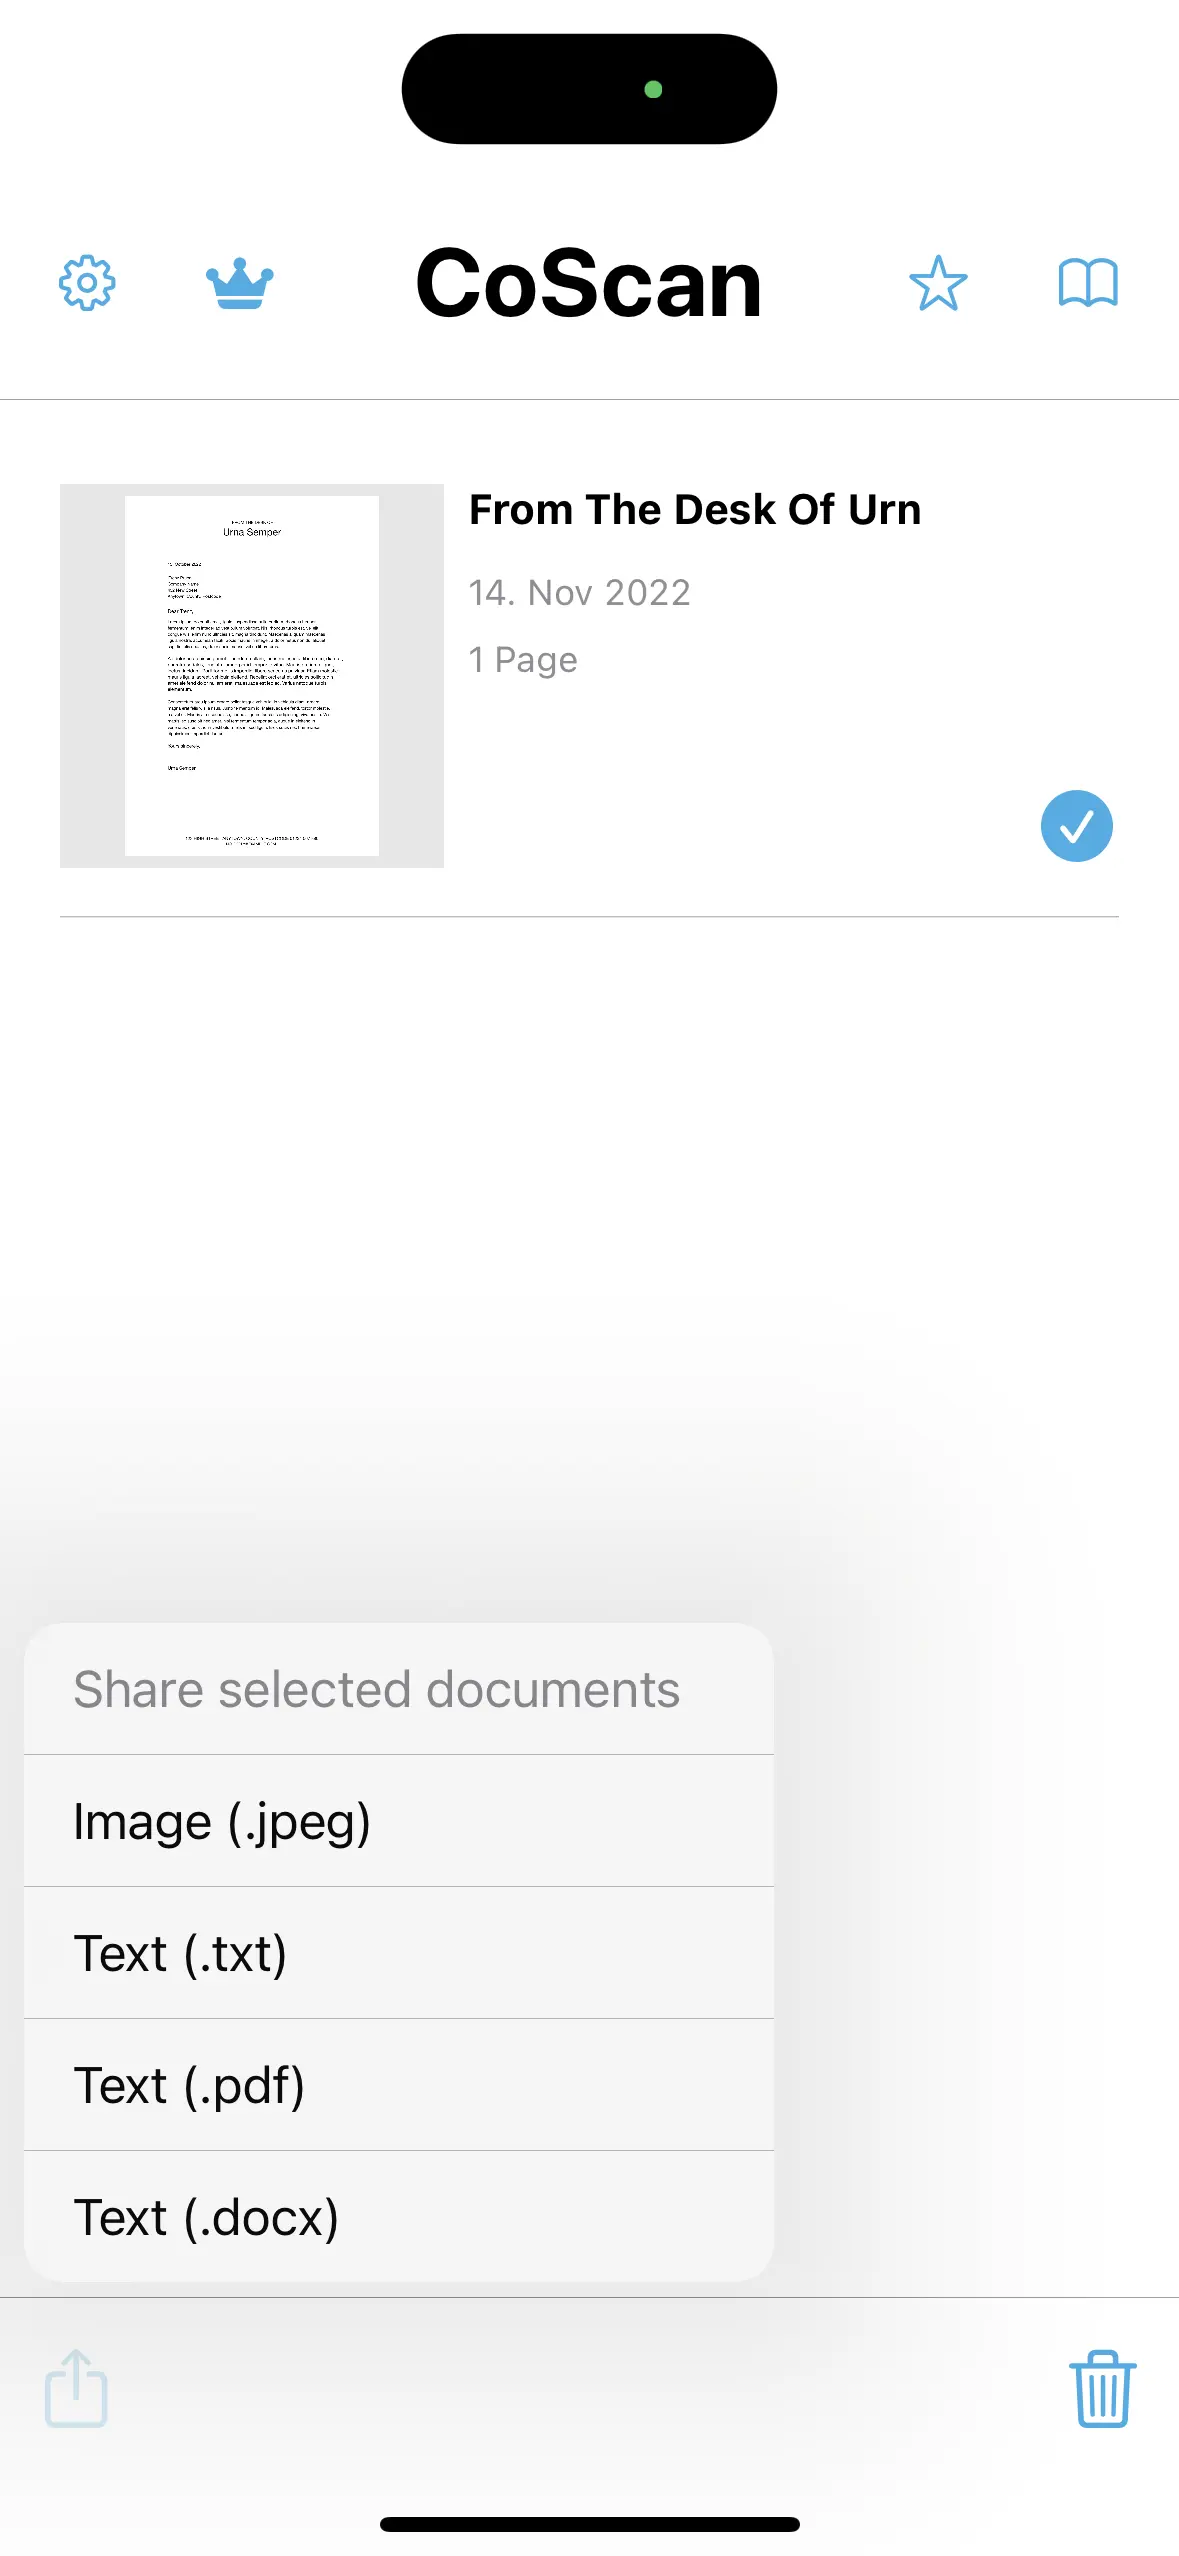
Supported are the following formats:
- JPEG: Exports a color corrected, cropped and deskewed image in JPEG format; if the document has multiple pages, they will be exported as a ZIP archive
- TXT: Exports a single text file (extension ".txt") without formatting, but with line breaks to separate the individual paragraphs
- PDF: Exports a PDF with pure textual content, font sizes and layout as close as possible to the original. The created PDFs are fully editable and searchable
- DOCX: Exports a Microsoft Word document with font sizes and layout as close as possible to the original. DOCX files can also be opened without loss of quality in Apple Pages and Google Docs
Tap the desired export format and you will be presented with the standard iOS "Share"-pane where you can save to files, email or print the selected document.
Deselecting the document will bring back the "Camera"-button.
Document editing
In the main screen, tap the document thumbnail to go to the document detail view:
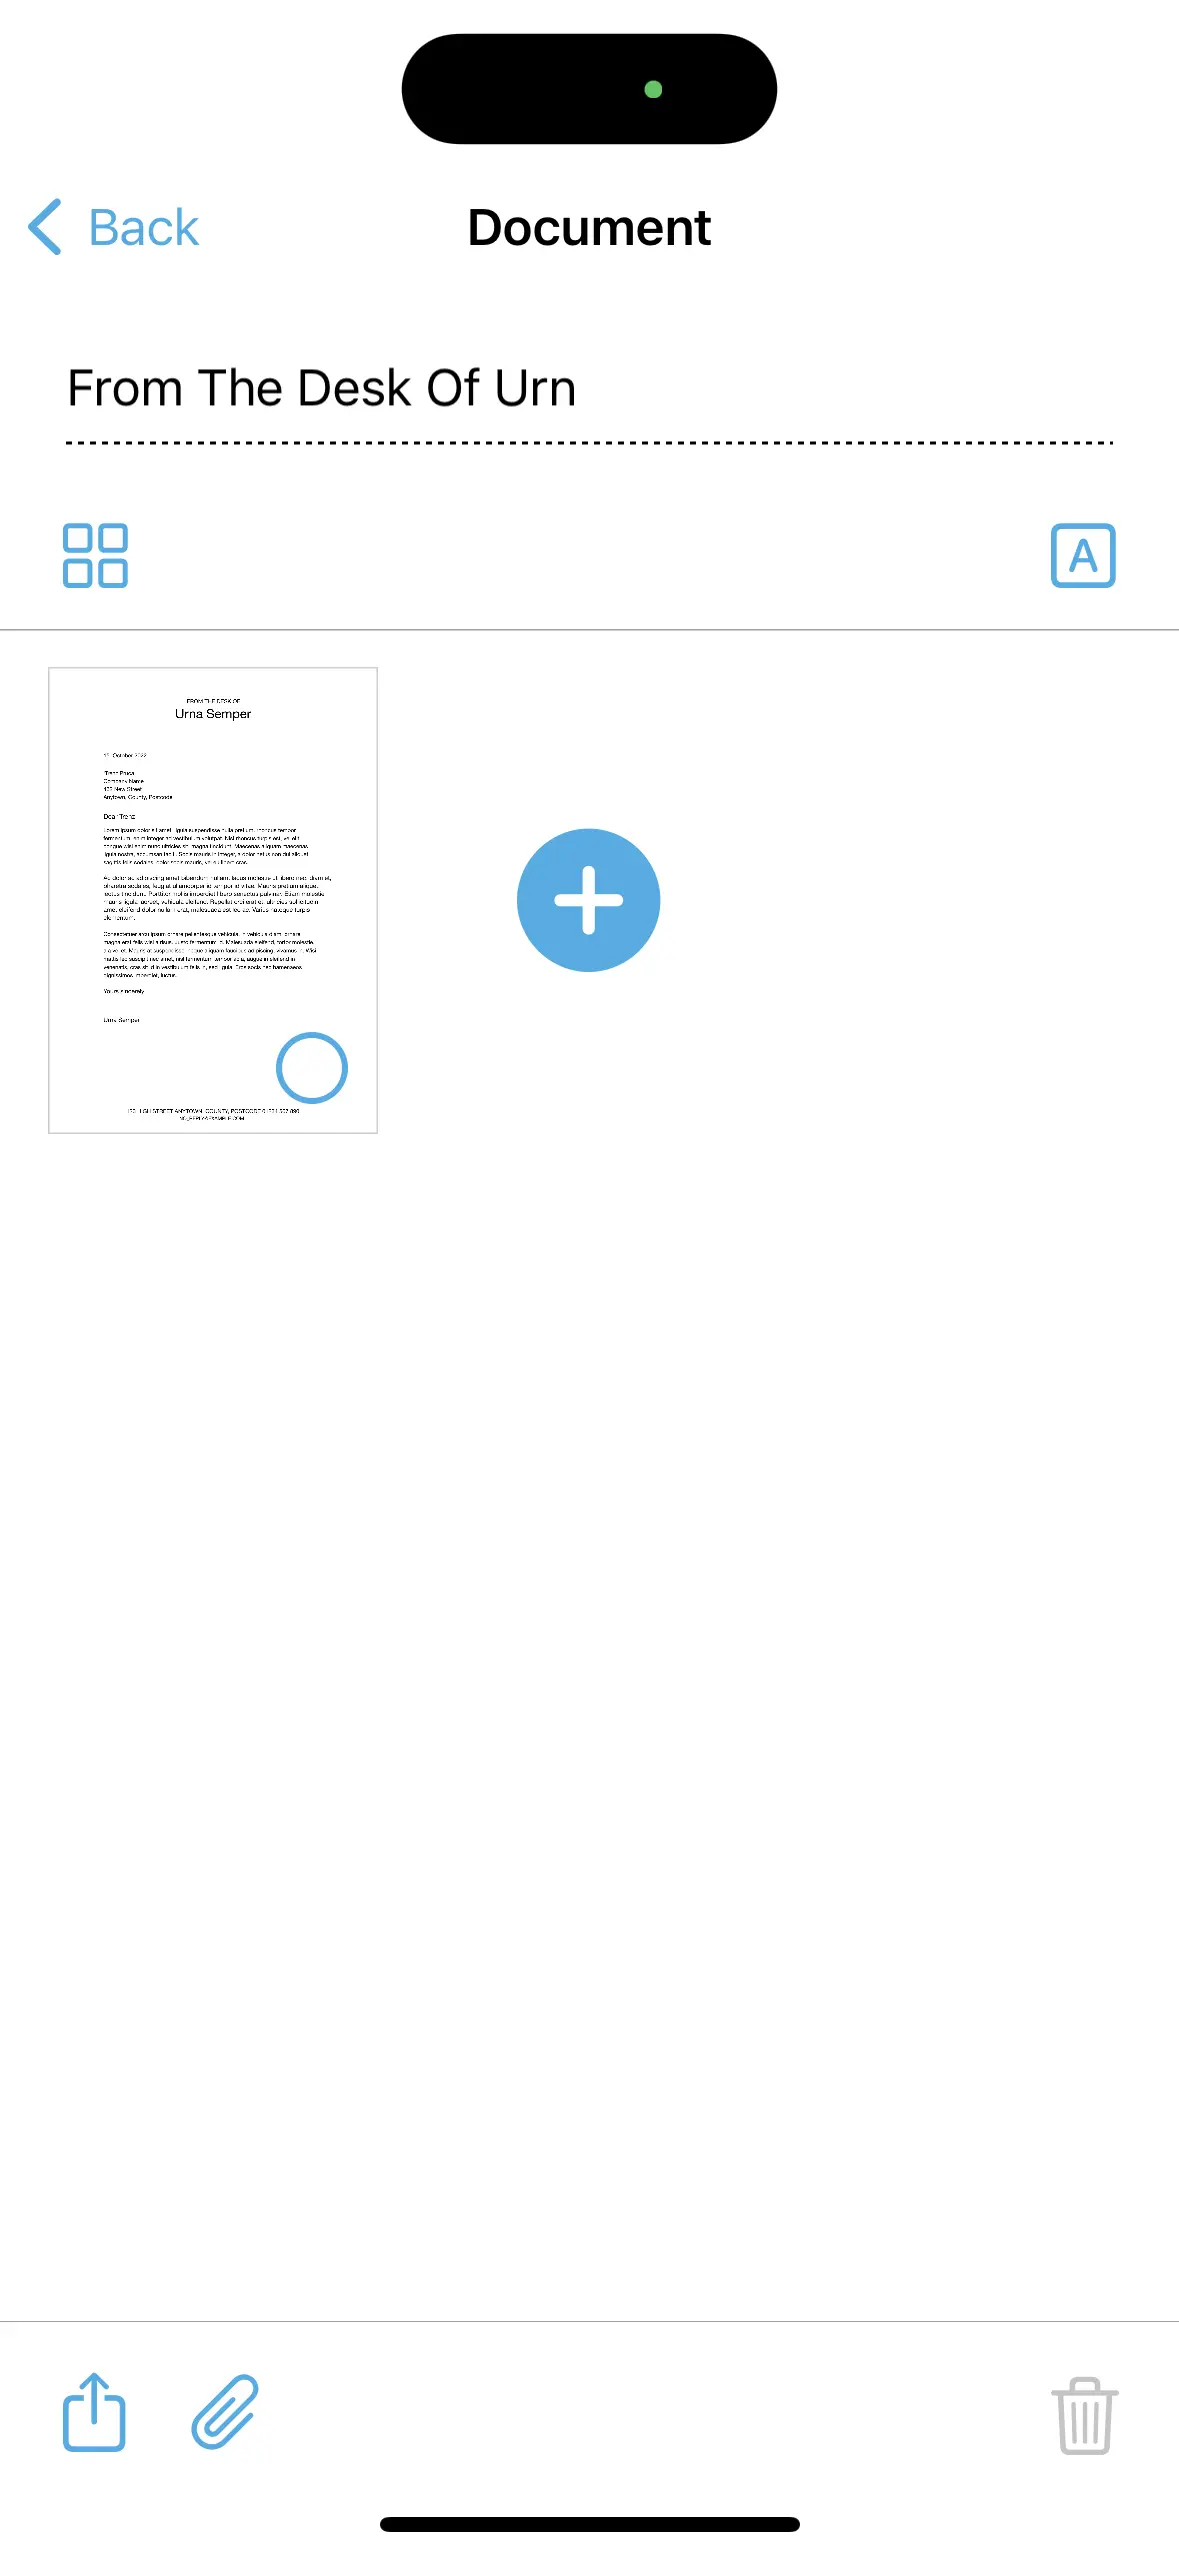
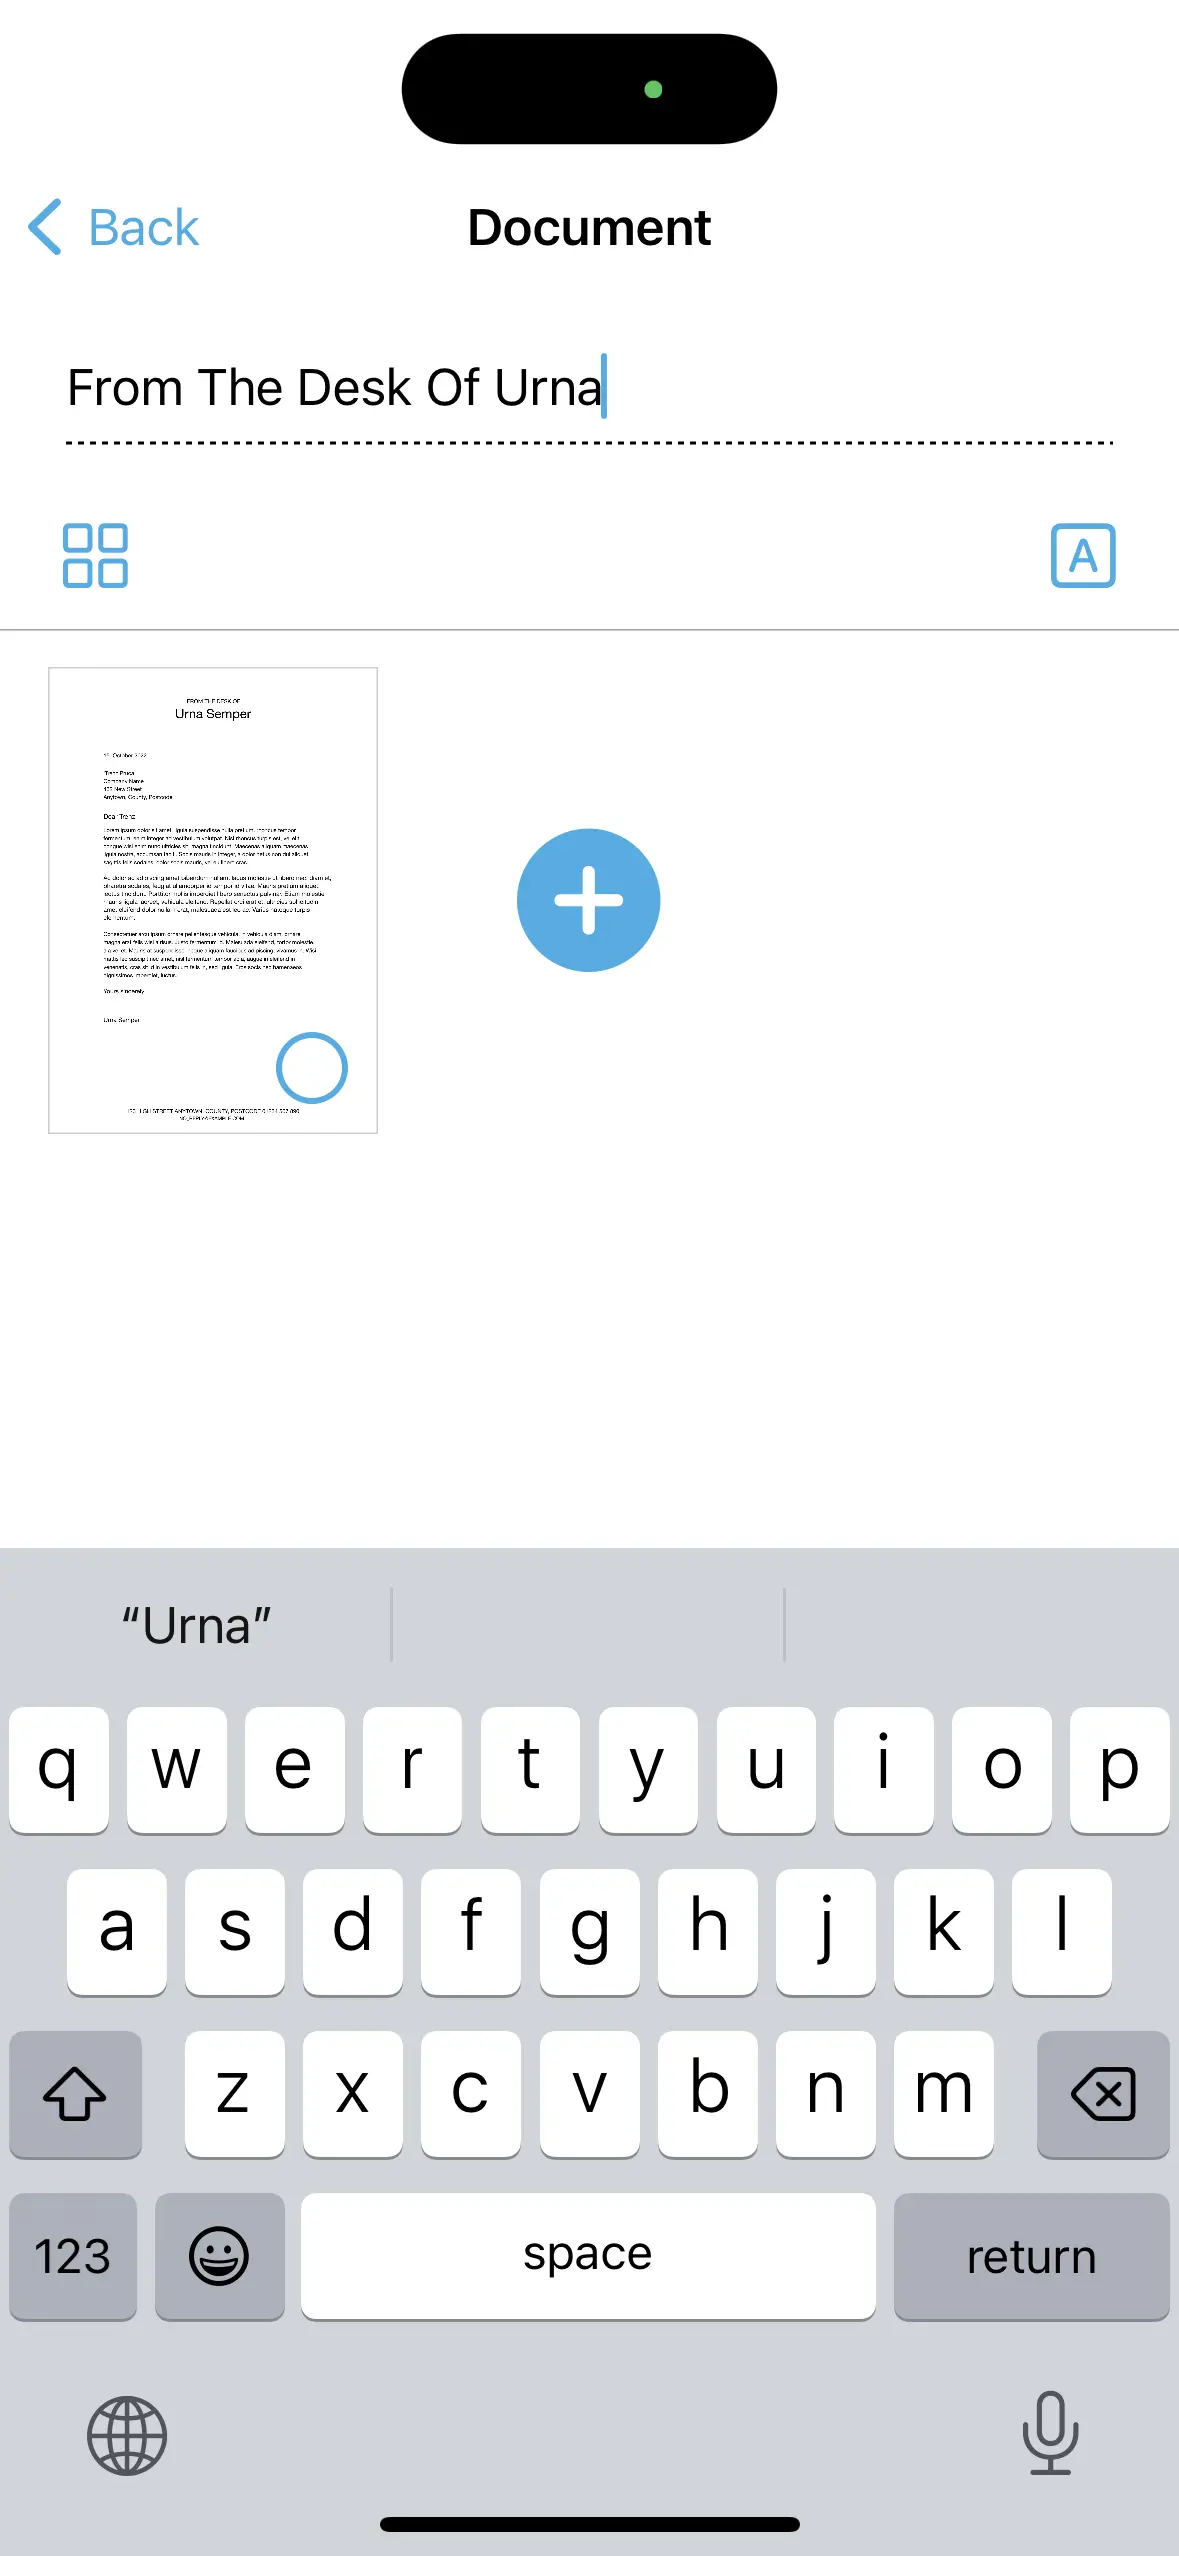
Per default the app will use the first couple of words of the document text as the doc's title, "From The Desk Of Urn" in this example. Tap the title to change it, tap "Return" when done:
To delete individual pages from the document, select them by tapping the blue circle, then tap the deletion button in the lower right. Like the main screen, the document detail view has a sharing button which works as described previously. The difference is that nothing needs to be selected, the button is always there and will let you share or export the document directly from this screen.
The document detail view will also let you add pages to an existing document. Tapping the blue "Plus"-button will take you to the camera screen where you can scan additional pages which will then be added to the doc.
Per default, the doc's pages are displayed in a grid view (note blue "Grid"-button in the top left). Tap it to change the view to individual pages (you can also simply tap the thumbnail of the page):
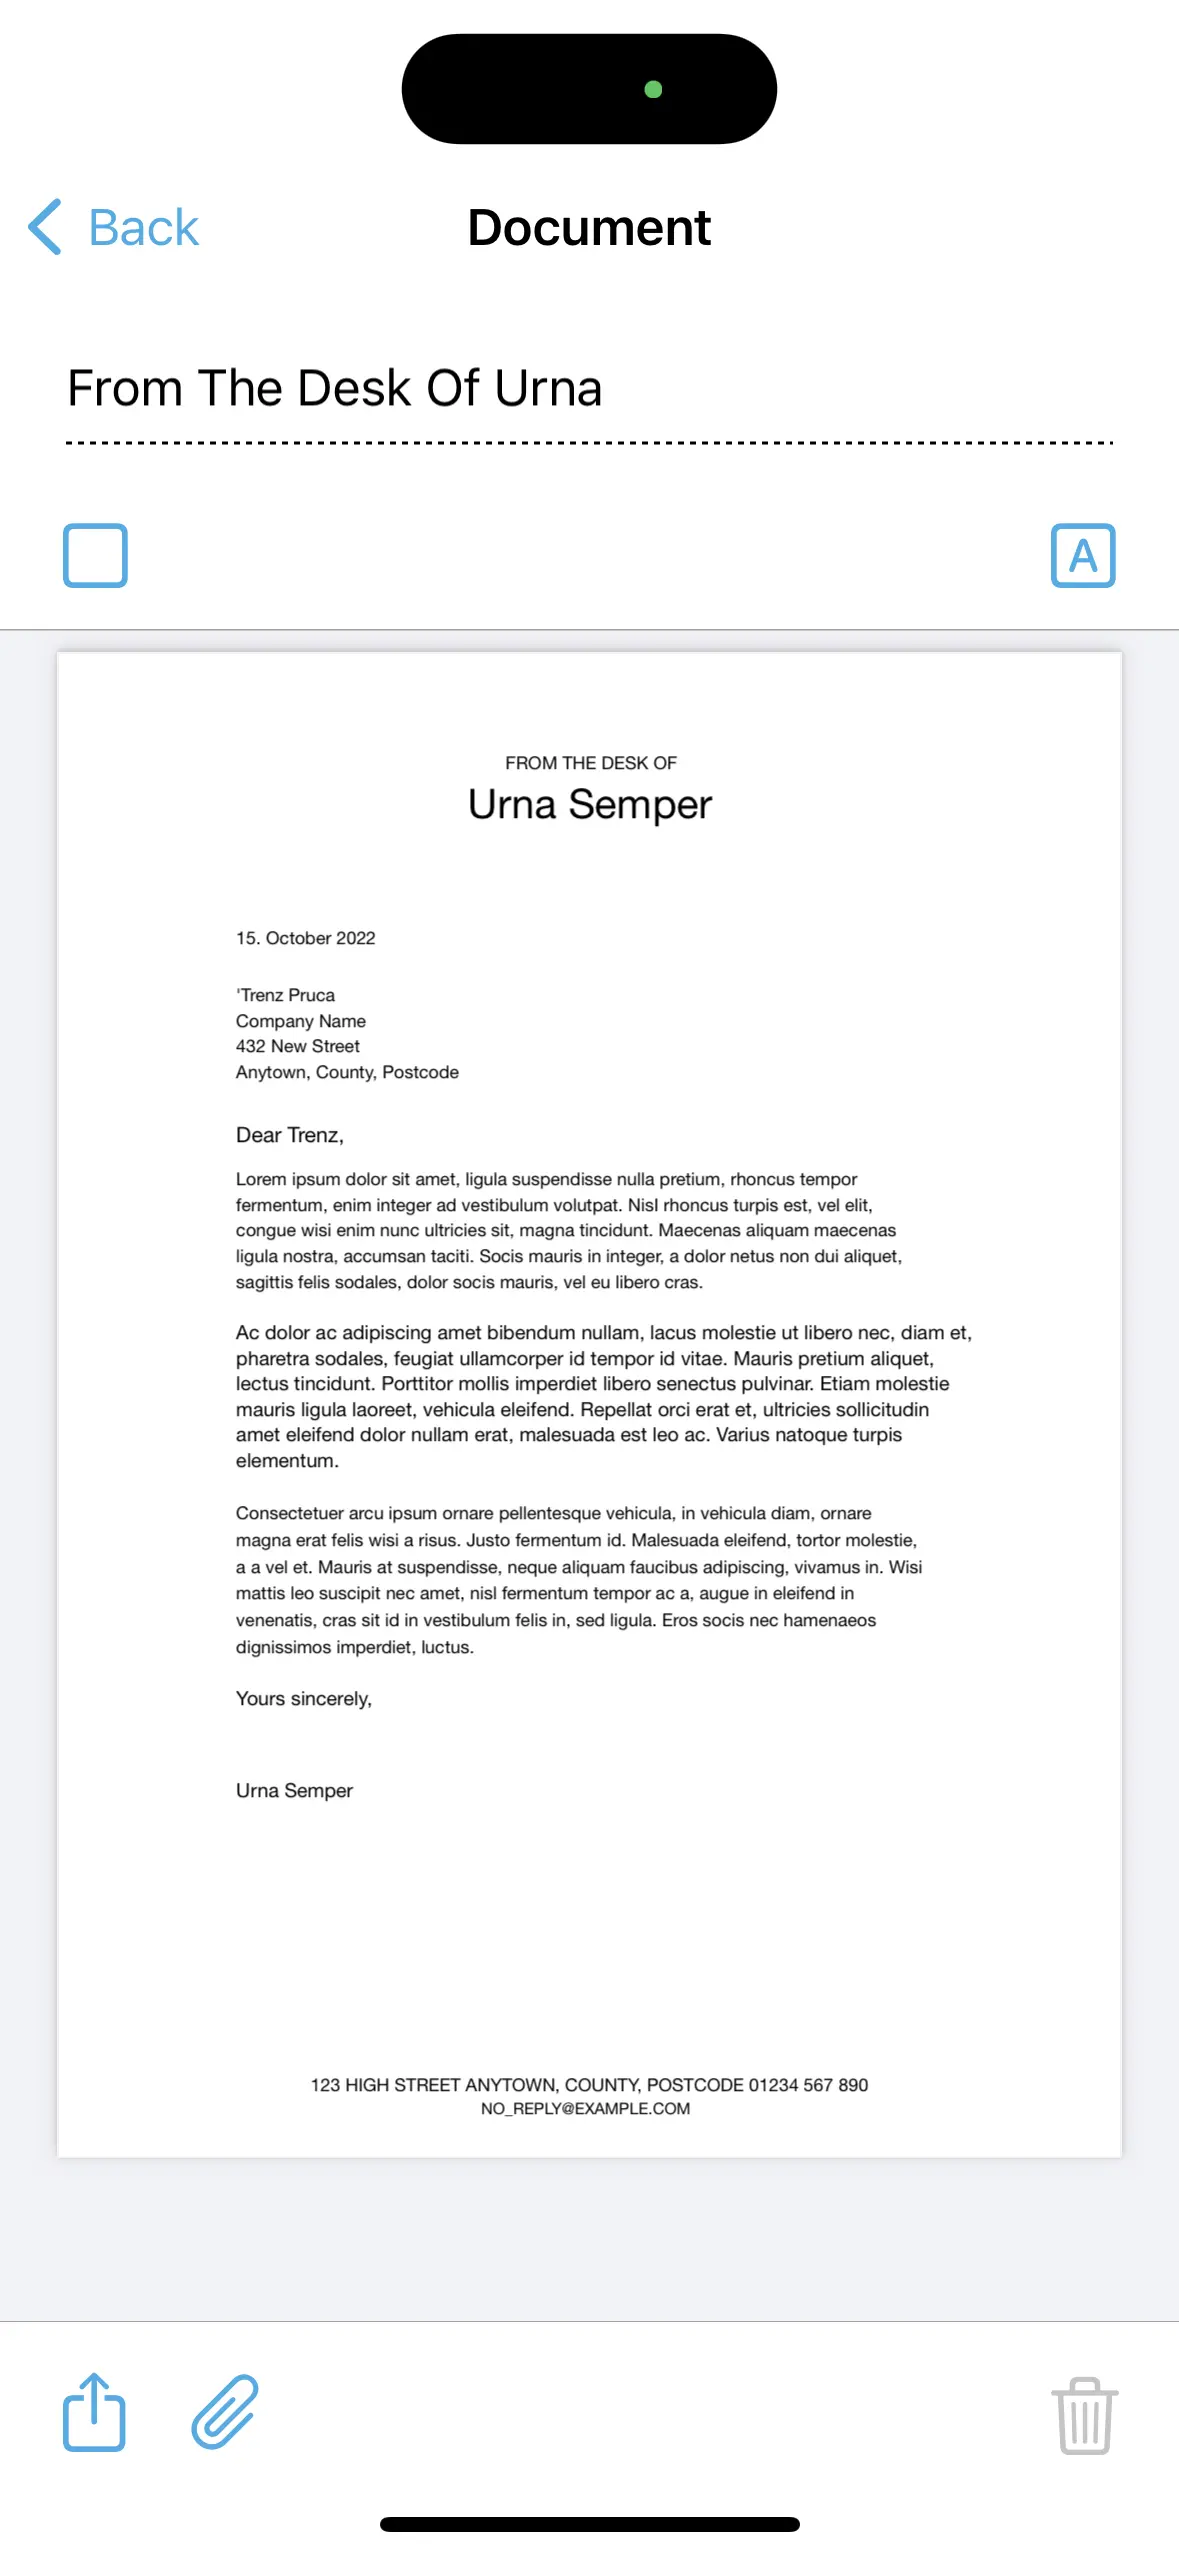
Use the single view to zoom in on the text using the standard pinch-to-zoom gestures. Shown in the screenshot above is the textual content of the scan as produced by the text recognition. As such, you can simply tap and hold to select text which can then be copied to the clipboard:
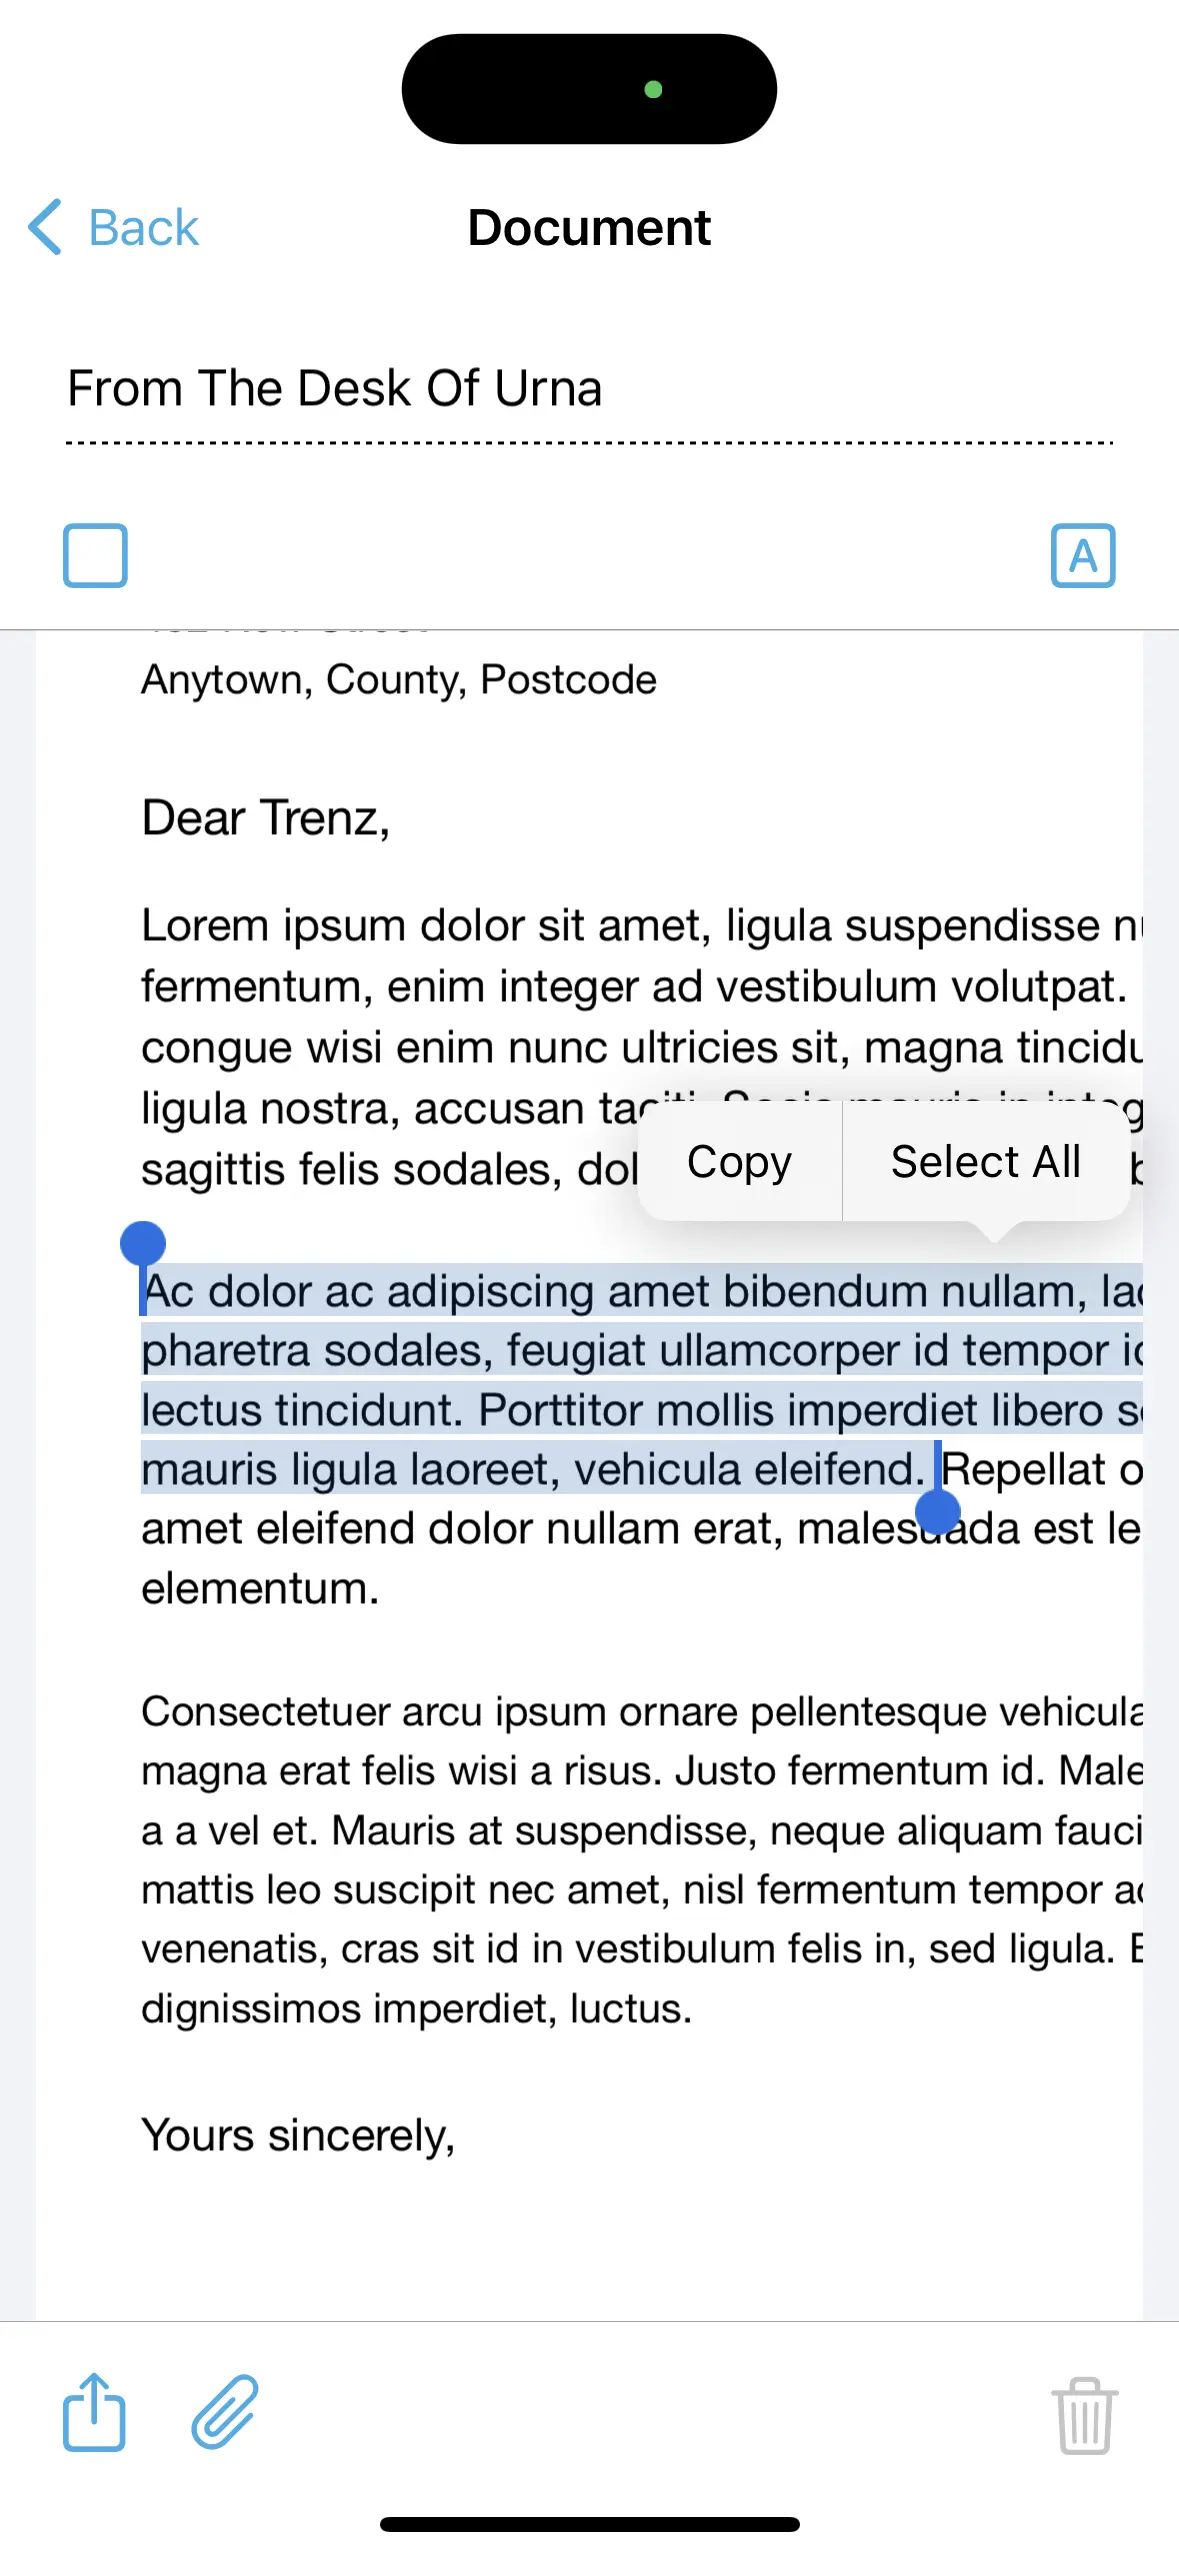
You can also display and zoom into the actual scan by tapping the "A"-button in the top right:
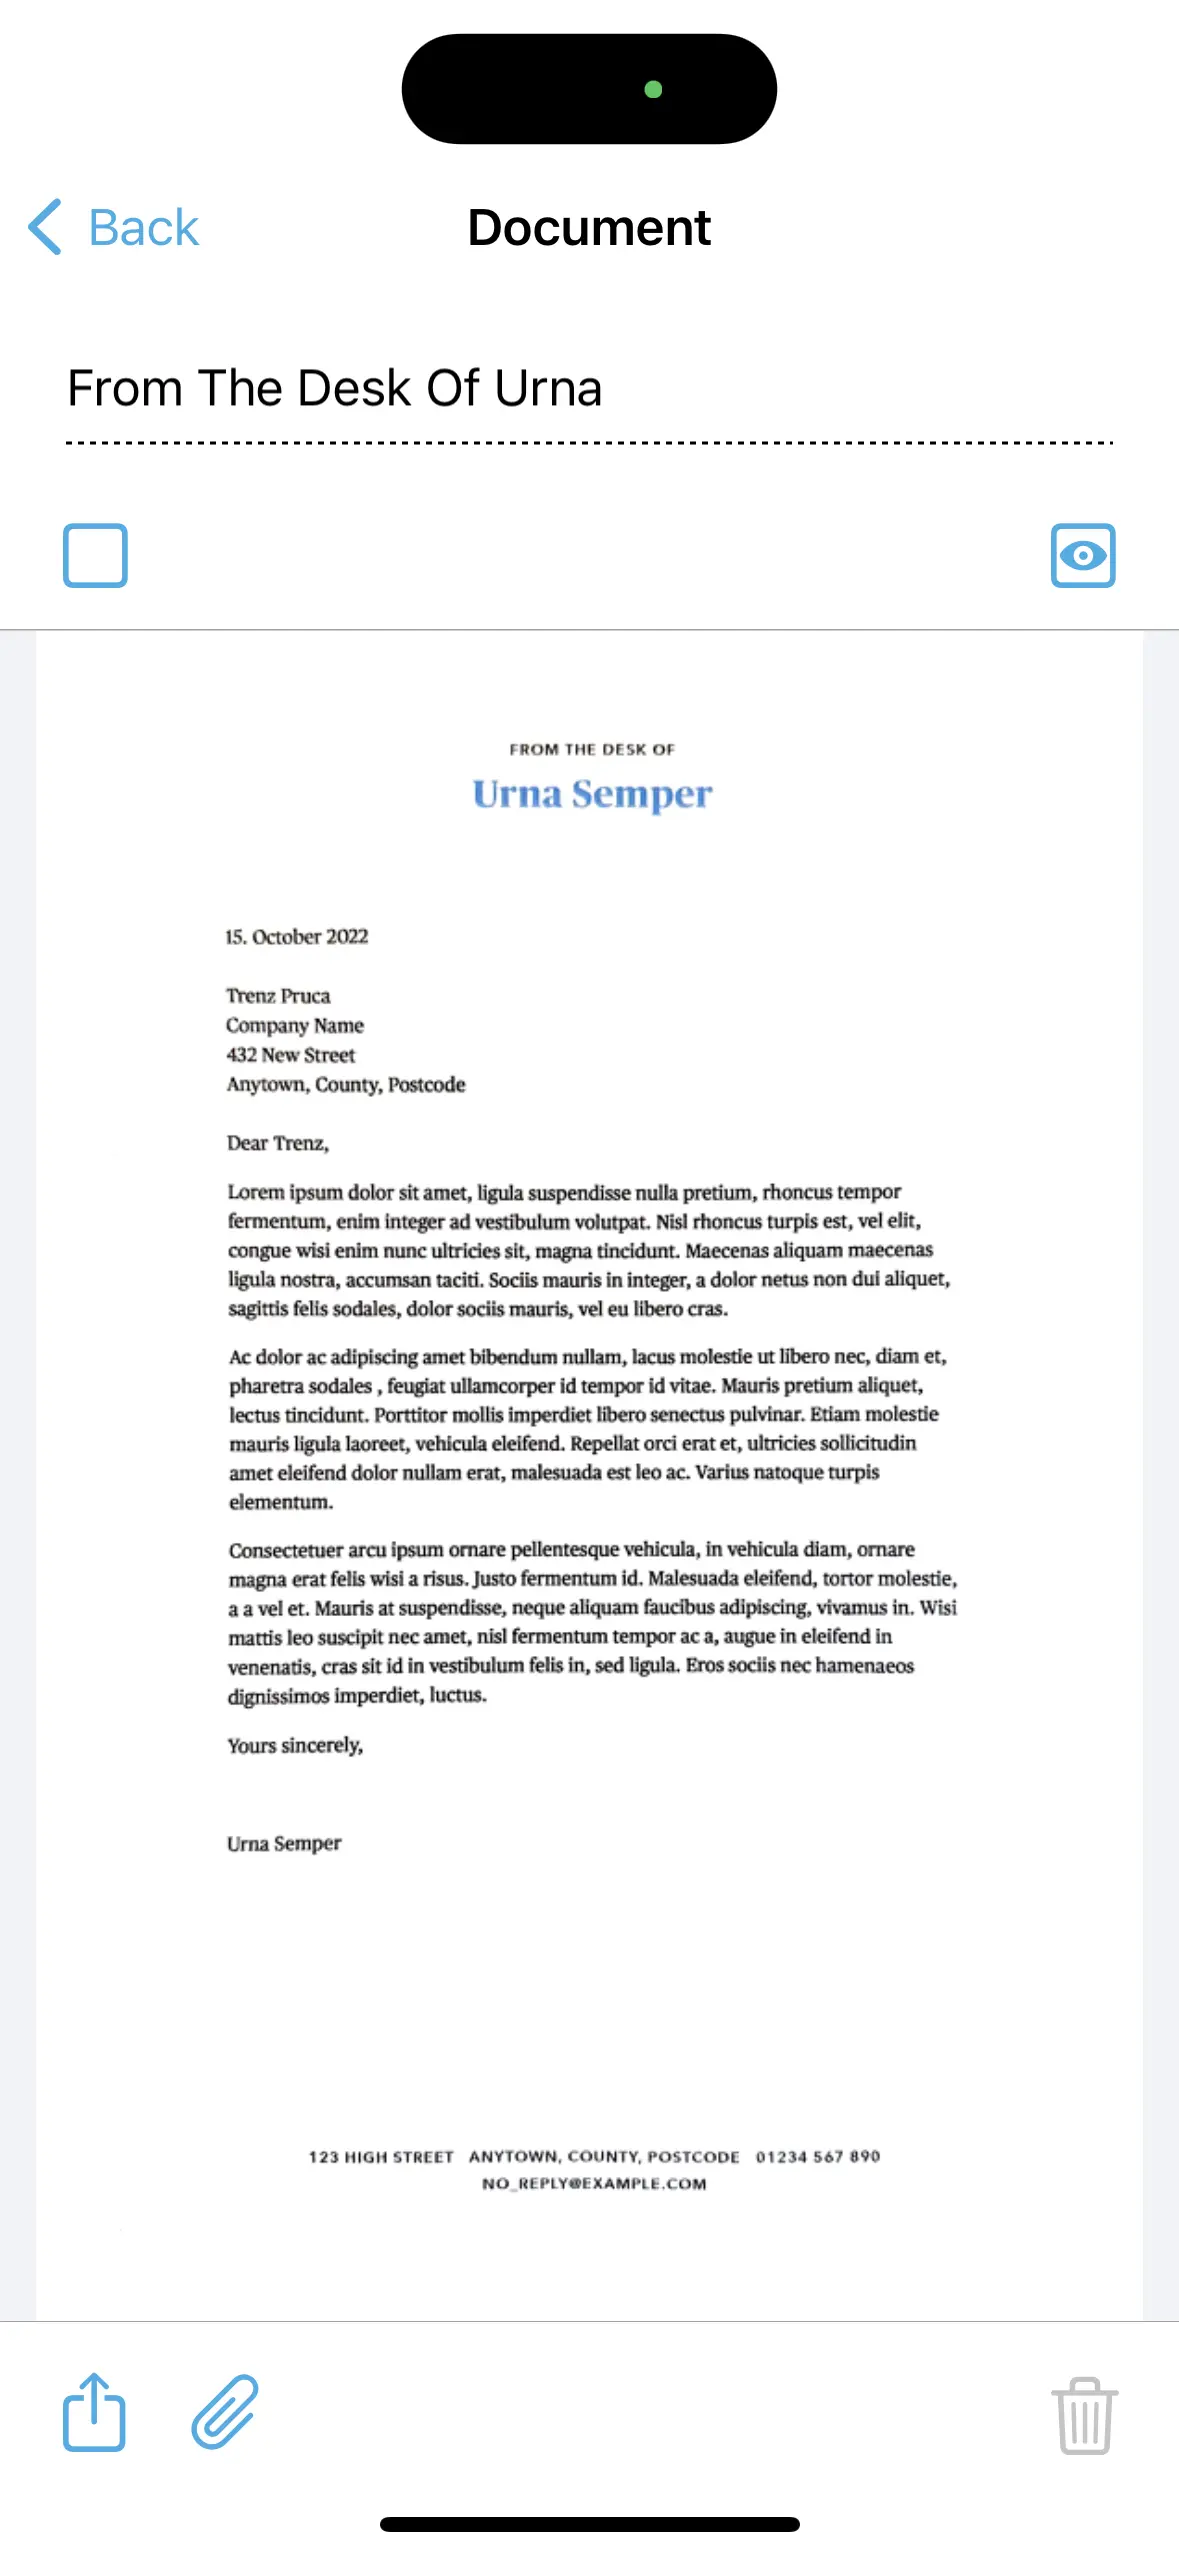
Finally, the screen offers a quick way of copying the pure text of an entire page to the clipboard. Tap the "Paper clip"-button and select the page you want to copy from the list:
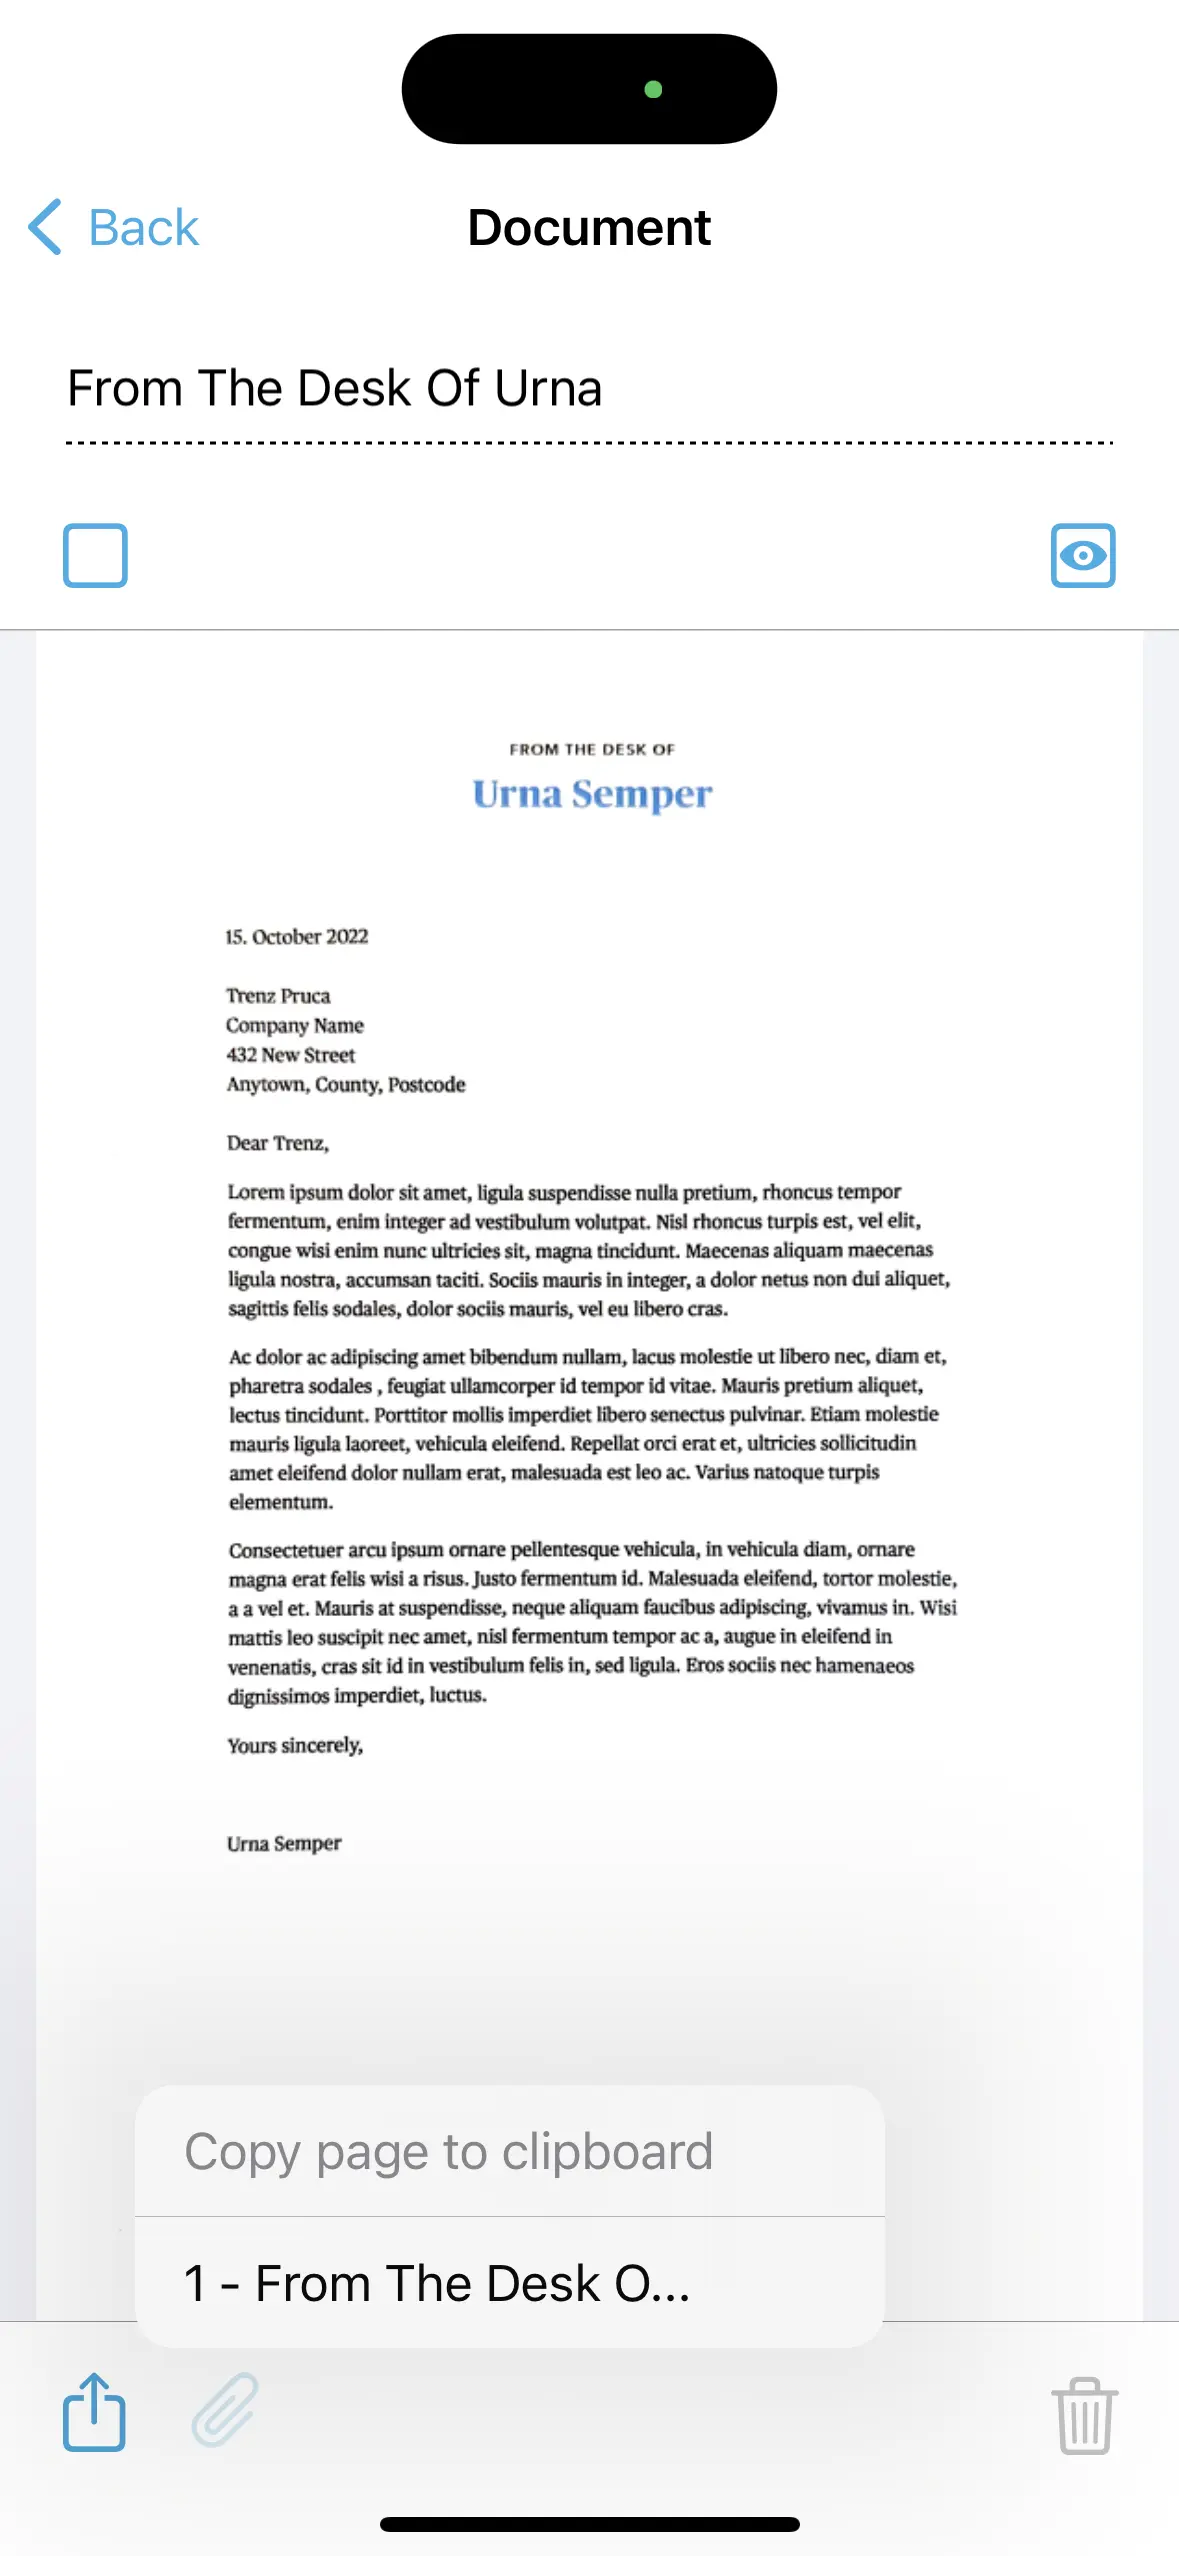
Return to the main screen by tapping the "Back"-button in the top left.
Tip: If you have documents with multiple pages you can easily change the page order if necessary: Simply tap and hold the page thumbnail in grid view and then drag it to the new position.
Settings
Tap the gear button in the main screen to open the "Settings"-pane:
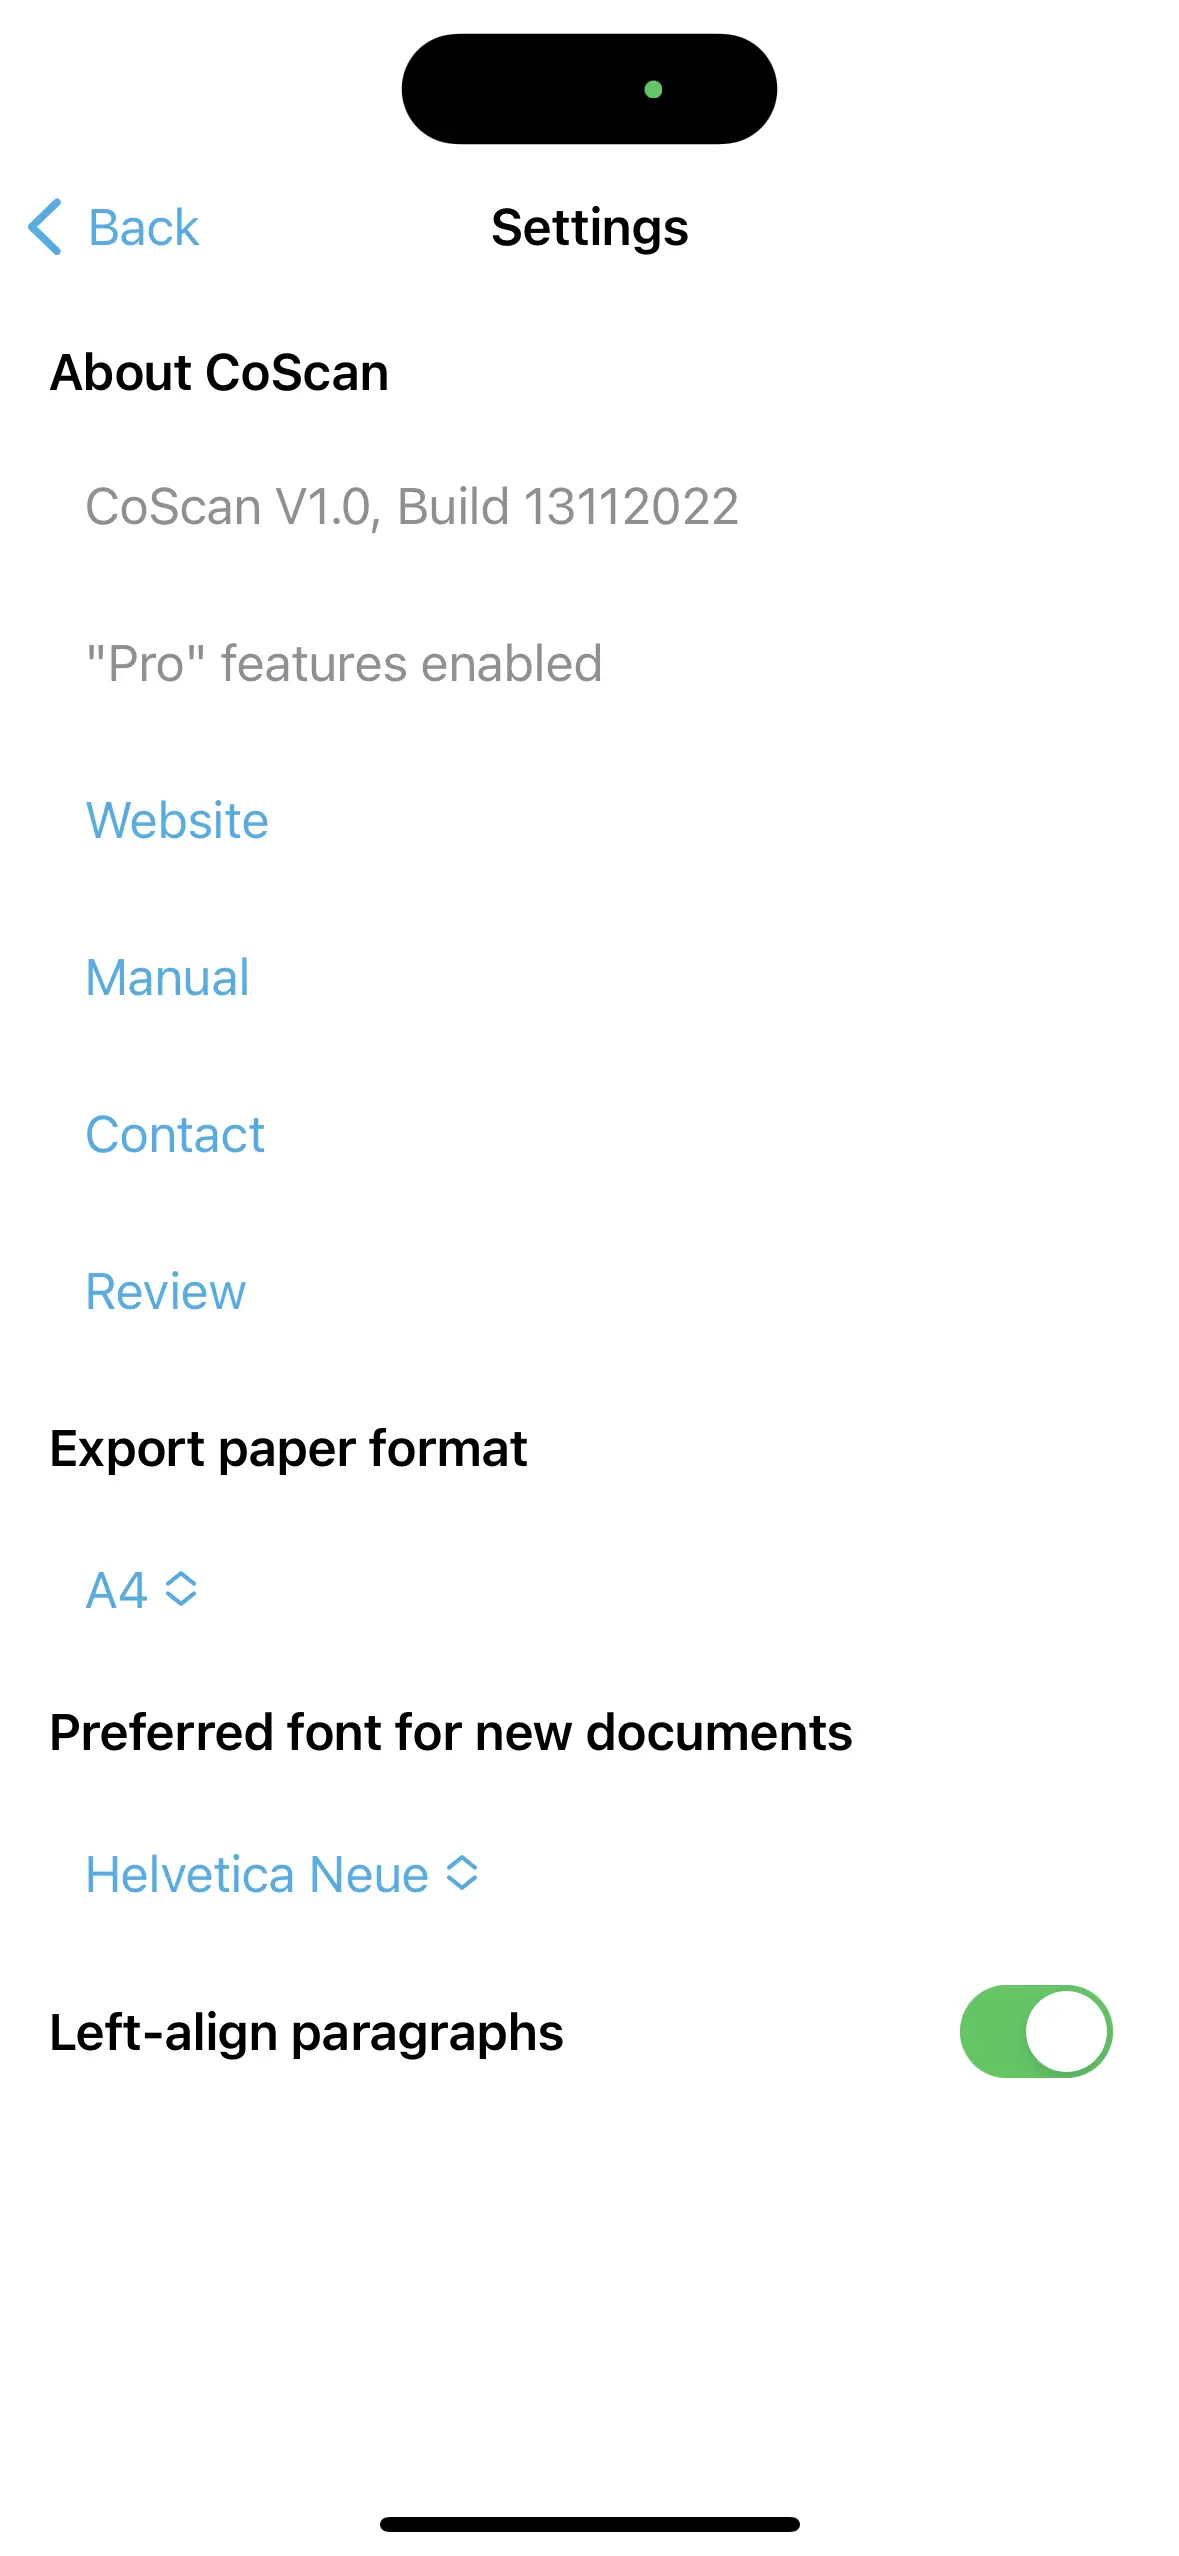
The current version of CoScan and assorted links are listed first and should be self-explanatory. Please use the "Contact"-link to submit bug reports, feature requests and comments per mail. Please be as specific as possible and include document scans if they help illustrate your issue.
Options:
- Export paper format: Choose between A4 and US Letter. We recommend to set this once; all subsequent documents will then be created with the selected format. Default: A4.
- Preferred font: Choose between "Helvetica Neue" or "Times New Roman". Again, we recommend to set this once. Default: Helvetica Neue
Note: An upcoming version of CoScan will bring advanced font detection. - Left-align paragraphs: This option will auto align the left boundaries for paragraphs for a more regular layout. Deactivate if you scan multi-column documents or documents which contain lots of centered or right-adjusted text.
CoScan Pro Features
Some advanced functions and export formats are only available in the "Pro"-version of CoScan. Tap the "Crown"-button in the main screen to enable them:
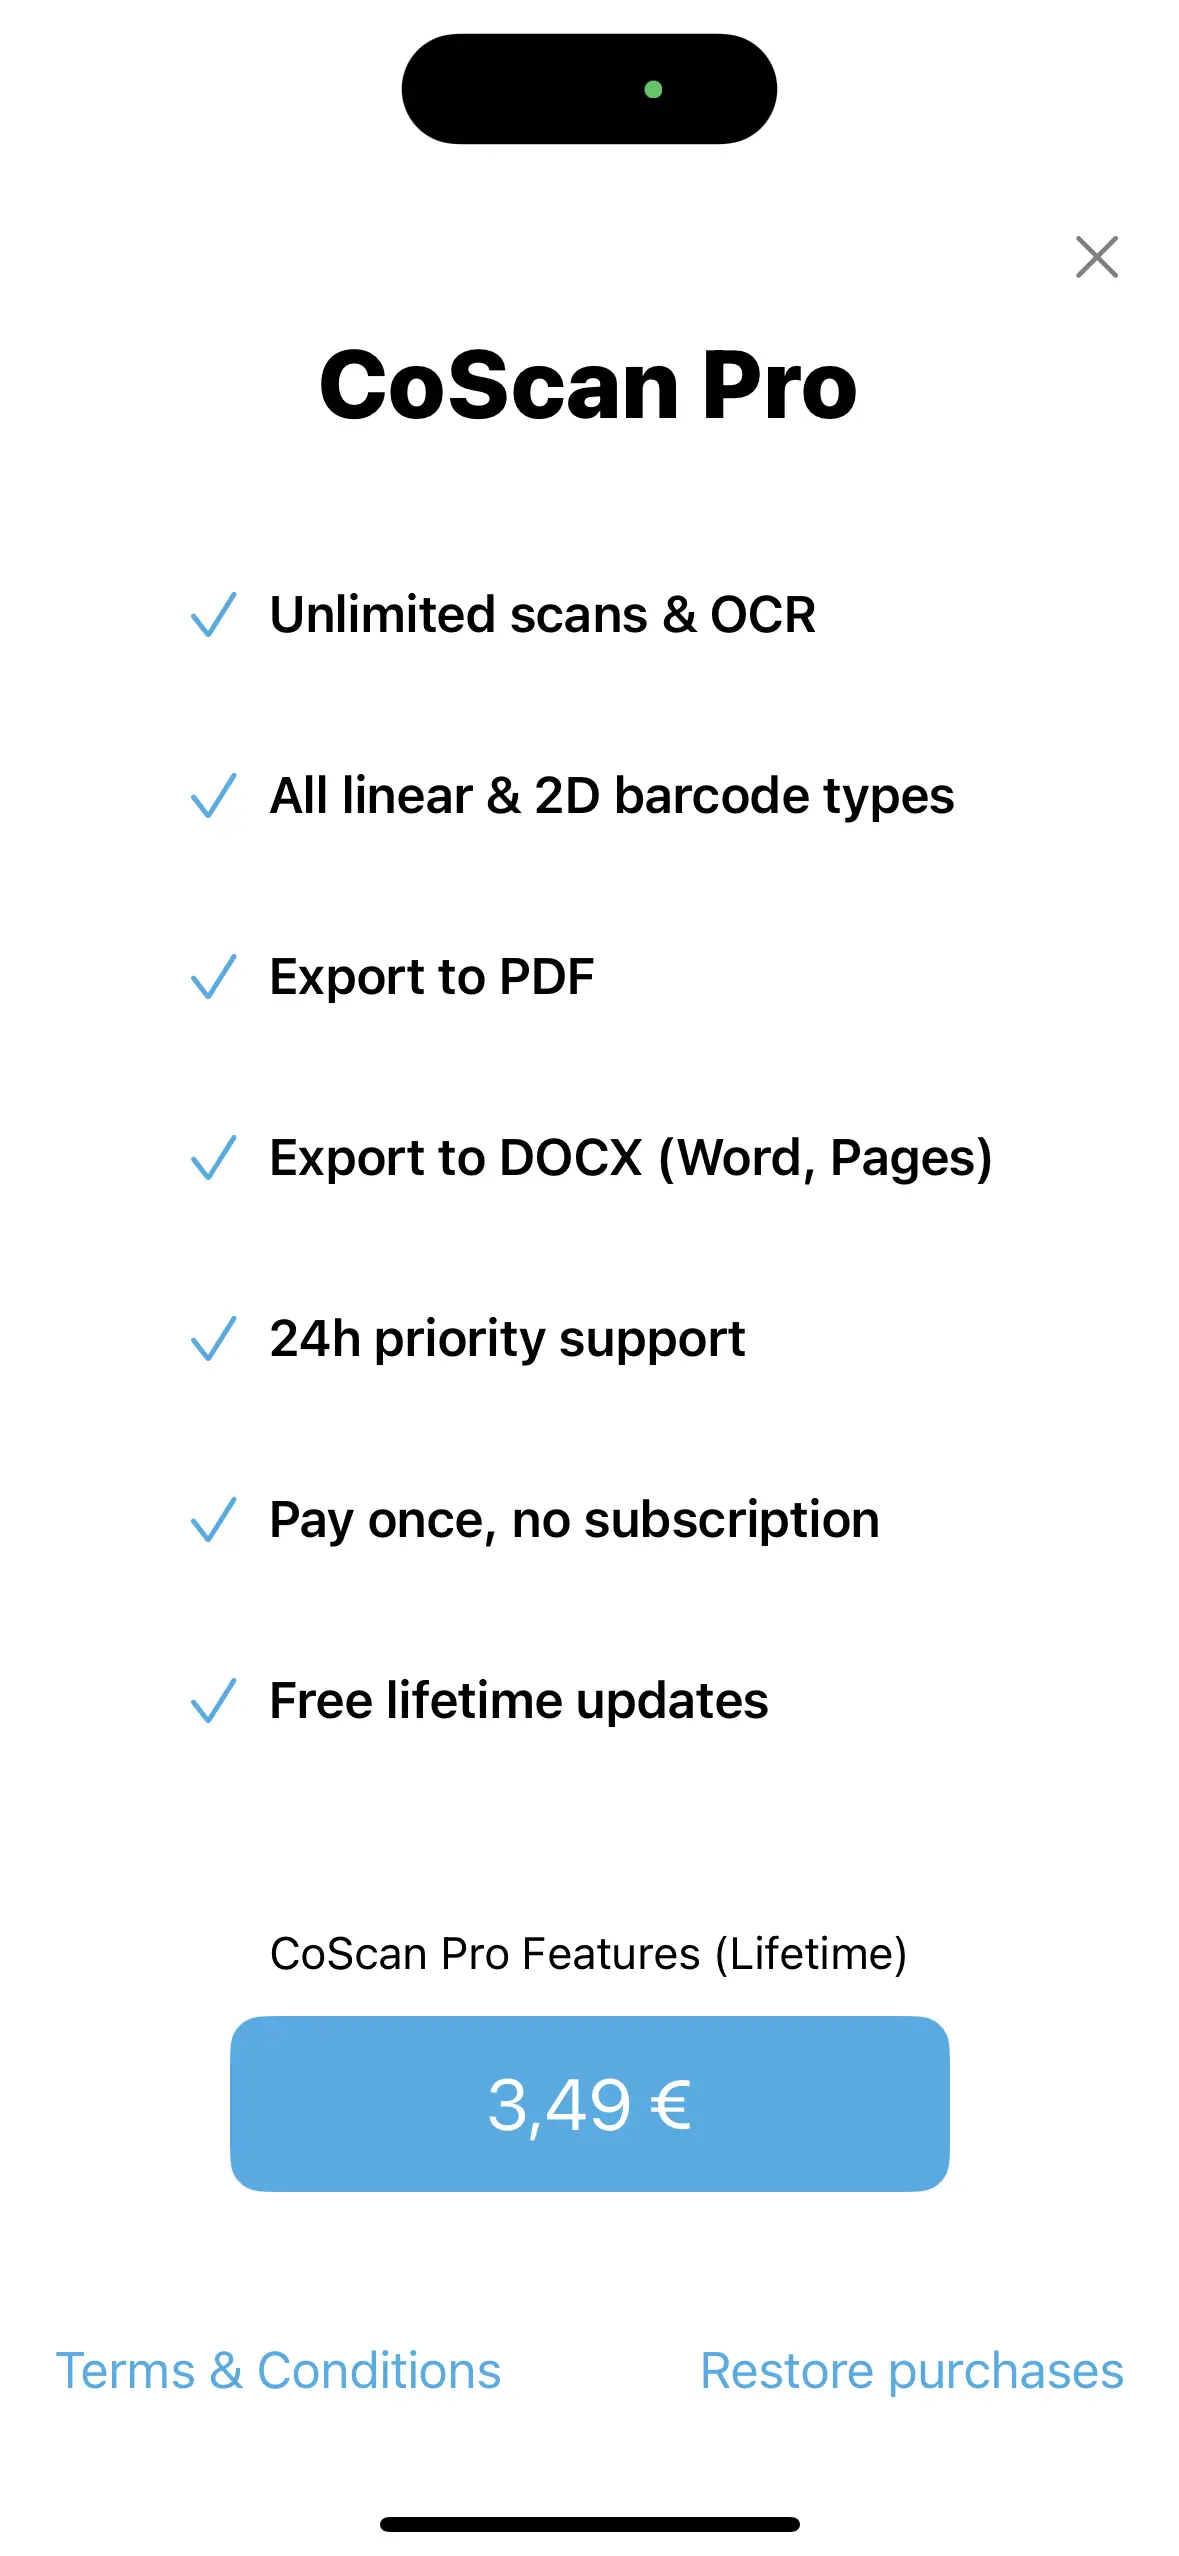
Note that the price listed will vary depending on your region and currency.
A note from the developers
App development takes a lot of effort. Devices have to be purchased, code has to be developed, manuals have to be written and providing customer support is time-consuming and, hence, expensive. As such we can't give CoScan away entirely for free. We despise ads and subscriptions like the next guy; instead we believe that a reasonable one-time payment is a fair proposal which benefits everyone involved, developer and user.
Thank you for your support and happy scanning!


