Create QR Codes in Adobe InDesign 2021
Fast and easy creation of custom QR 2D barcodes with the Softmatic QR Designer for Adobe InDesign 2021 or higher. Choose from eight different code styles and millions of colors. Customize the QR barcode for your brand by adding logos or icons to the symbol. Supported data types:
The extension features one of the fastest QR generation algorithms with the code updated in real time as you type or change styles and colors. The designer is fully Unicode capable with support for accented characters, umlauts and non-Latin scripts. The Softmatic QR Designer plugin works stand alone, no online access, external components or barcode fonts required. The code is created as a high-quality vector graphic; ID documents with QR codes have no dependencies and can be freely shared. A sample INDD document showing the supported QR styles and content types (download, ID 2021 or higher format): 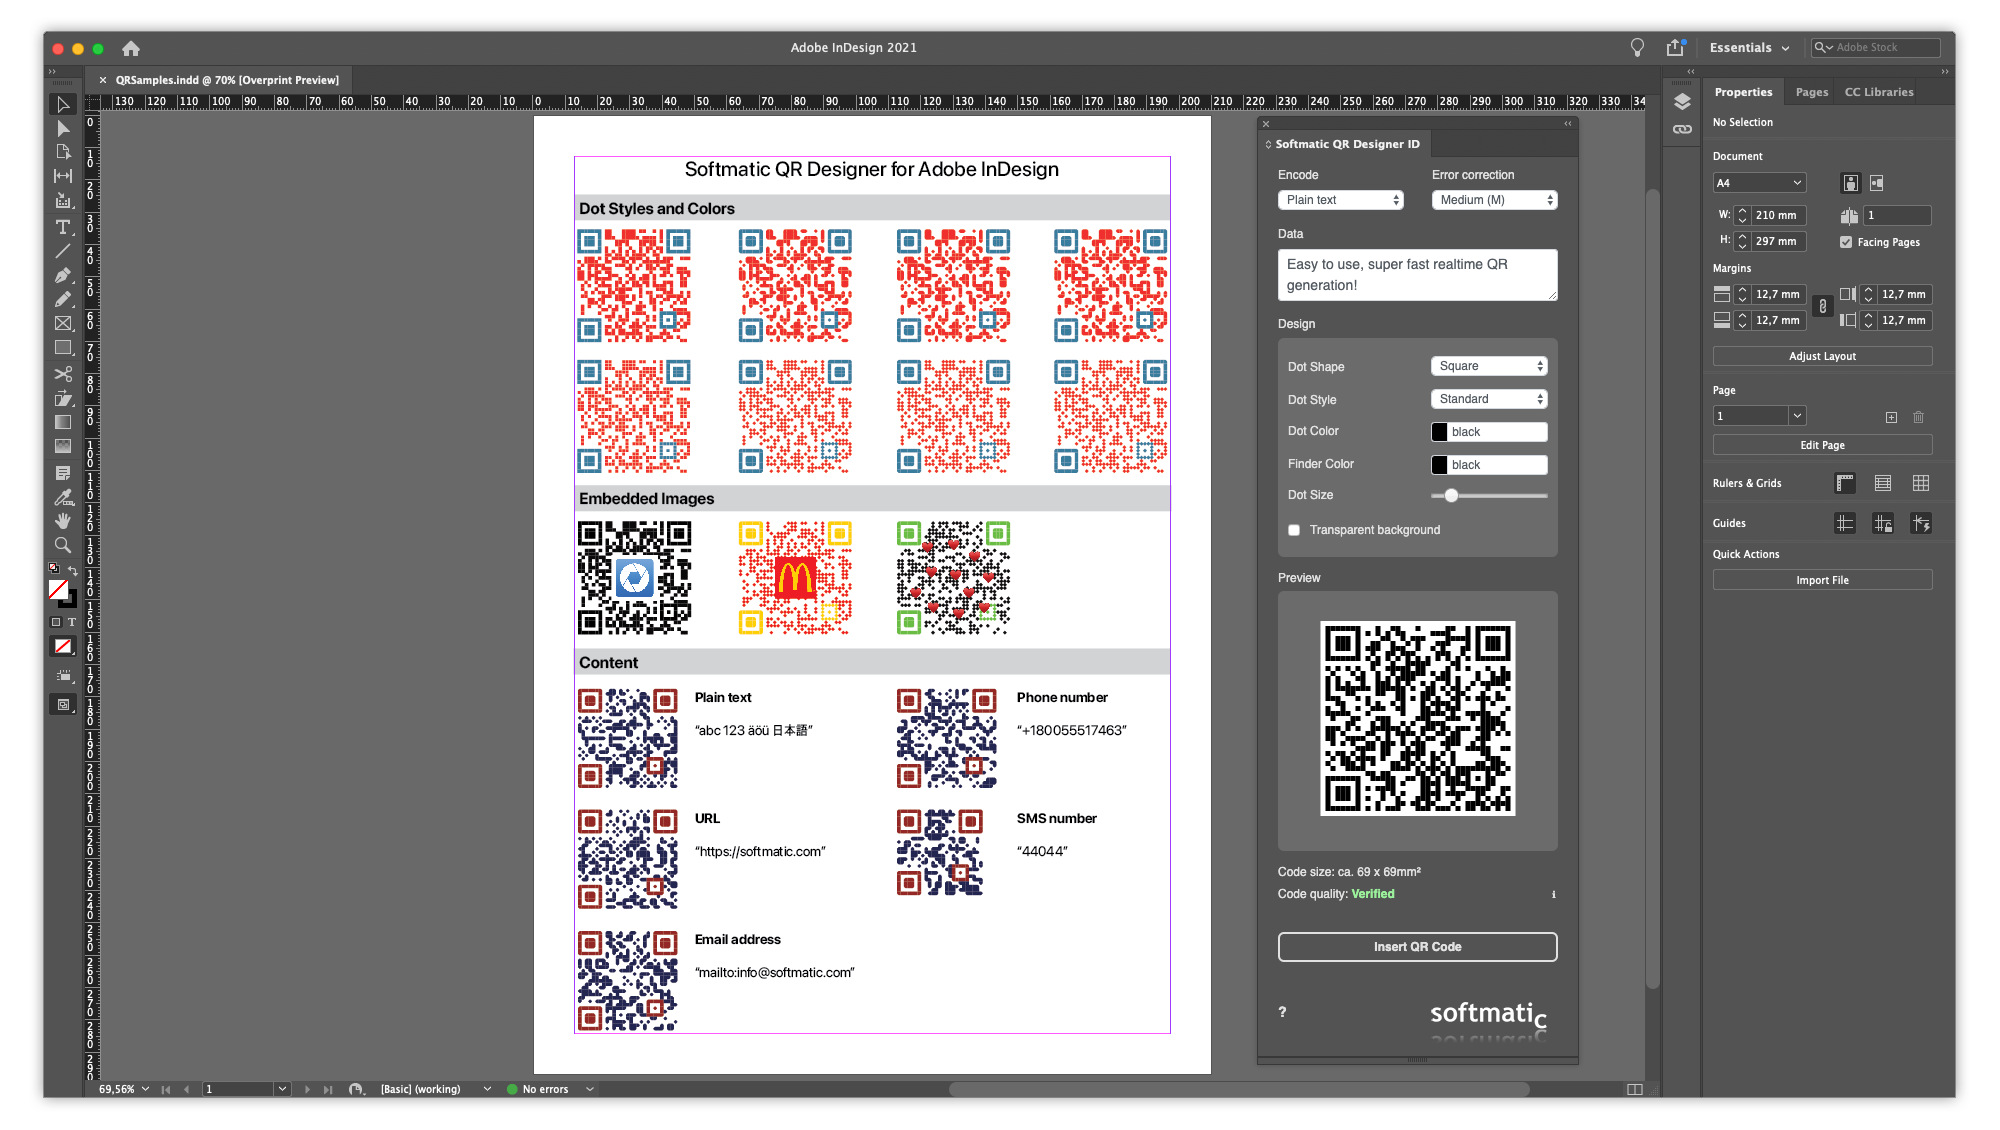
Current version: V1.4.0 2023 (previous versions) System requirements: macOS 10.15 or higher Windows 10 or higher Adobe InDesign CC 2021 (Version 16) or higher InstallationPurchase through Adobe ExchangeLocate the extension on the Adobe Exchange. It is also available in the Creative Cloud App. Select the Stock & Marketplace tab, section Plugins and search for "softmatic": 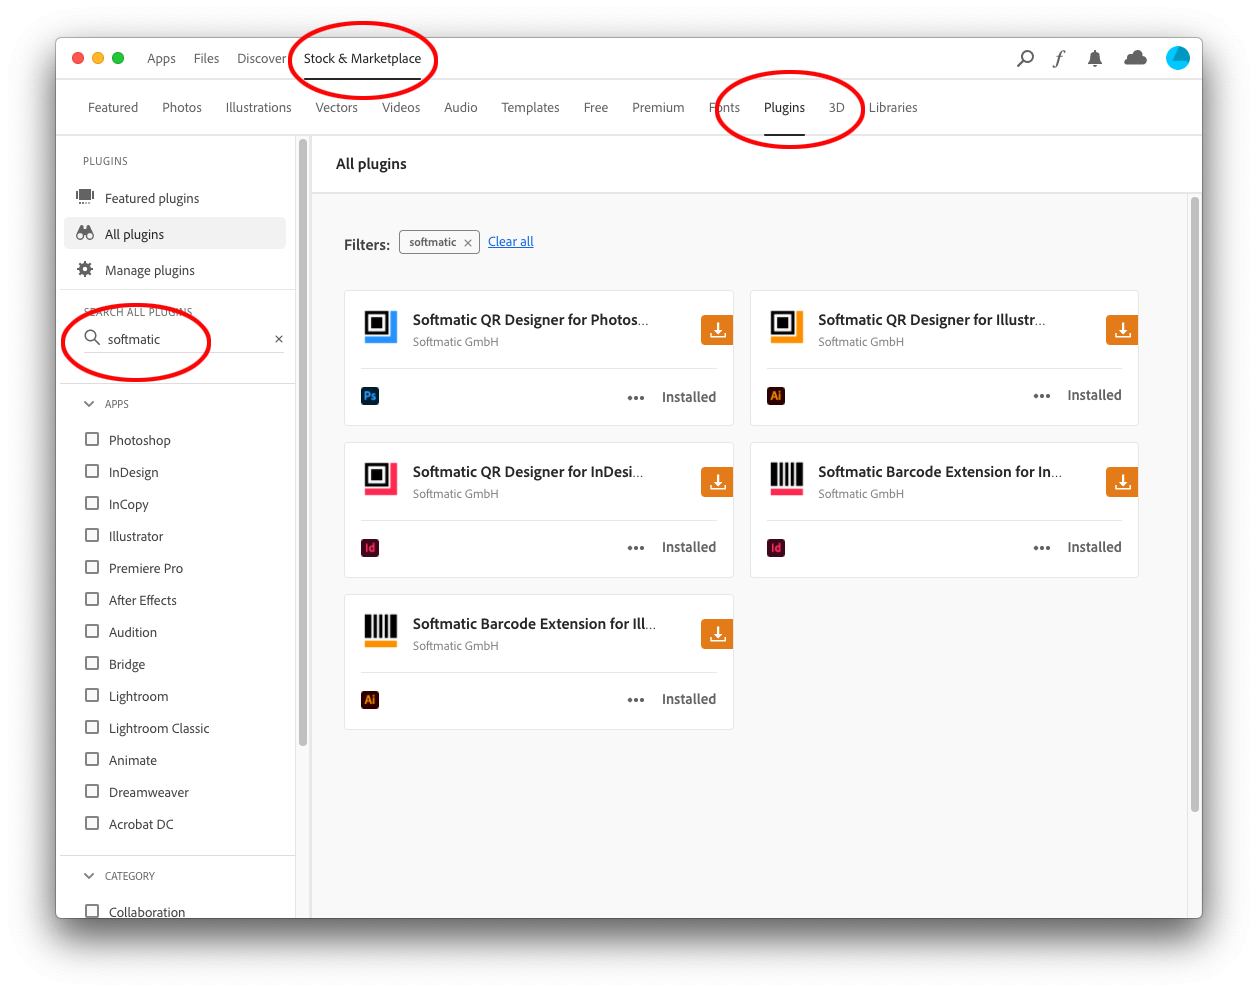
After purchasing, the extension should automatically be downloaded and installed in your local extensions folder. The extension can then be found in the InDesign menu bar Window > Extensions. If the automatic install fails, you can anytime install manually: In the Creative Cloud app navigate to Stock & Marketplace > Plugins > Manage Plugins. The extension should be listed in this panel. Close InDesign and then click the "Install" button next to the listing. After installation, reopen InDesign. Note that the extension is tied to the Adobe ID that was used for downloading. Purchase through the Softmatic Online StoreFollow the instructions here for installation; on first launch the extension will prompt you for the license key which you should have received after checkout in the store. Creating a QR code in InDesignCreating a QR code in InDesign works in four easy steps:
Let's look at those steps in more detail. Shown is the extension's panel with the default settings: 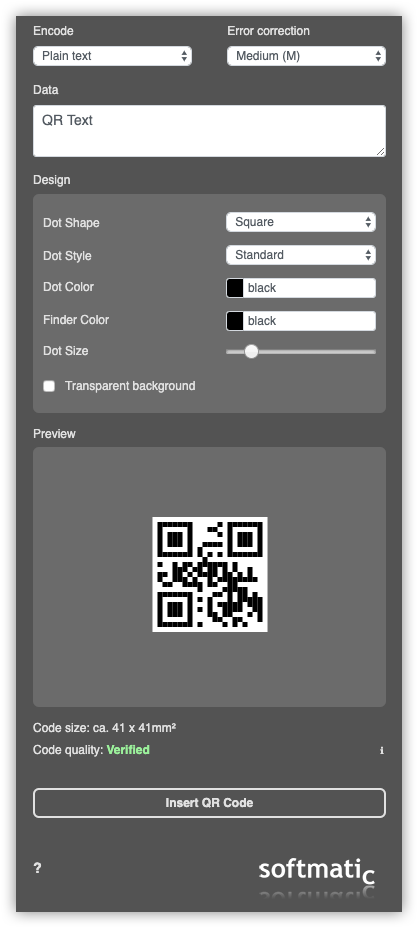 Select the content type from the drop down in the top left corner. Available are:
More on VCard dataWith VCard content type selected, you can enter all relevant data manually. However, it's much faster to simply drag a VCF file with contact data over the panel, like so (note the highlight green frame): 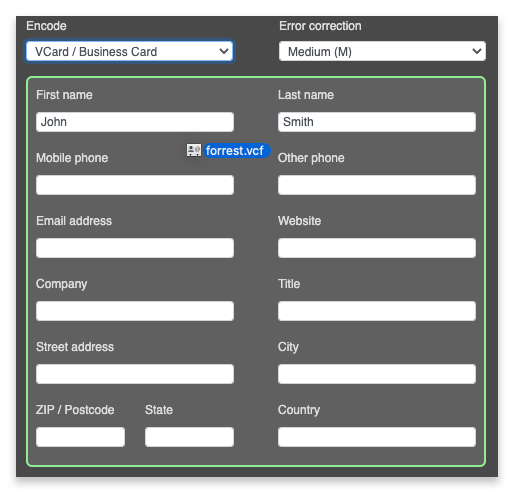 This will automatically fill in all the data. This post has more on VCF files and creating QR codes with VCard & business card data. Data inputEnter your text into the Data field, note how the code is updated in real time as you type. You can also paste text into the field; if the preview doesn't update, type a space or hit <Enter>.Set styles and colors of the QR codeThe extension lets you choose between four different shapes and two different styles for the dots. Click the color wells to select colors or type a color name, e.g. "green", into the edit field. You can also paste HEX codes into the field (e.g. "#FF0000" for red) and update the color with <Enter>.Make sure to select colors that provide some contrast between the background and the code. Avoid very light colors as they can reduce the readability of the code. Per default the code has a white background. As an additional option, you can create the code with a transparent background, this is useful if you want to place the barcode on an existing document, e.g. a book cover or packaging. Again, make sure to have contrasty color combinations. Do not create "inverted" codes (e.g. yellow on a black background) as most barcode reader apps won't scan such codes. Note: The three finder patterns in the corners of the QR code are always drawn solid to ensure that the code will scan properly. Setting the size of the QR codeUse the slider in the design panel to set the desired size of the code. The approximate final size of the code is indicated unter the preview window. If the selected dot size results in a code that won't fit into the preview, the display will be scaled down accordingly.Setting the error correction level (ECC) of the QR codeThe QR barcode supports four levels of error correction capability:
Adding an image or logo to the QR code in InDesignOne outstanding feature of QR is the very capable error correction. When set to the highest level, even codes where 30% of the area are missing or damaged can still be recognized. This can be exploited for so called "vanity codes" by overlaying a company logo or icon or other imagery over the code.To add an image, simply drag it from the desktop or the file manager over the preview; note the highlighting: 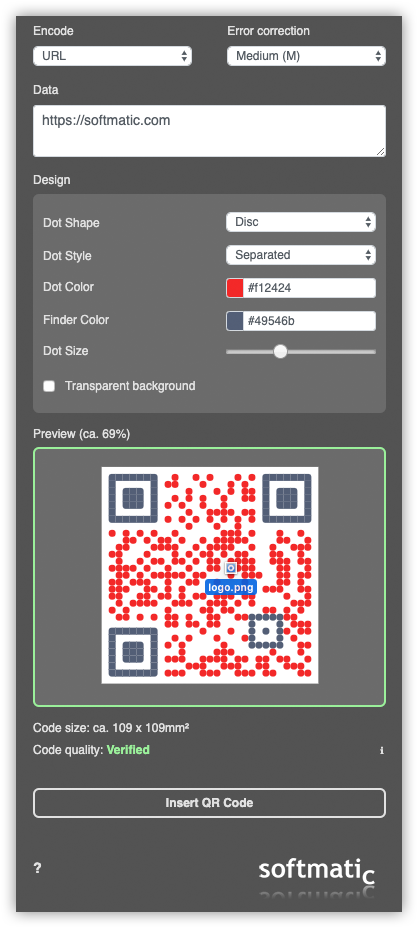 The QR Designer supports embedding logos & images in all common image file formats (TIFF, PNG, JPEG) and will honor transparency if present in the image (TIFF, PNG only). Please consider the following best practices when embedding an image:
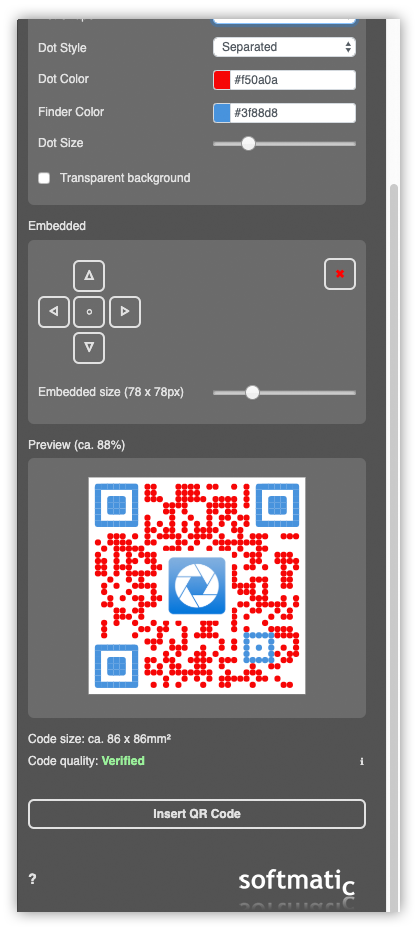 By default the image is centered within the QR code. Use the arrow buttons above the preview to change the position of the image. Adjust the size with the slider, delete the image with the "x"-button. Tip: If you want to embed your logo later, simply use a white square as an image and adjust it to the proper size. This will leave an empty space in the center of the code where you can then place your artwork. Add QR code to InDesignOnce the preview is updated and shows a valid barcode, click "Insert QR Code" to add the QR code to your InDesign document. The barcode will be added to the current page of the currently active document, with the top left corner of the barcode element at the center of the page.Do not scale or stretch the barcode after it was placed as this may render the code unusable. If the code has the wrong size, simply delete it and create a new one. Tip 1: To prevent accidental changes, select and right-click the barcode on the page and choose Lock from the context menu. Tip 2: When the barcode is displayed blocky like a low-res image, adjust the display settings in View > Display Performance. Alternatively, activate View > Overprint Preview. Verifying the QR code in InDesignThe extension comes with its own integrated QR reader to verify the code. This is especially useful if you embed images into the code. In this example, the embedded logo is too large. The code is not verified, even with the ECC setting to "Best":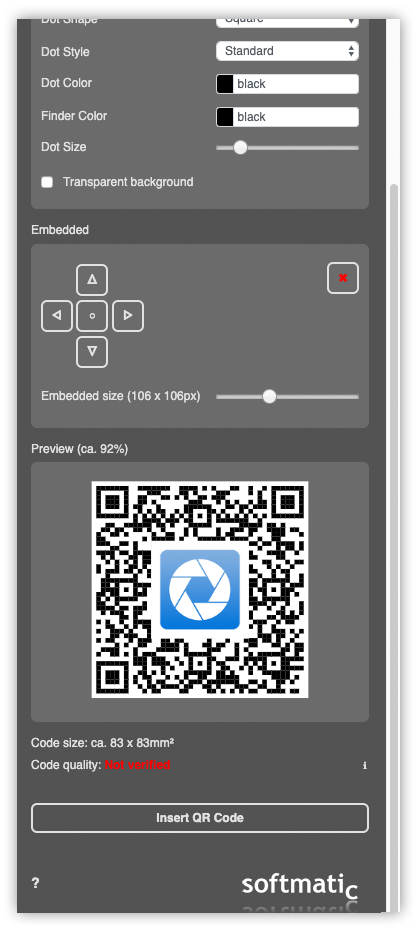 Scaling the logo down a little results in a code that is valid: 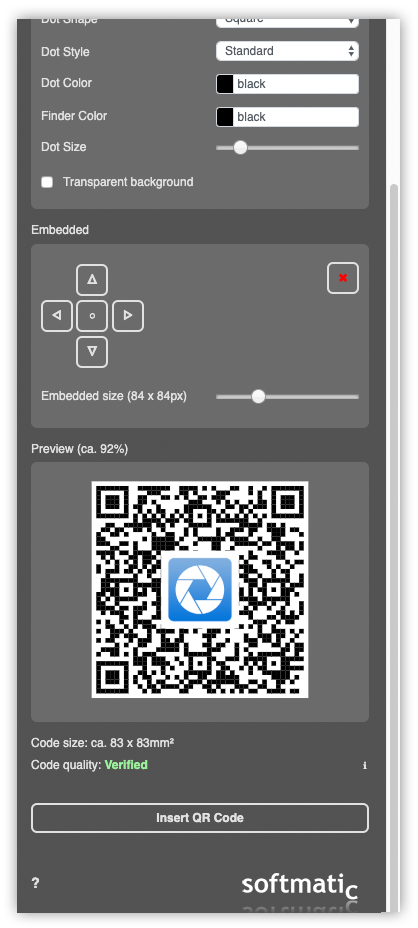 However, the reader has two shortcomings which you should keep in mind:
It is therefore highly recommended that you test the code with a dedicated scanner app. See next section. Scanning QR CodesOn iOS you can use the stock camera app which can detect and read QR codes. A far more capable alternative is CoScan, a document and barcode scanner app: 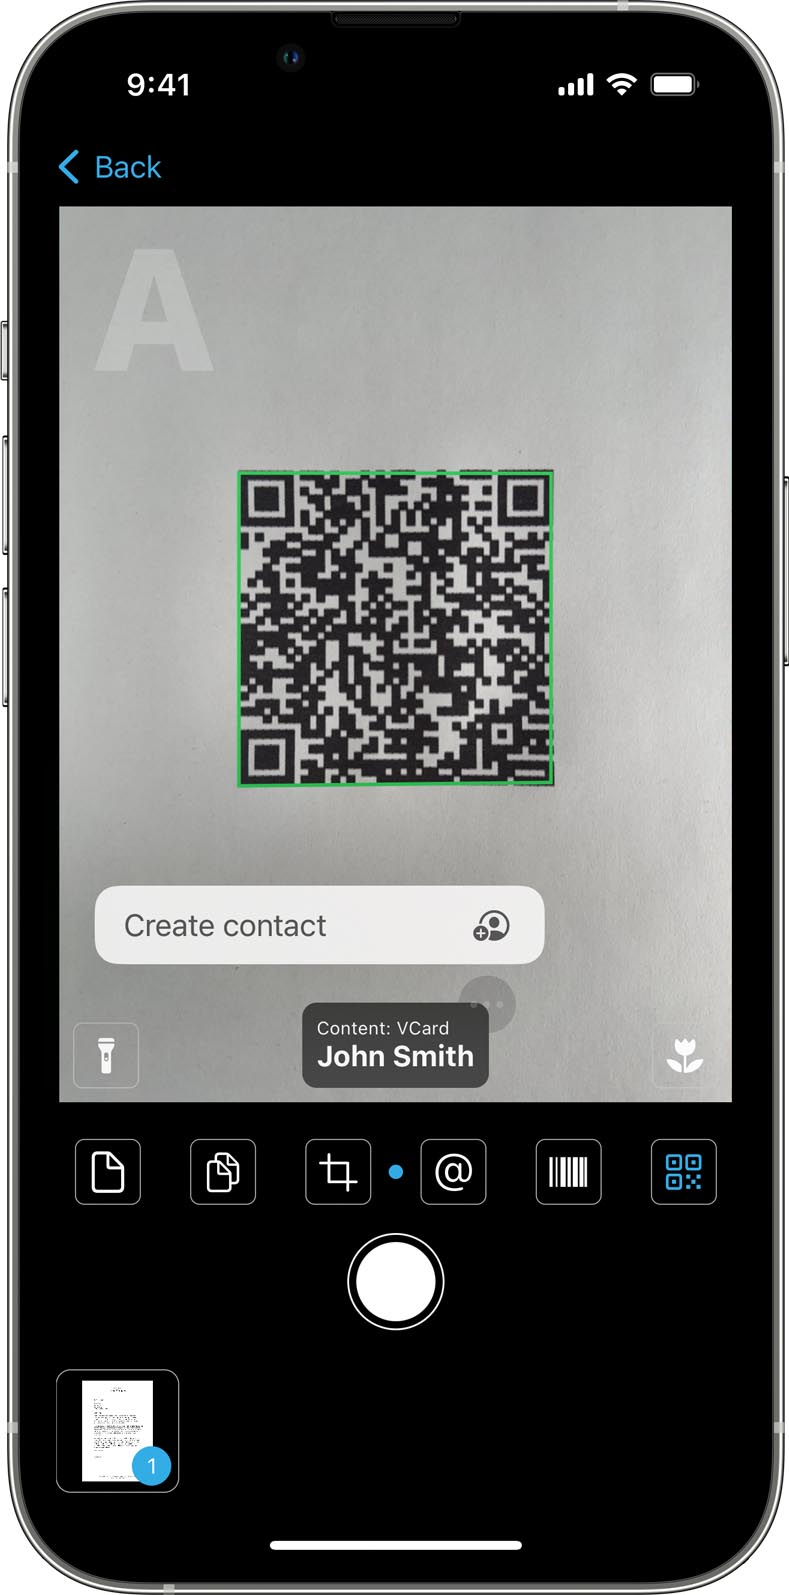
For Android, we recommend the free Google ZXing app. Google ZXing is also available as an online service. This post has tips on scanning QR codes. Export QR barcode from InDesign
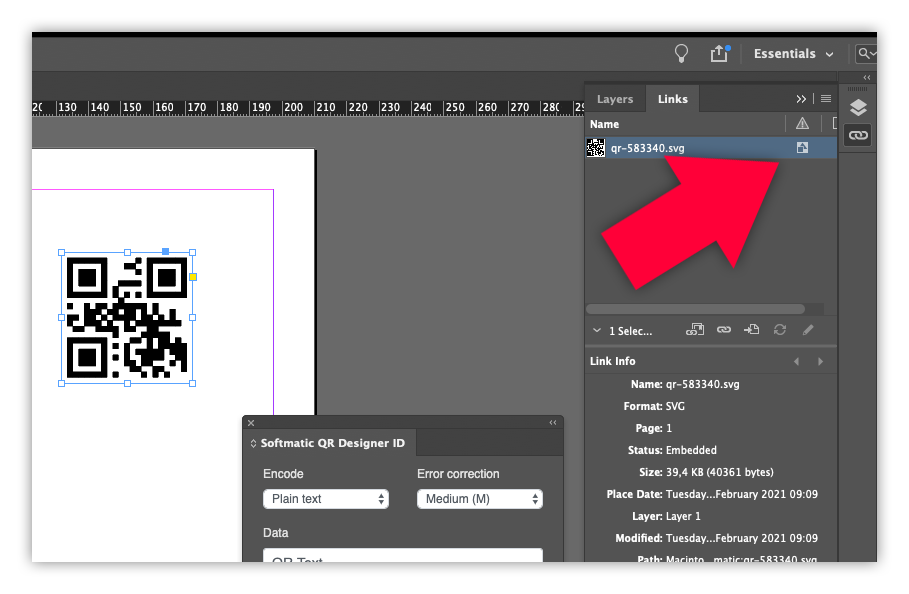
The created QR code is an SVG file that will be listed in the Links panel:The Softmatic QR Designer for InDesign can be downloaded from the Creative Cloud Marketplace. We also provide barcode extensions for Photoshop and Illustrator, see here. FAQWill the extension work with InDesign CS5 or CS6? No. The minimum supported version is InDesign 2021 (V16). Can I use the extension for data merge? Right now, the extension is only suitable to create individual barcodes through user interaction, one at a time. That means it is not scriptable. We are currently waiting for Adobe to finalize the new UXP plug-in architecture for ID/AI; once this is available the extension will be accessible via scripting which will allow mass creation of barcodes. What color spaces are supported? Currently, only RGB is supported, CMYK color space is not supported. We plan to add support for native InDesign color panels as soon as the UXP plug-in interfaces are available. Can I return the extension if it does not meet my requirements? What's your refund policy? Obviously, we want our customers to be happy with their purchase. Should you find that the extension doesn't work for you, we can offer a full and unconditional refund within 30 days of purchase. Please contact us at webb AT softmatic.com. Softmatic QR Designer for InDesign - Version historyFebruary 2022: V1.2
New to QR codes?Make sure to see our introduction to QR codes. |

